
Thread: Majors new gym upgrade thread
 01-11-2026, 04:35 PM
-
#1

- MajorTendonitis
- Join Date: Jan 2016
- Location: East Kootenays BC
- Age: 65
- Height: 5'8"
- Weight: 241 lbs
- Posts: 41,983
- Subscribers: 8
- Rep Power: 715365
-
-

Majors new gym upgrade thread
Hey all I hijacked the last thread so I thought I’d make a new thread dedicated to my gym upgrades . Tbh I think everyone’s seen it lol , but you never know .
This time however I’m going to add a bit of commentary so you can follow my mental illness better .
In the beginning it started as a squat rack combo Olympic set and a piece of carper from WalMart that I threw in the corner of my basement, then it grew from there .
One thing I learned is these starter sets have a lot to be desired. I bought a second Olympic bar and after a while they both bent , and regardless of having bushing they’d like to roll out of your hands making for a dangerous situation. I only believe in buying quality bars now , so not they are all from ‘Rogue .
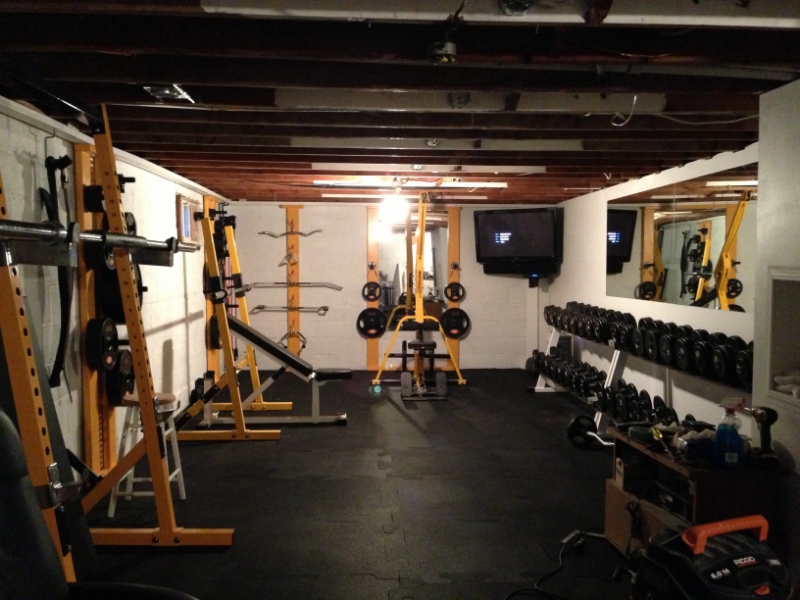
First pic’s below were after I decided to expand the gym and used over half the basement to add additional equipment.
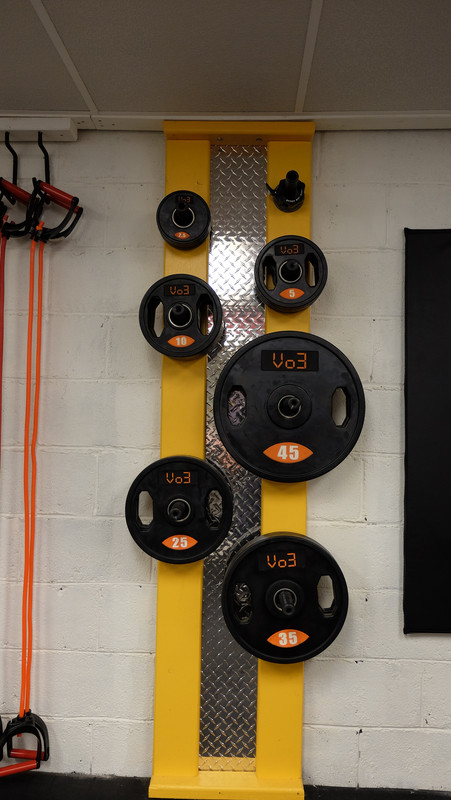
Made an improved bar rack and added checker plate
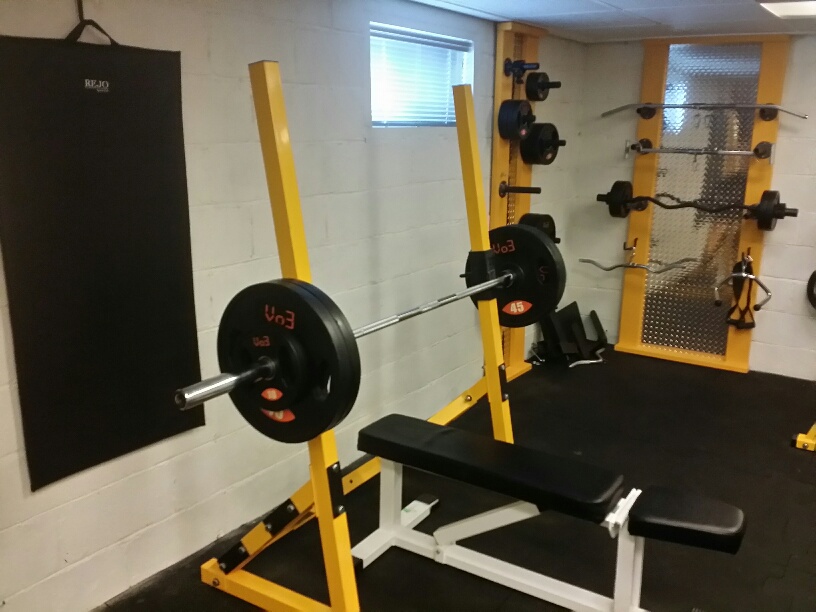
Originally I purchased handles and plates for dumbbells. You had to build them yourself and I put stickers on them but I never included the weight of the handles because they were different weights to accommodate more plates as the weight increased .
I sold them to a coworker as I found the Allen head screws were digging into my thighs as I tried to get them into position. Steel was nice though as they never get damaged

This time however I’m going to add a bit of commentary so you can follow my mental illness better .
In the beginning it started as a squat rack combo Olympic set and a piece of carper from WalMart that I threw in the corner of my basement, then it grew from there .
One thing I learned is these starter sets have a lot to be desired. I bought a second Olympic bar and after a while they both bent , and regardless of having bushing they’d like to roll out of your hands making for a dangerous situation. I only believe in buying quality bars now , so not they are all from ‘Rogue .
First pic’s below were after I decided to expand the gym and used over half the basement to add additional equipment.
Made an improved bar rack and added checker plate
Originally I purchased handles and plates for dumbbells. You had to build them yourself and I put stickers on them but I never included the weight of the handles because they were different weights to accommodate more plates as the weight increased .
I sold them to a coworker as I found the Allen head screws were digging into my thighs as I tried to get them into position. Steel was nice though as they never get damaged
Back with my Fam
01-11-2026, 04:37 PM
-
#2
 01-11-2026, 04:39 PM
-
#3
 01-11-2026, 04:43 PM
-
#4
- MajorTendonitis
- Join Date: Jan 2016
- Location: East Kootenays BC
- Age: 65
- Height: 5'8"
- Weight: 241 lbs
- Posts: 41,983
- Subscribers: 8
- Rep Power: 715365
-
-
Originally Posted By p7nk⏩
That was the plan but that bench is gone as those first pics are from the early 2000’s . Later on I upgraded to rubber dumbbells which had orange texts, so I slowly converted everything to orange . Wish I would have sprung for urethane back in the day thoughGotta paint that bench yellow
Back with my Fam
01-11-2026, 04:43 PM
-
#5
- RustledJimmies
- Registered Pupper
-

- RustledJimmies
- Registered Pupper
- Join Date: Jan, 2026
- Posts: 2,153
- Subscribers: 1
- Rep Power: 76390
-
-
Post deleted by user
01-11-2026, 04:47 PM
-
#6
- MajorTendonitis
- Join Date: Jan 2016
- Location: East Kootenays BC
- Age: 65
- Height: 5'8"
- Weight: 241 lbs
- Posts: 41,983
- Subscribers: 8
- Rep Power: 715365
-
-
I removed the plasma tv and sound bar and relocated the tv and sound system to the other end of the gym . Replaced the 42” plasma with an LG 48” C2 oled . What a phenomenal picture
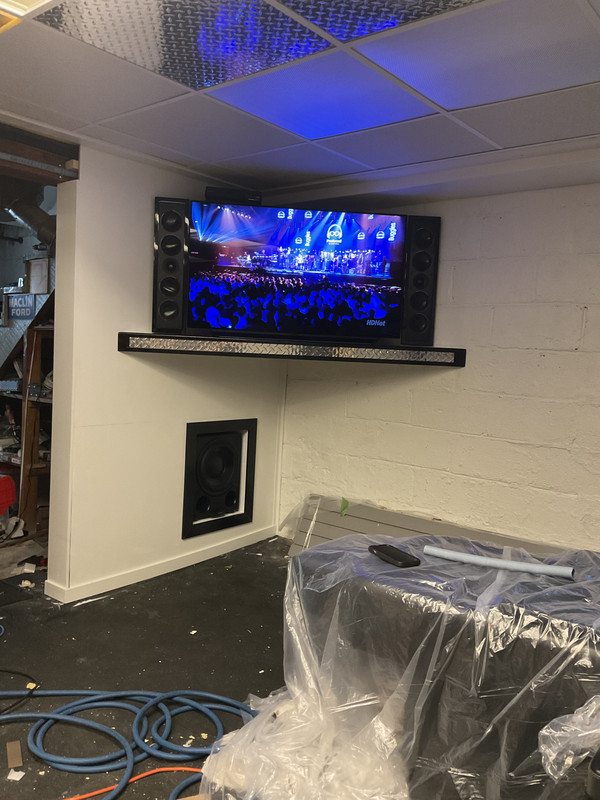
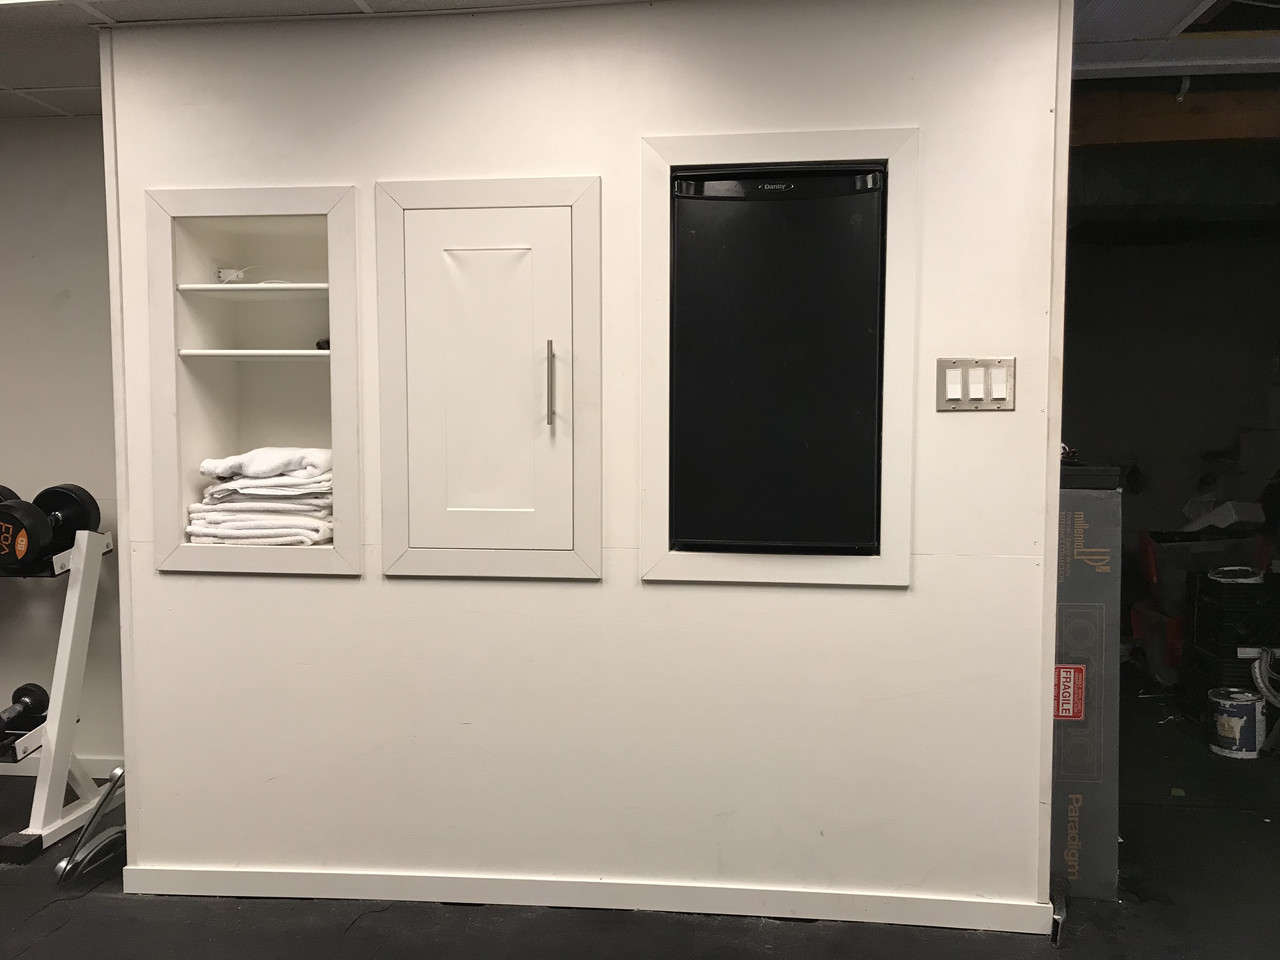
This was my first attempt at building the wall . There’s a chimney in the way plus a hot water tank and the furnace , so I used that area for storage instead . On the right is a mini fridge . Store miscellaneous in the cupboard in the middle , and store towels on the left and have a few shelves for things like remotes or a place to put your cell phone etc
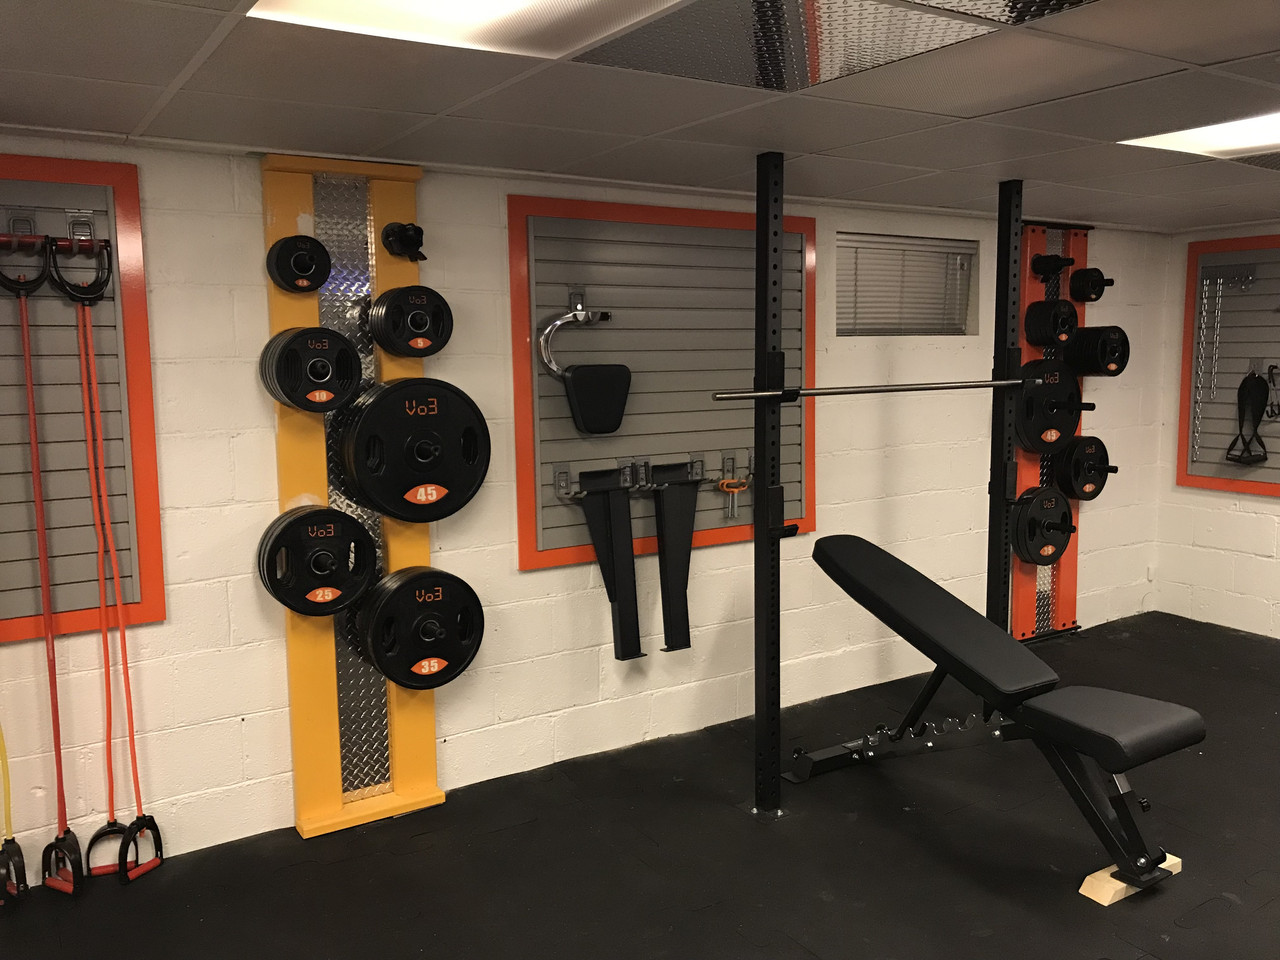
The closet bench was yellow and I got around to painting it the same colour as the StoreWall trim . It’s called Real Orange , a spray paint from Tremclad . It has a really tough finish ,almost like it has its own clear coat mixed in
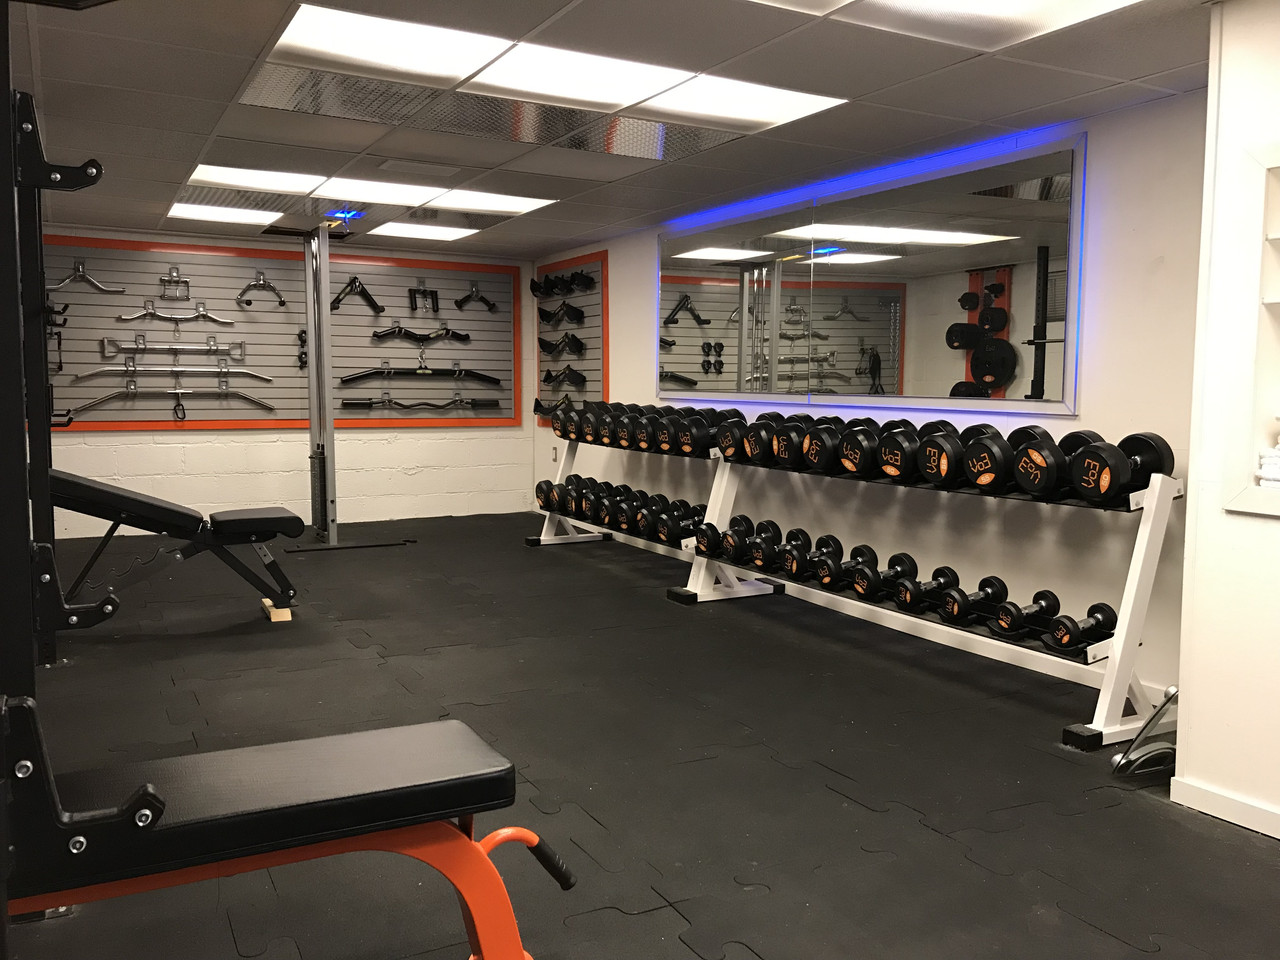
Slowly but surely I got around to phasing out anything yellow . I kind of liked the yellow but it clashes with orange so I changed everything to orange as time went on . I think the orange highlights look better anyways
This was my first attempt at building the wall . There’s a chimney in the way plus a hot water tank and the furnace , so I used that area for storage instead . On the right is a mini fridge . Store miscellaneous in the cupboard in the middle , and store towels on the left and have a few shelves for things like remotes or a place to put your cell phone etc
The closet bench was yellow and I got around to painting it the same colour as the StoreWall trim . It’s called Real Orange , a spray paint from Tremclad . It has a really tough finish ,almost like it has its own clear coat mixed in
Slowly but surely I got around to phasing out anything yellow . I kind of liked the yellow but it clashes with orange so I changed everything to orange as time went on . I think the orange highlights look better anyways
Back with my Fam
01-11-2026, 04:48 PM
-
#7
 01-11-2026, 05:16 PM
-
#8
- MajorTendonitis
- Join Date: Jan 2016
- Location: East Kootenays BC
- Age: 65
- Height: 5'8"
- Weight: 241 lbs
- Posts: 41,983
- Subscribers: 8
- Rep Power: 715365
-
-
Originally Posted By allfather⏩
Thanks for the kind words . I live in a 860sqft shack with a low basement height of 7’ so it requires some improvising but I made the best of it .
You have an awesome gym. Mirin hard.
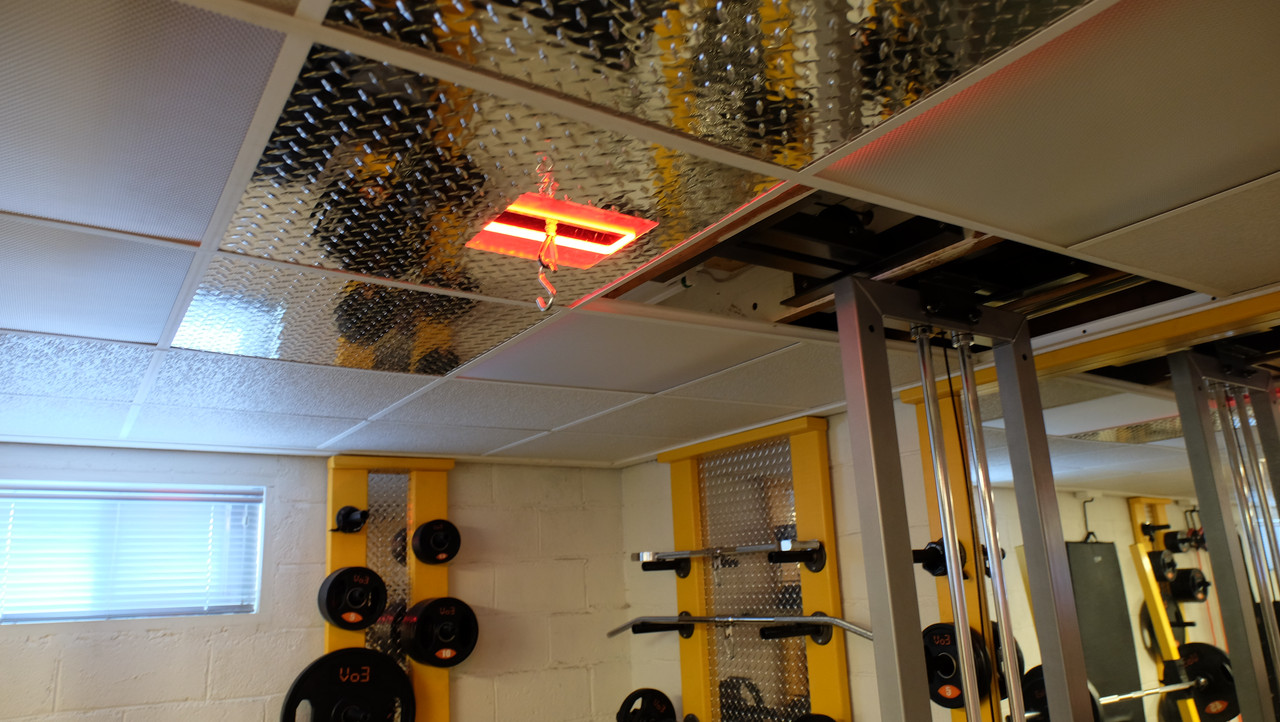
I used a special false ceiling system exclusive to HD that only takes up one inch . Unfortunately I cannot fit a lat machine in unless I break concrete , so I built one myself .
I bought a pec machine that was being sold half price because this fitness place couldn’t sell it. I basically purchased it for the weight stack and frame , as I’m just learning how to weld (15 minutes worth) and didn’t think I could make a really top quality piece on my own .
I did however build custom racks with 4.5” that fit between floor joists . You kind of get the idea below
This is the first rack to go in and it’s where the cable drops
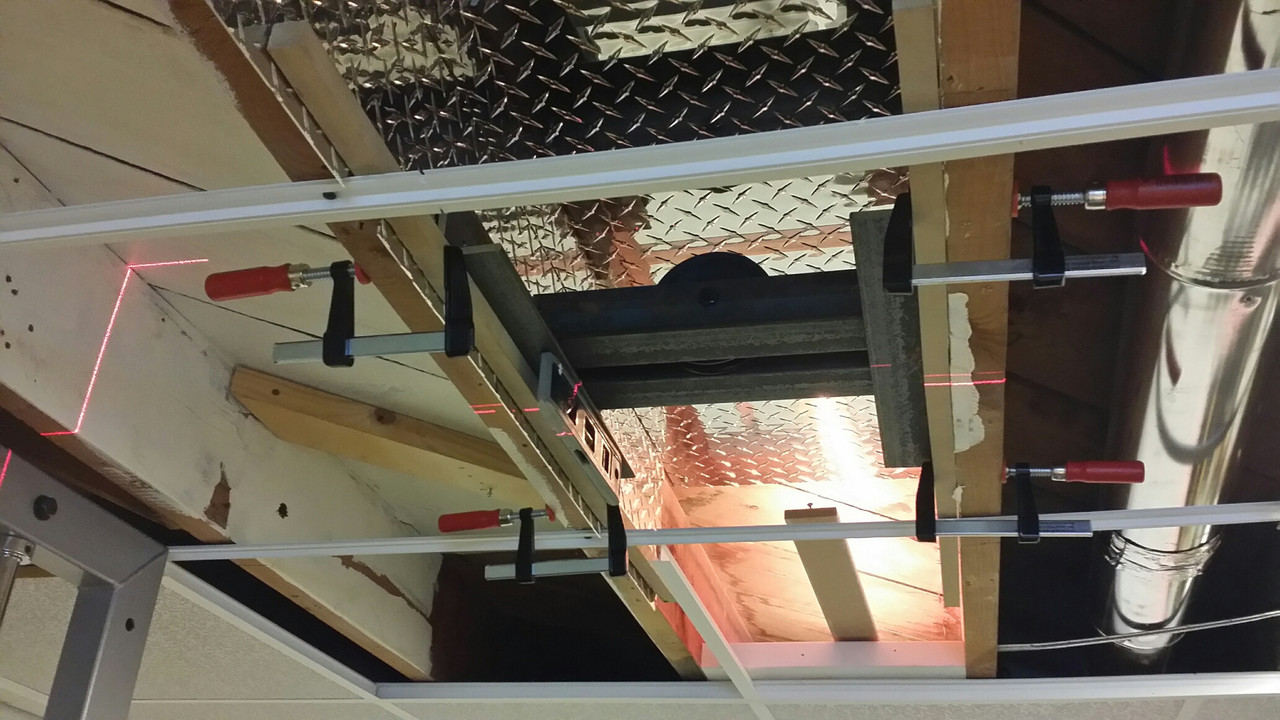
The rack in the open ceiling tile to the right is the middle rack . It’s really doing nothing atm , but in the future a cable drops down to two 6.5 inch pulleys and comes back up again .
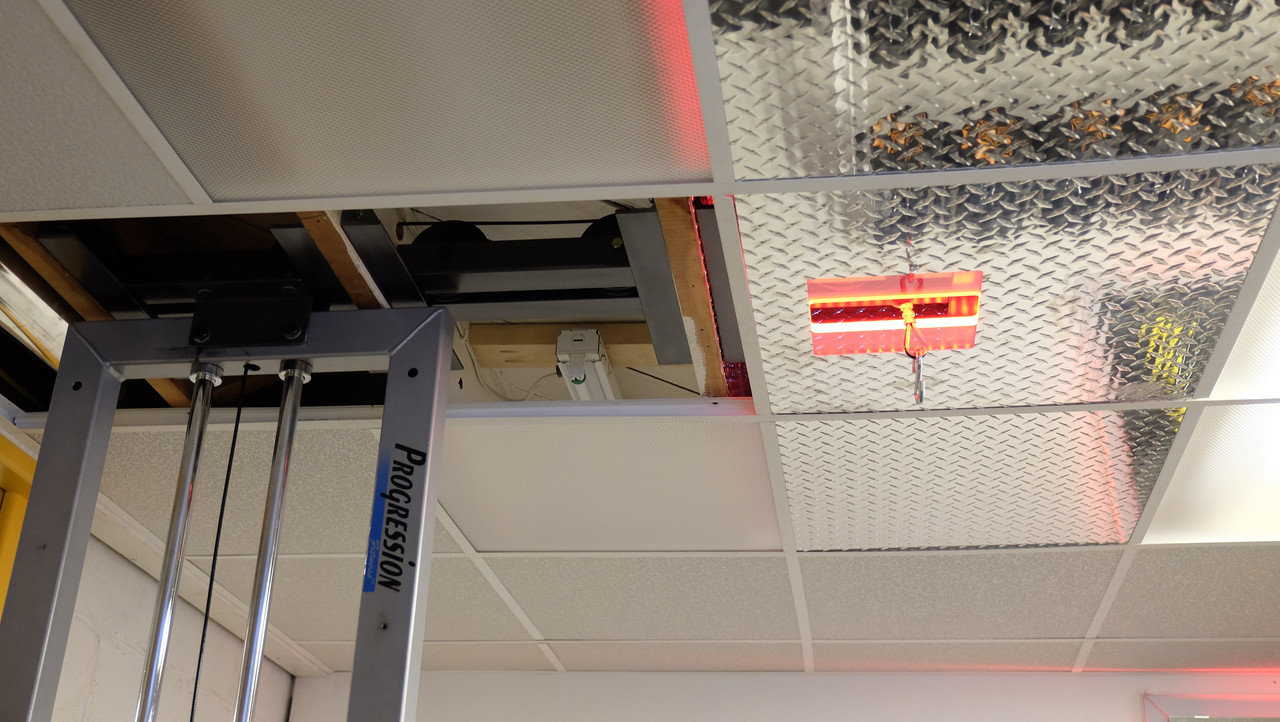
Cut a piece on plexi out on my router table where the cables exists for your bars . Unnecessary I know lol
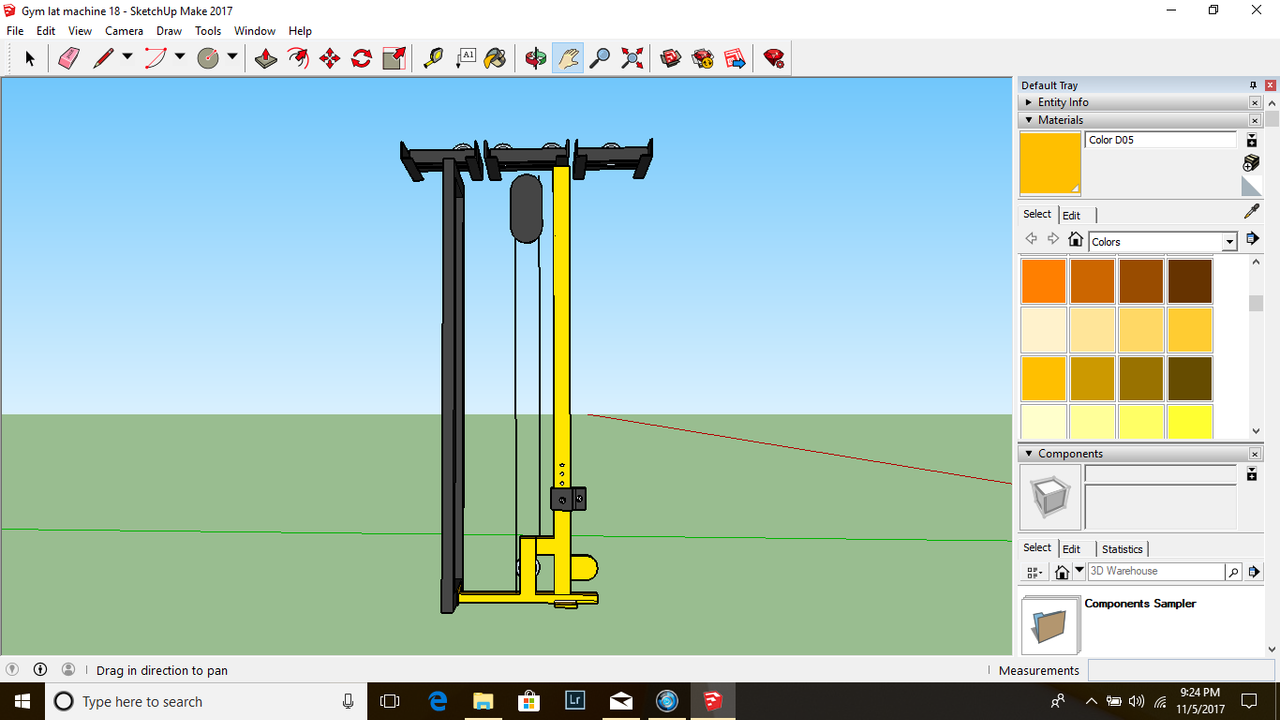
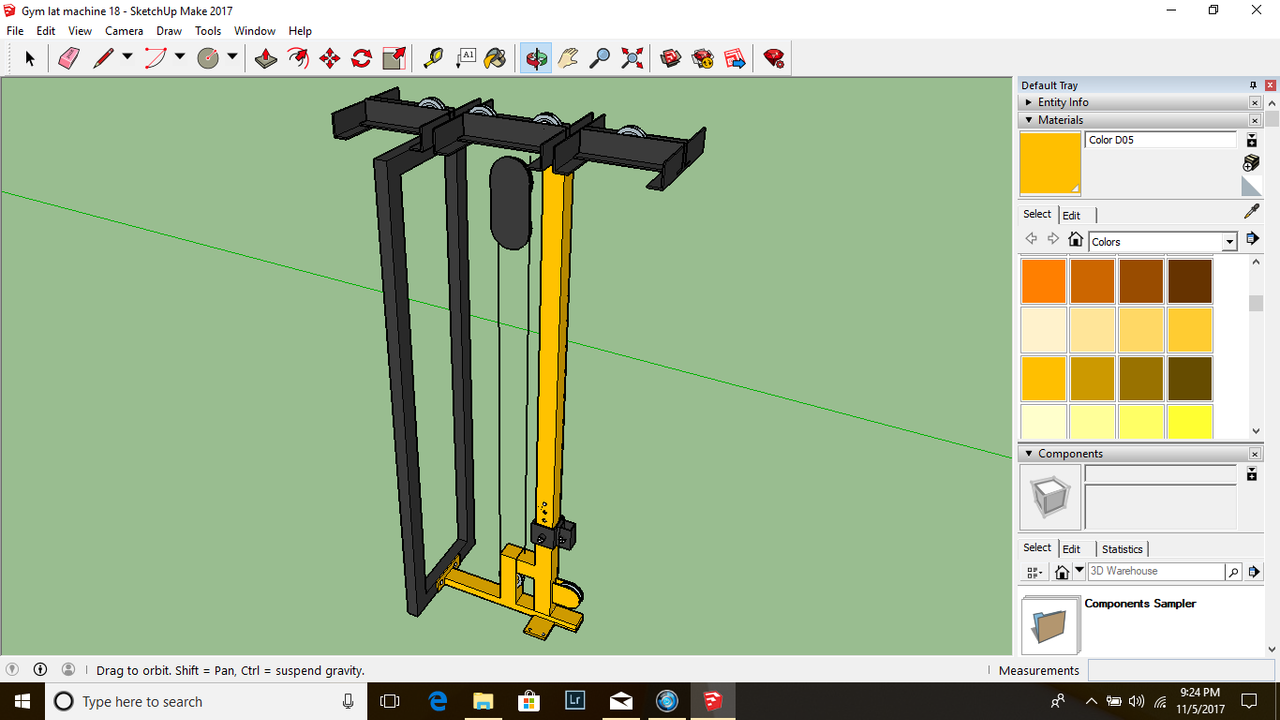
Forgive my primitive attempt at trying Google Sketch Up .
This is close to what I wanted to design for the lat machine . The weight stack should be turned 180 degrees , as later on in the build I thought maybe having to move the weight stack pin may be a pain with the cables in the way so I relocated it to the side .
I was having difficulties showing the cables, but this design provides a way to have a pulley at the bottom of the lat machine also
Here’s a pic of the Powertec lat machine I used to use . It did the job but it was a pita to change the weights , but one of the few machines that would sort of fit.
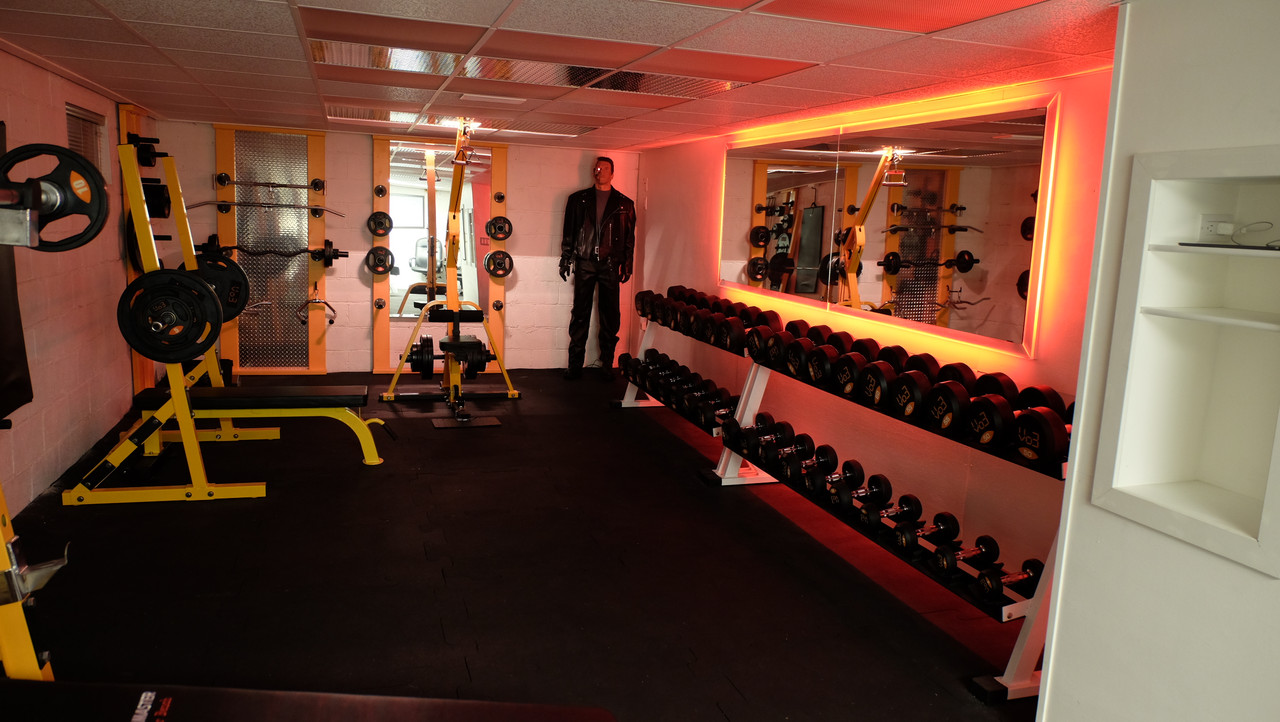
Srs I sure miss Arnold
Back with my Fam
01-11-2026, 05:39 PM
-
#9
- MajorTendonitis
- Join Date: Jan 2016
- Location: East Kootenays BC
- Age: 65
- Height: 5'8"
- Weight: 241 lbs
- Posts: 41,983
- Subscribers: 8
- Rep Power: 715365
-
-
Subwoofer install .
So I had this 12” front firing port sub , and because the ports are in the front I thought how clever would it be to install it under the stairs .
This way it’s flush with the wall and out of the way .
Finished here , but after all was said and done it sucked as there was a huge null in the room . Most of the deep base was actually in the other room .
I was pretty disappointed after all that fking around and removed it. Note to self , get a long cable and place the subwoofer in different locations to see where it hits best .
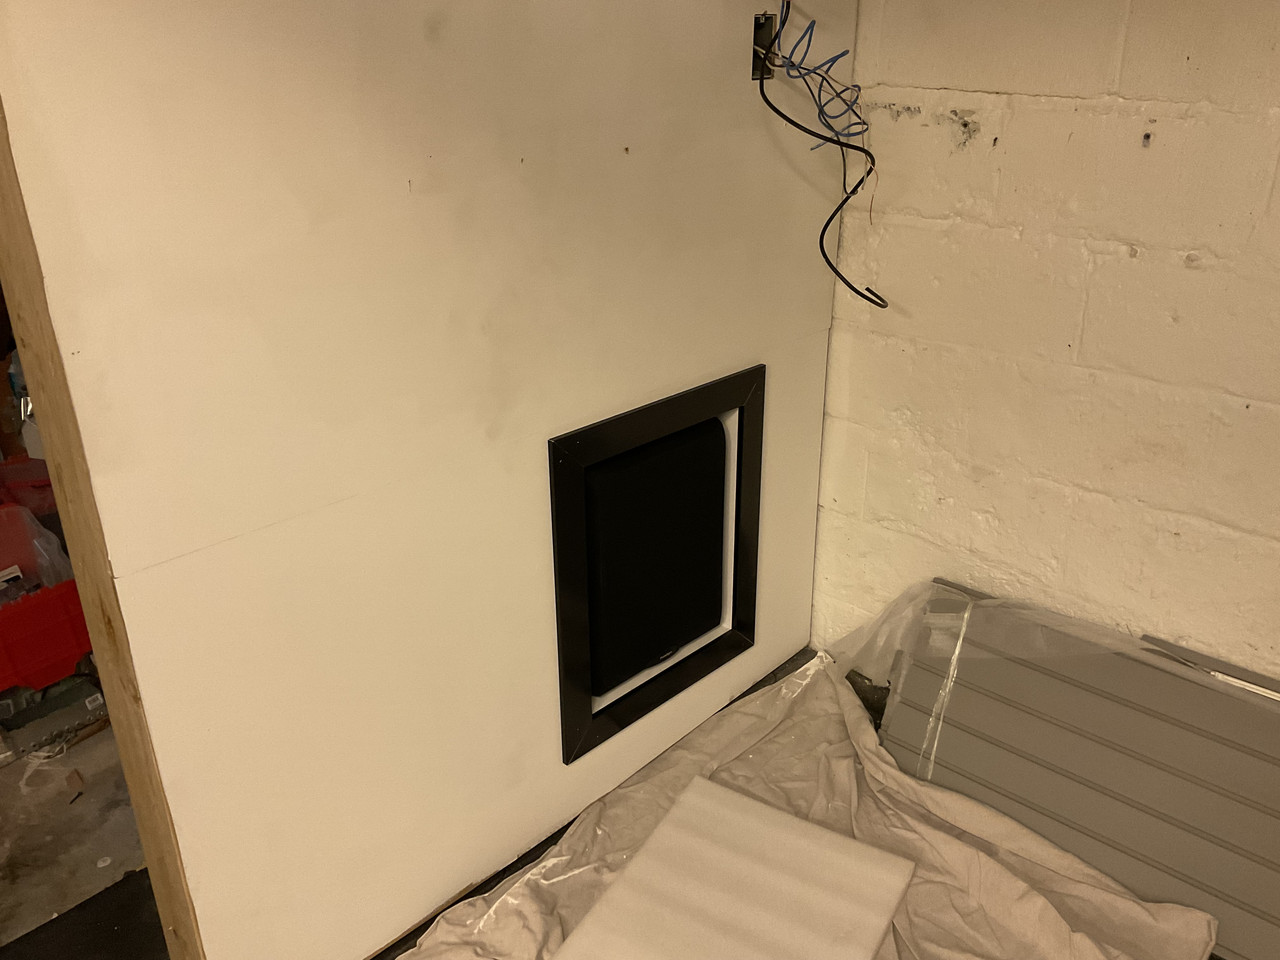
The beginning
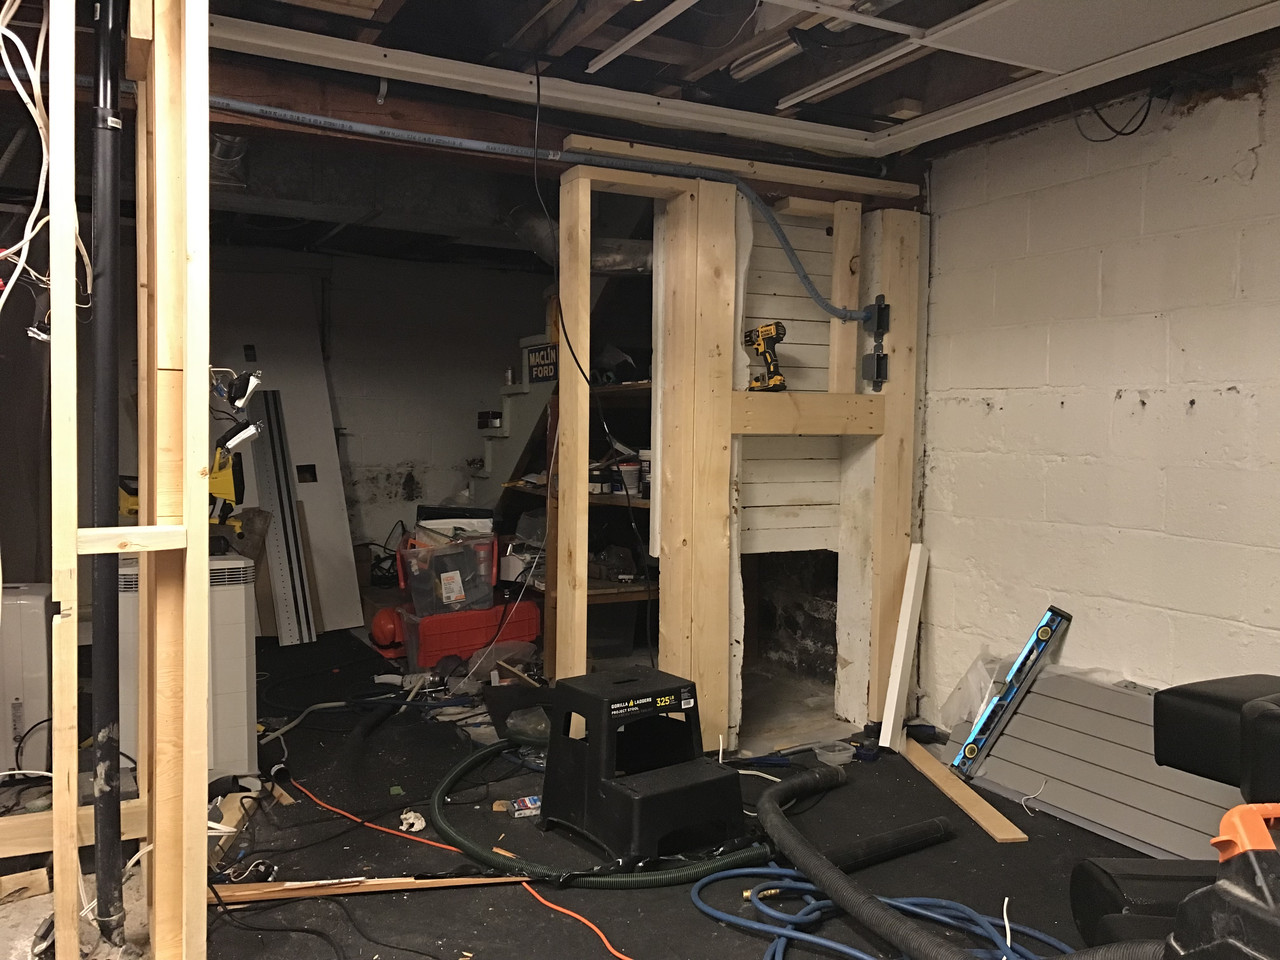
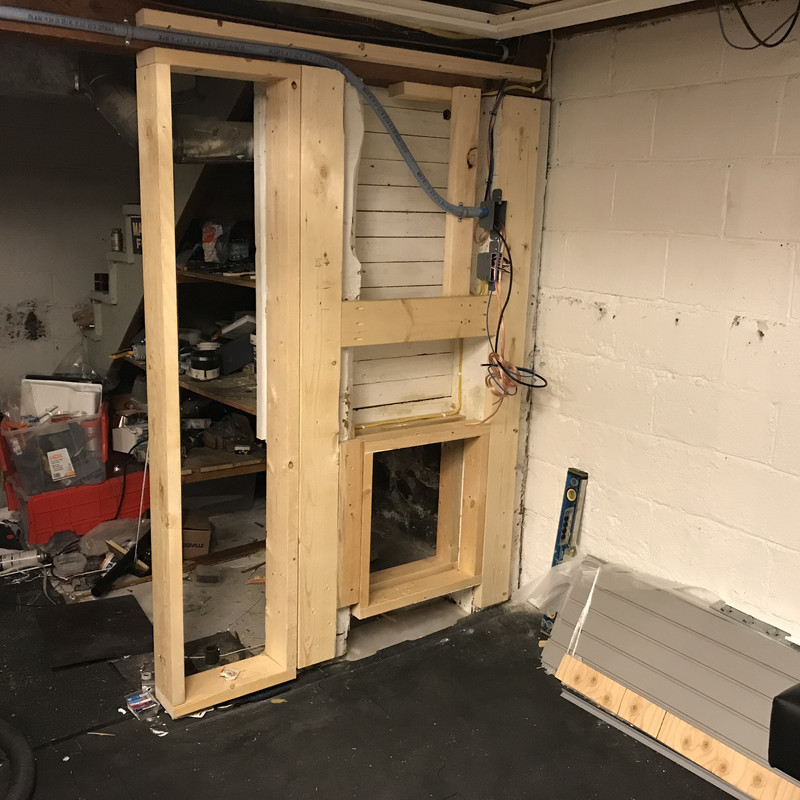
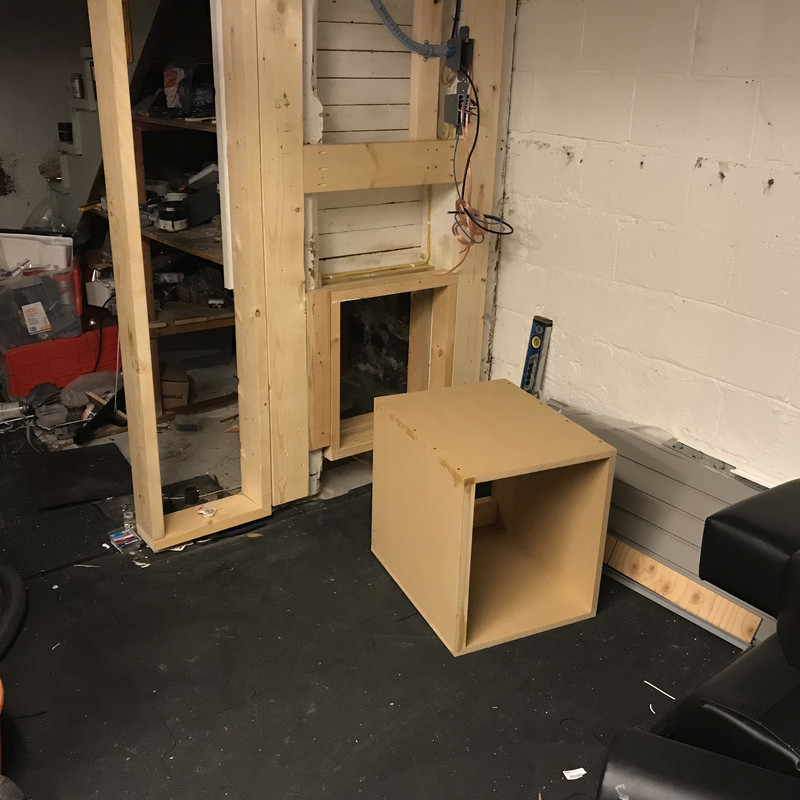
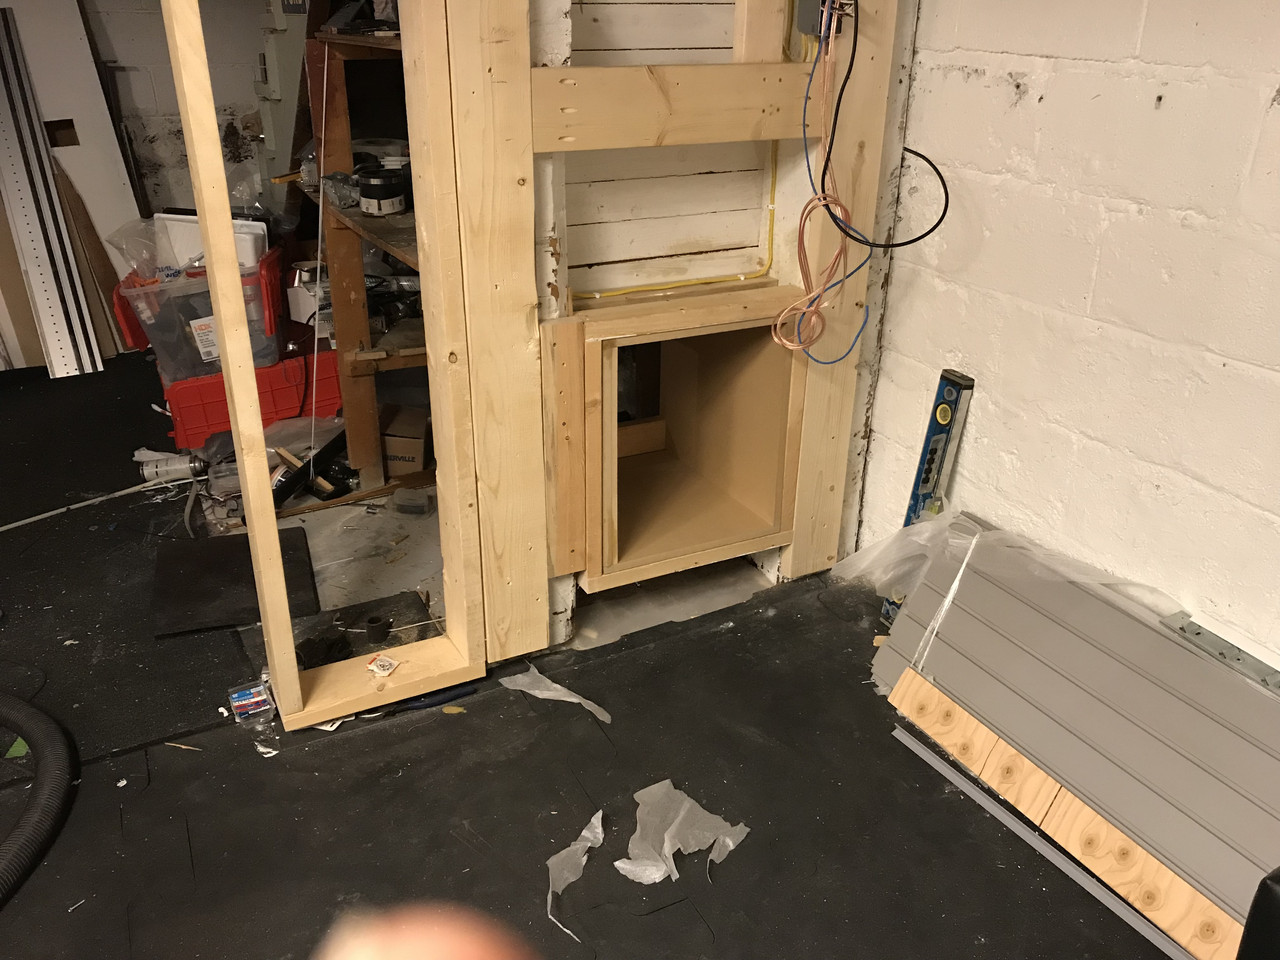
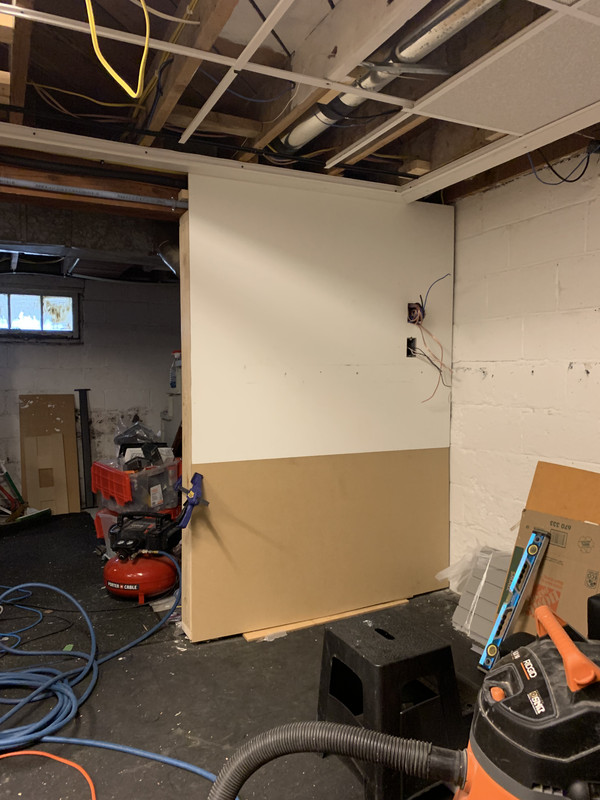
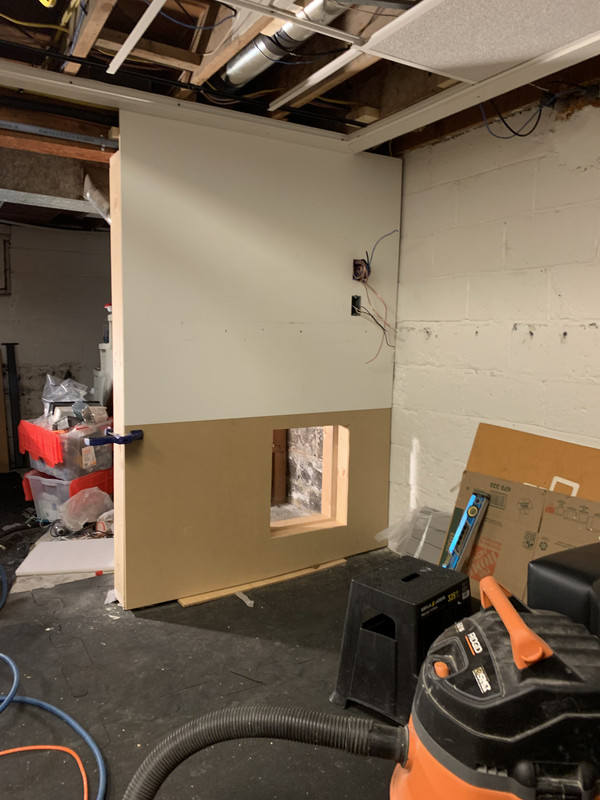
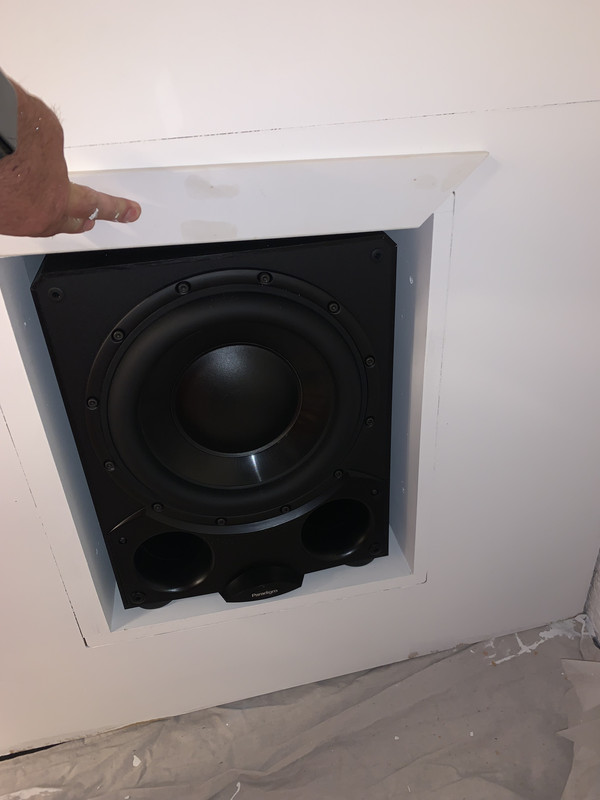
So I had this 12” front firing port sub , and because the ports are in the front I thought how clever would it be to install it under the stairs .
This way it’s flush with the wall and out of the way .
Finished here , but after all was said and done it sucked as there was a huge null in the room . Most of the deep base was actually in the other room .
I was pretty disappointed after all that fking around and removed it. Note to self , get a long cable and place the subwoofer in different locations to see where it hits best .
The beginning
Back with my Fam
01-11-2026, 05:50 PM
-
#10
- MajorTendonitis
- Join Date: Jan 2016
- Location: East Kootenays BC
- Age: 65
- Height: 5'8"
- Weight: 241 lbs
- Posts: 41,983
- Subscribers: 8
- Rep Power: 715365
-
-
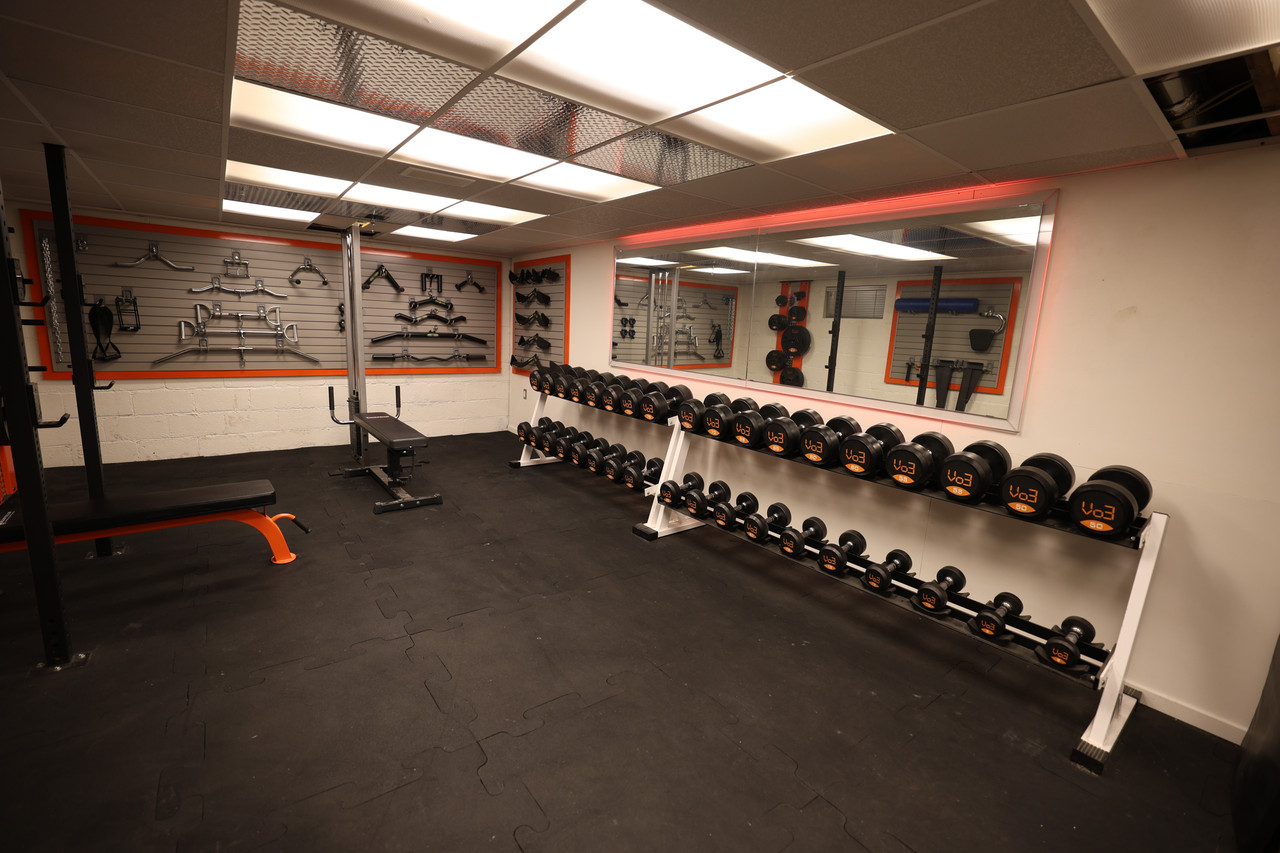
Ok I’ll jump ahead a bit here and post some more recent pics from early last year
One of my fav angles . As you can see I just move a bench over to my home made lat machine as needed
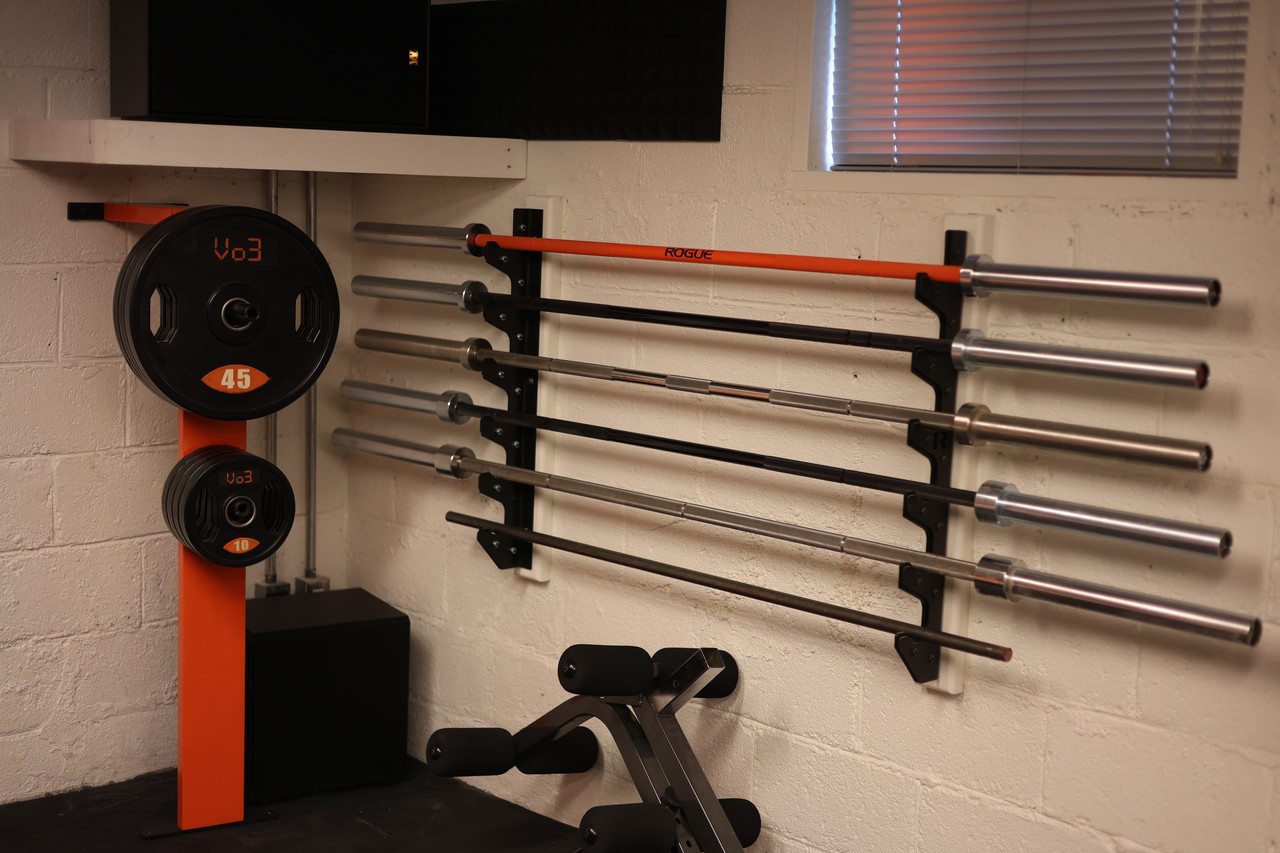
I love Rogue bars . As I mentioned my cheap ones bent and were always trying to roll in your hand.
The middle one is there full stainless . Below that is their thinner bar for deadlifting , and below that their thick bar for squats .
Located on the very bottom is a bar I had cut and use for my dumbbell hangers. I used a cericoat bar previously and the previous hangers scratched the chit out of it so I got a dedicated piece of round bar . I’m still going to weld collars on the end someday so it cant slip off the squat rack
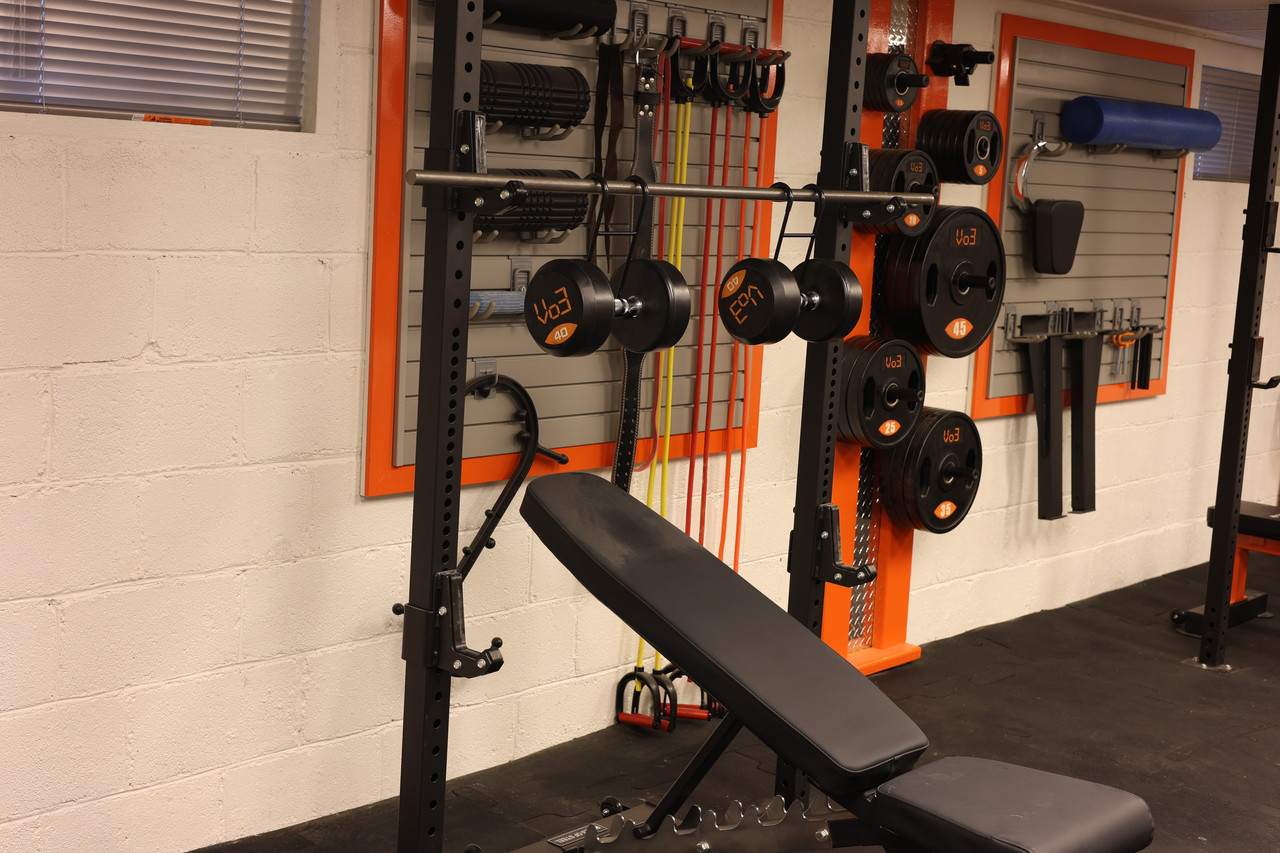
I really like these hangers , they’re from Mad Spotter . Anyways in October I was flat benching 90 lbs dumbbells and there’s no way at my age I could I rack them and get the into place. Actually if I managed to I’d have no strength left for the exercise
One of my fav angles . As you can see I just move a bench over to my home made lat machine as needed
I love Rogue bars . As I mentioned my cheap ones bent and were always trying to roll in your hand.
The middle one is there full stainless . Below that is their thinner bar for deadlifting , and below that their thick bar for squats .
Located on the very bottom is a bar I had cut and use for my dumbbell hangers. I used a cericoat bar previously and the previous hangers scratched the chit out of it so I got a dedicated piece of round bar . I’m still going to weld collars on the end someday so it cant slip off the squat rack
I really like these hangers , they’re from Mad Spotter . Anyways in October I was flat benching 90 lbs dumbbells and there’s no way at my age I could I rack them and get the into place. Actually if I managed to I’d have no strength left for the exercise
Back with my Fam
01-11-2026, 06:02 PM
-
#11
- MajorTendonitis
- Join Date: Jan 2016
- Location: East Kootenays BC
- Age: 65
- Height: 5'8"
- Weight: 241 lbs
- Posts: 41,983
- Subscribers: 8
- Rep Power: 715365
-
-
StoreWall , I love this product . Many years ago a Miscer here had this really cool wall storage product where he kept all his bars and accessories organized and stored on the wall.
I have never heard of that product b4 so kudos to Misc for making me aware srs.
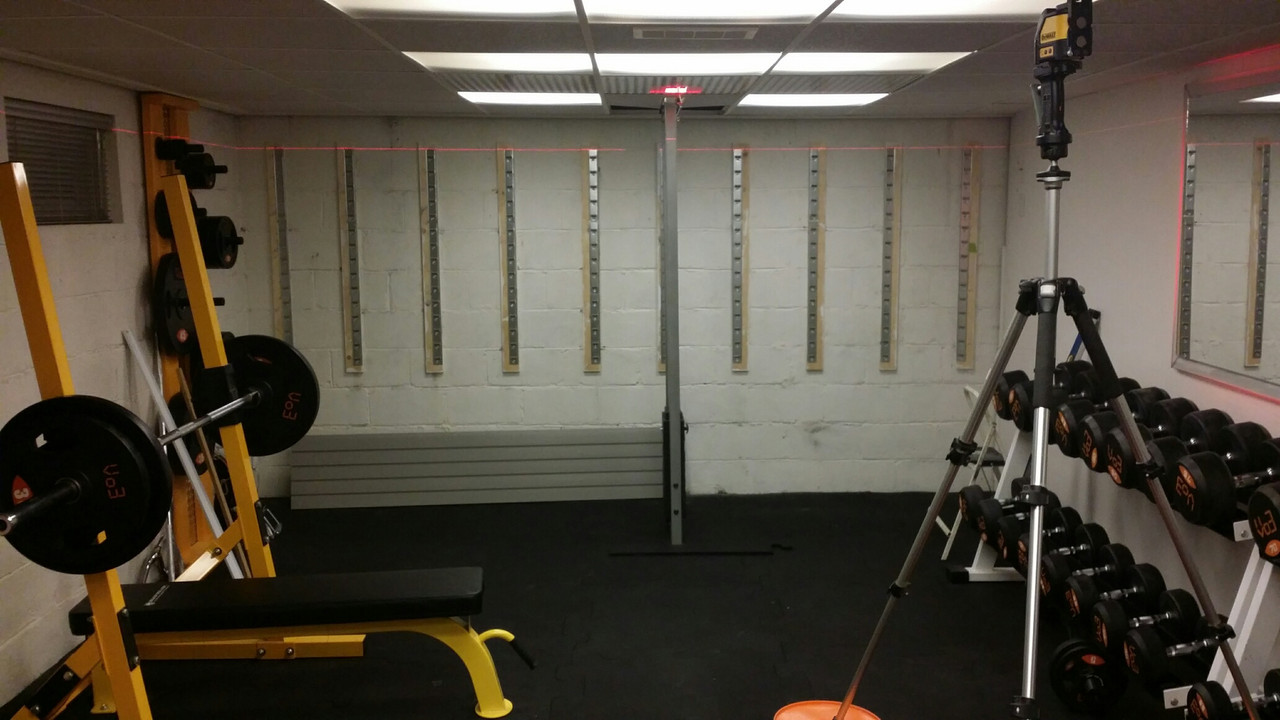
Srs I hate working with block walls . I thought it would be best to secure 1x4’s to wall to install the strips that hold up the StoreWall sections
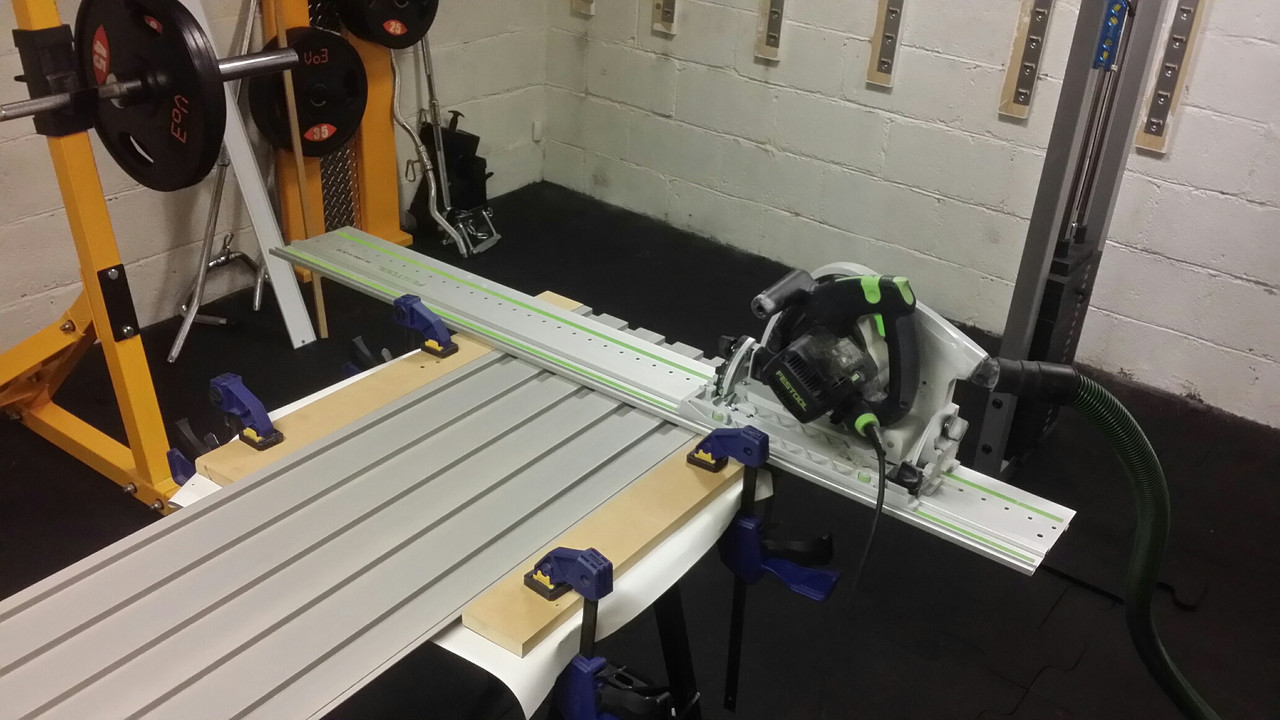
Having a track saw was definitely a bonus for cutting that thick plastic accurately
I intentionally made the strips larger in order to incorporate moulding around the perimeter. I think it was a good choice tbh .
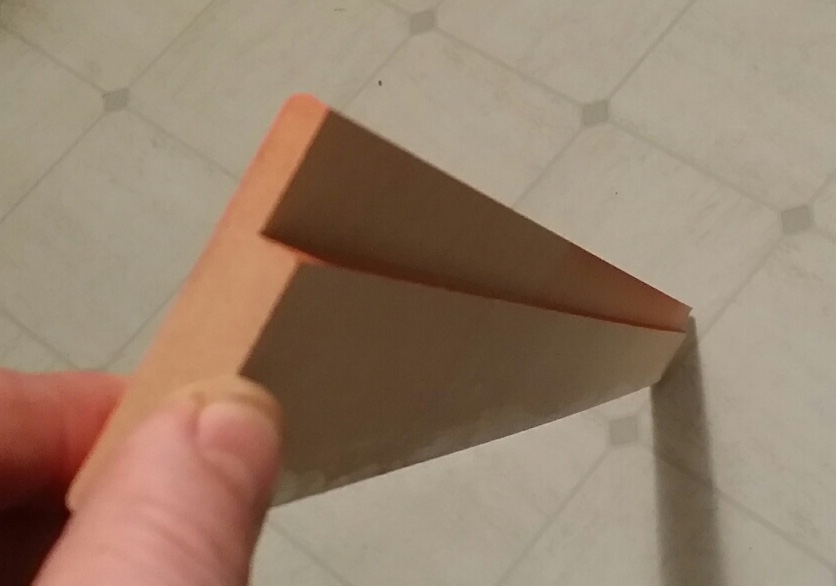
I used a dado blade on my table saw to cut out a section of the top molding in order for it to fit flush against the top piece of StoreWall
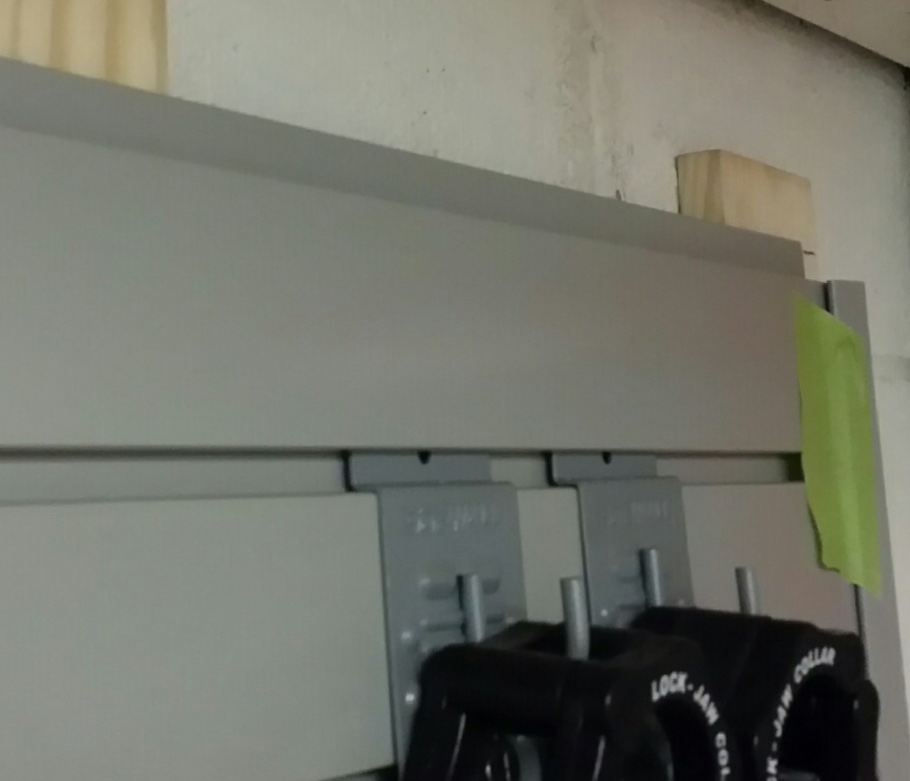
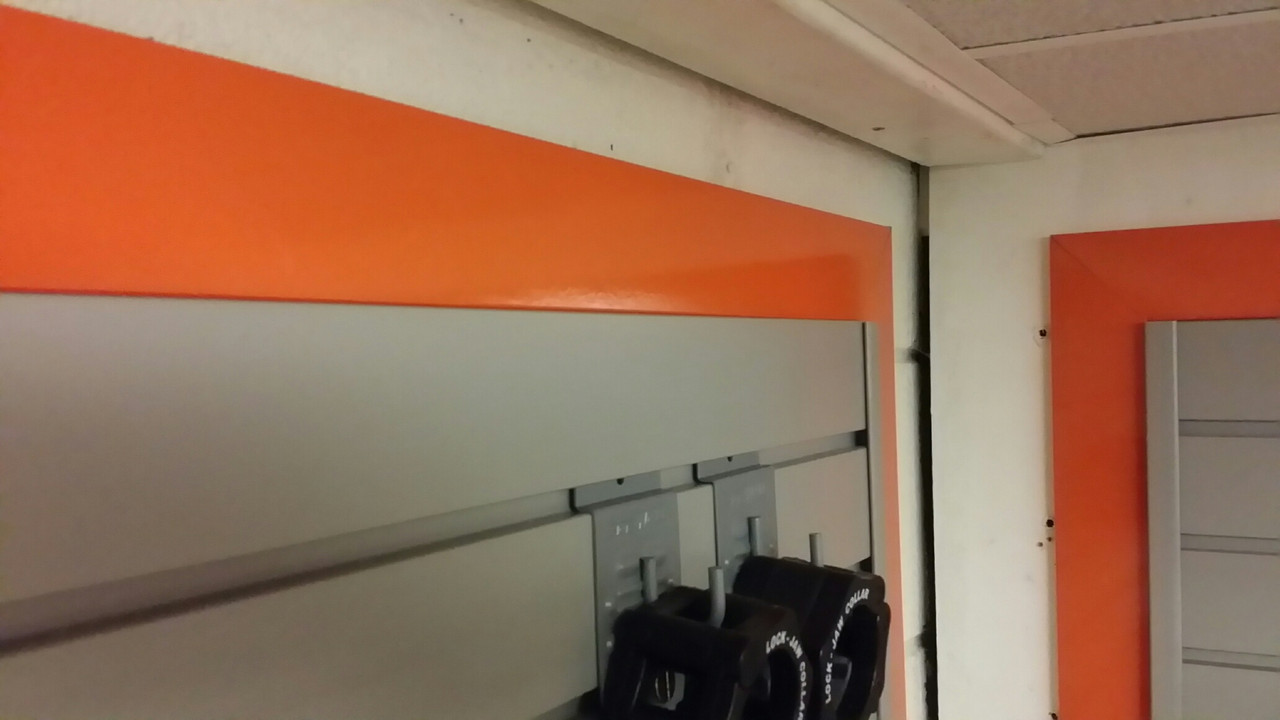
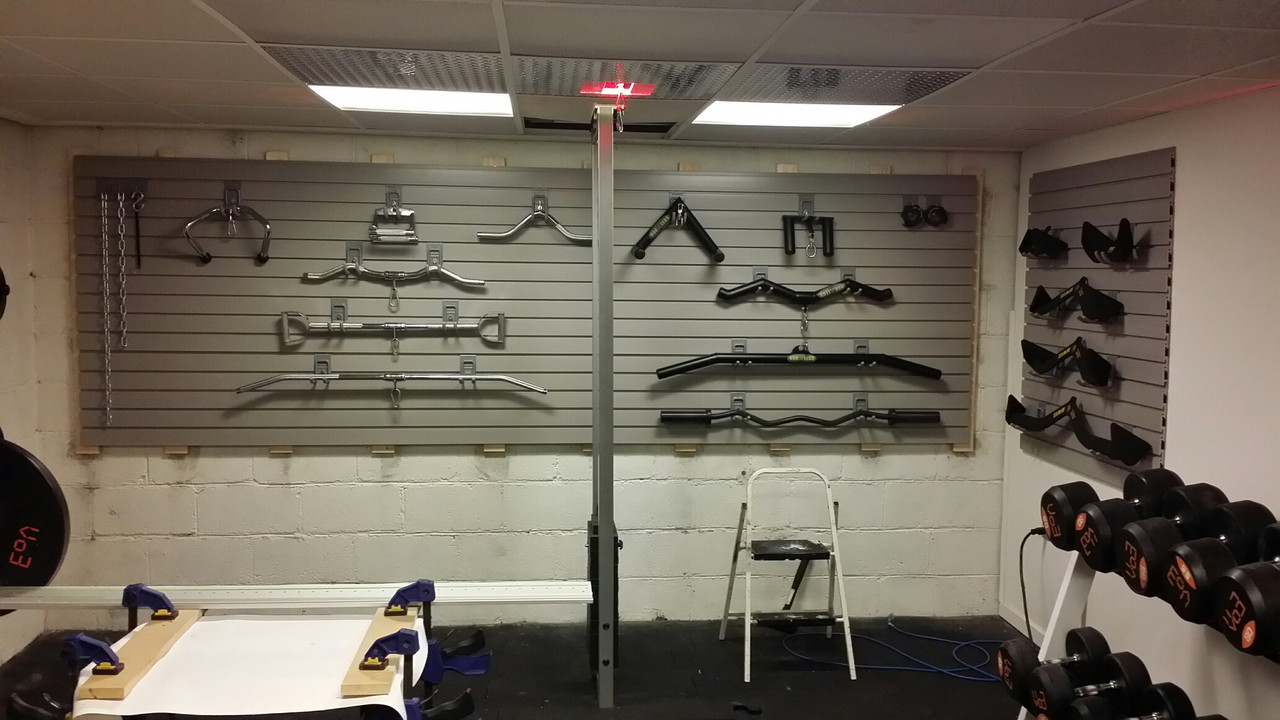
Recent pics . Added a few things
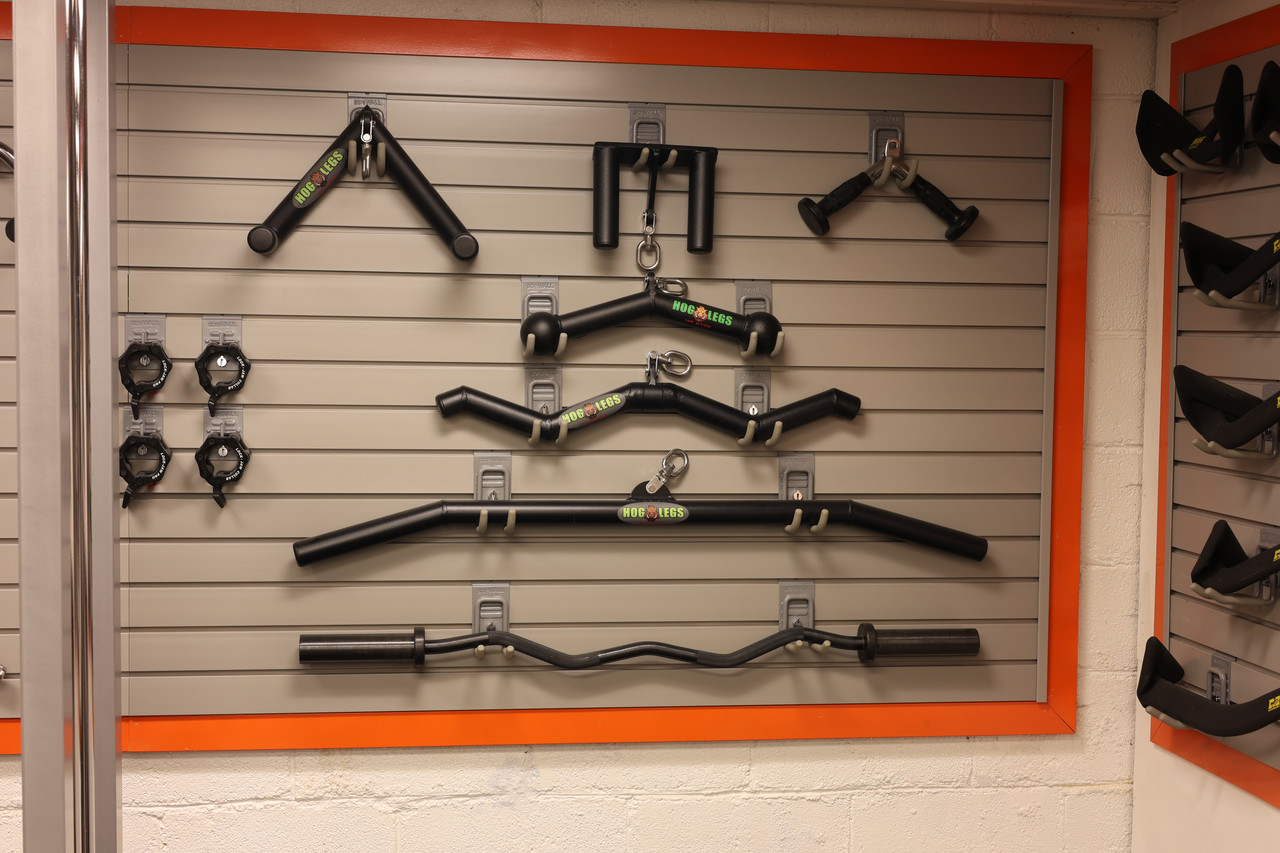
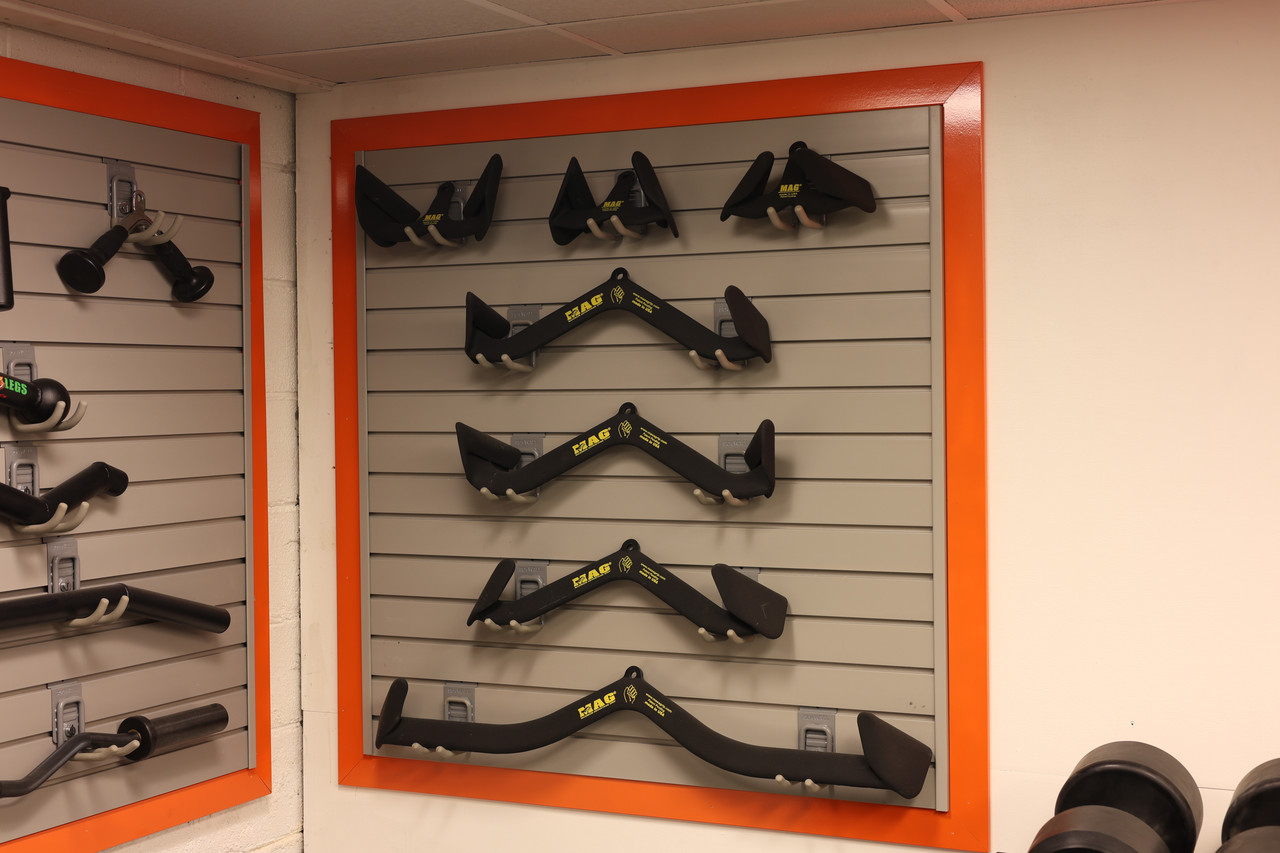
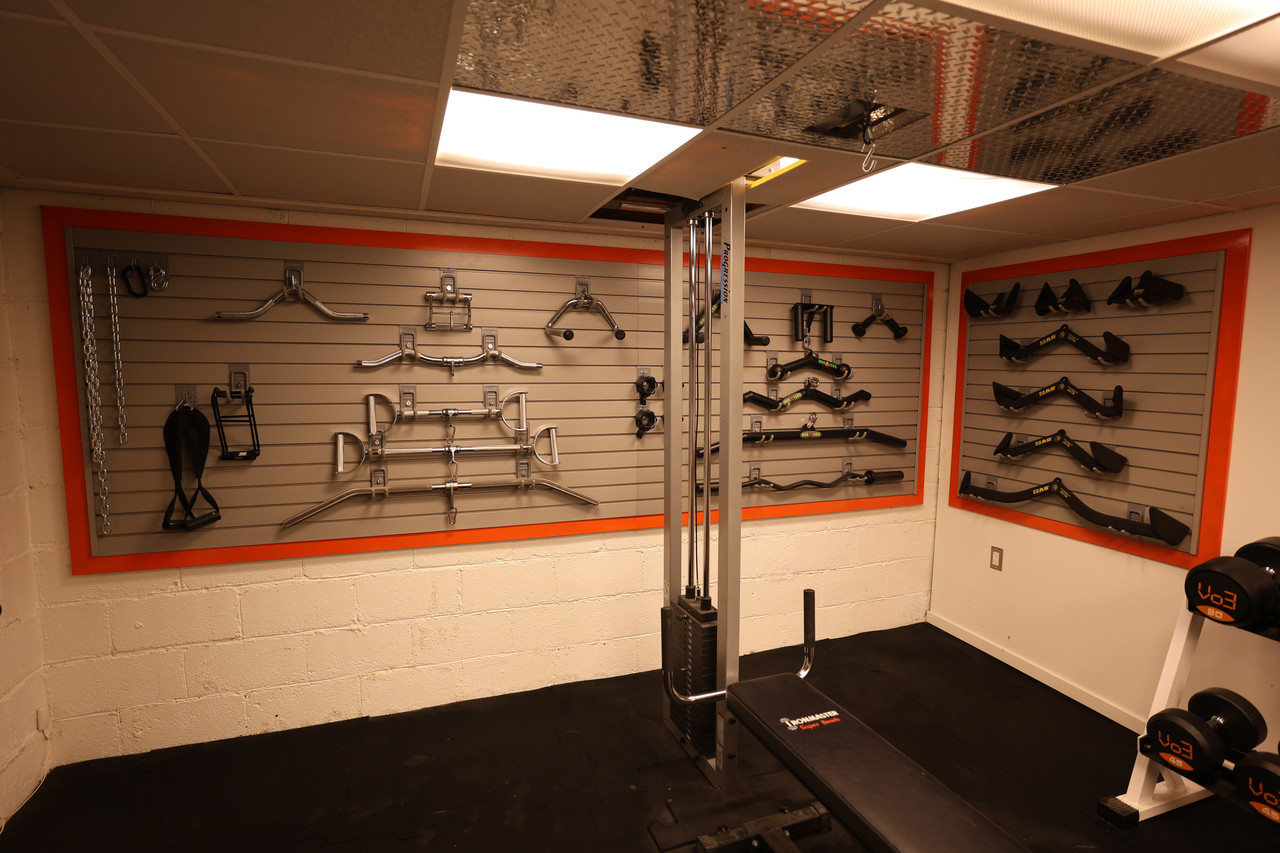
I have never heard of that product b4 so kudos to Misc for making me aware srs.
Srs I hate working with block walls . I thought it would be best to secure 1x4’s to wall to install the strips that hold up the StoreWall sections
Having a track saw was definitely a bonus for cutting that thick plastic accurately
I intentionally made the strips larger in order to incorporate moulding around the perimeter. I think it was a good choice tbh .
I used a dado blade on my table saw to cut out a section of the top molding in order for it to fit flush against the top piece of StoreWall
Recent pics . Added a few things
Back with my Fam
01-11-2026, 06:02 PM
-
#12
 01-11-2026, 06:11 PM
-
#13
- MajorTendonitis
- Join Date: Jan 2016
- Location: East Kootenays BC
- Age: 65
- Height: 5'8"
- Weight: 241 lbs
- Posts: 41,983
- Subscribers: 8
- Rep Power: 715365
-
-
Originally Posted By allfather⏩
Thx bruh srs. I did the best I could under the circumstances
You have an awesome gym. Mirin hard.
Originally Posted By p7nk⏩
Done bruh , it’s now orange. Took me a while but the objective was to eventually change anything that was yellow to orange. That bench was a gross yellow too boot . I dun goofed and should have ordered it in black at the time
Gotta paint that bench yellow
Originally Posted By ezmac31⏩
This nonsense has been going on for over two decades . Obviously I need a life lolHow do you find time to do all this (for the second time at that)?Really impressive man
Back with my Fam
01-11-2026, 06:22 PM
-
#14

- MikeLowrrrey
- Join Date: Jul 2018
- Age: 56
- Posts: 35,133
- Subscribers: 2
- Rep Power: 120067
-
-

Im really contemplating building a home gym. Just knowing I can roll out the bed in my boxers sounds good. Would also be way more consistent.
The only benefit of commercial gym is sloots. Otherwise too many downsides
The only benefit of commercial gym is sloots. Otherwise too many downsides
01-11-2026, 06:29 PM
-
#15
- MajorTendonitis
- Join Date: Jan 2016
- Location: East Kootenays BC
- Age: 65
- Height: 5'8"
- Weight: 241 lbs
- Posts: 41,983
- Subscribers: 8
- Rep Power: 715365
-
-
Originally Posted By MikeLowrrrey⏩
I have no regrats. Besides getting sick too often going to a huge public gym , I found I had to go there directly after work . Problem now is I’d be hypoglycaemic to go after work and I’d end up having supper. The worse thing about being home in the winter after supper is I find it difficult to get motivated lol .
Im really contemplating building a home gym. Just knowing I can roll out the bed in my boxers sounds good. Would also be way more consistent.
The only benefit of commercial gym is sloots. Otherwise too many downsides
The only benefit of commercial gym is sloots. Otherwise too many downsides
Best to have it at your home so you can do it at your leisure. The odd time I didn’t feel I hit a muscle enough and an hour later I’d back down and hit a few more sets .
Ya I love having a home gym tbh , miss the comradely though
Back with my Fam
01-11-2026, 06:37 PM
-
#16
- MajorTendonitis
- Join Date: Jan 2016
- Location: East Kootenays BC
- Age: 65
- Height: 5'8"
- Weight: 241 lbs
- Posts: 41,983
- Subscribers: 8
- Rep Power: 715365
-
-
On to the squat rack build . I bought a full cage from Bells of Steel but actually never assembled it as it would be too tight in my gym . I have 13’ of width and get claustrophobic.
So I built two individual squat racks instead . Srs I love having two racks as I use the one on the left for deadlifts and squats and the one on the right for bench pressing and shoulders.
Almost like divine intervention, the uprights were in the perfect position to secure them to the floor joists . They ended up exactly where my previous racks were , and I only had to do accord on the far left upright .
Doing a test fit . Mind blown that it was exactly where the Powertec rack sat , and crazy enough the other joist ended up being exactly where my new racks width was .
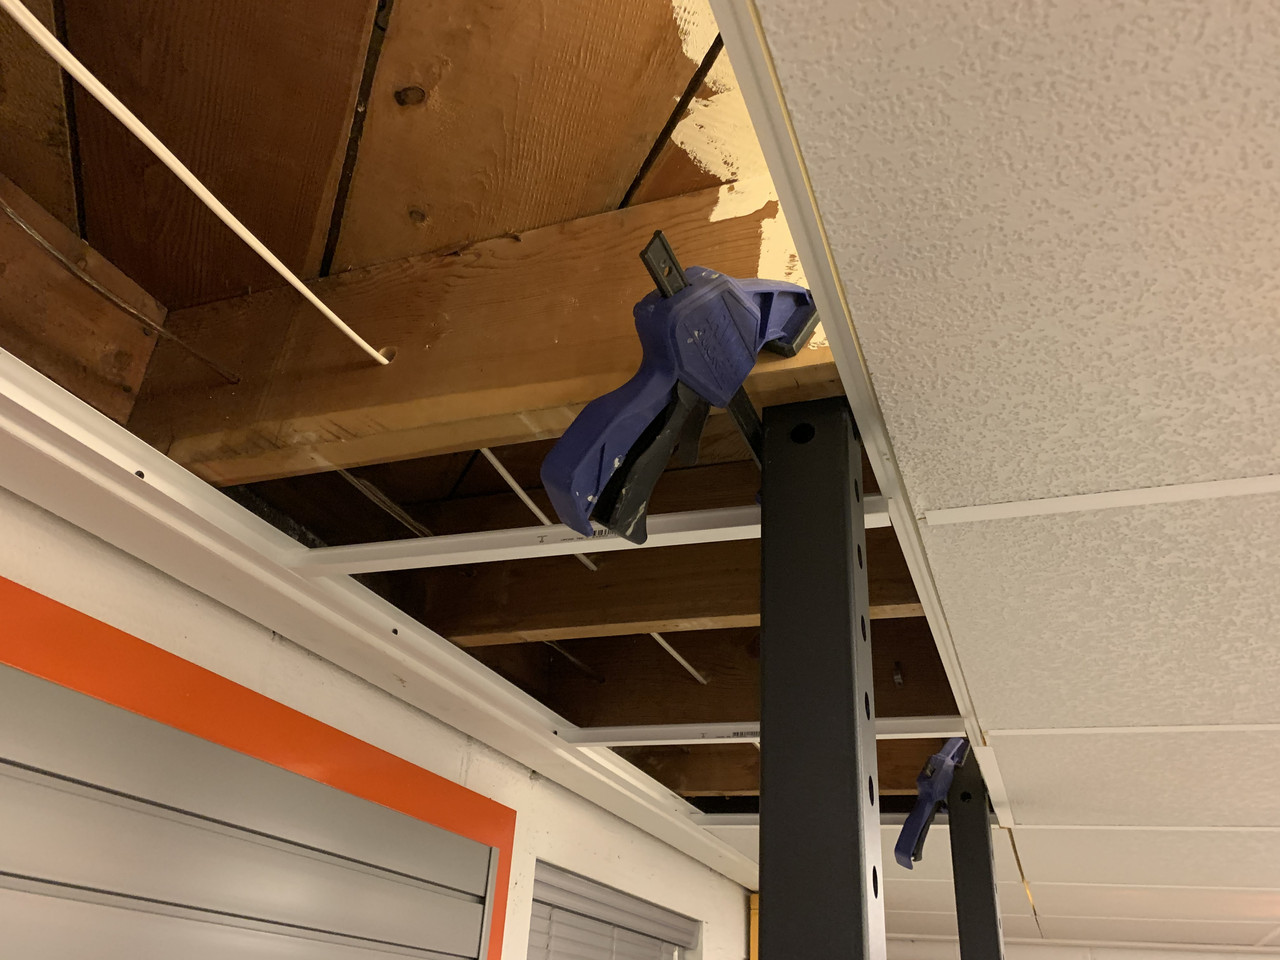
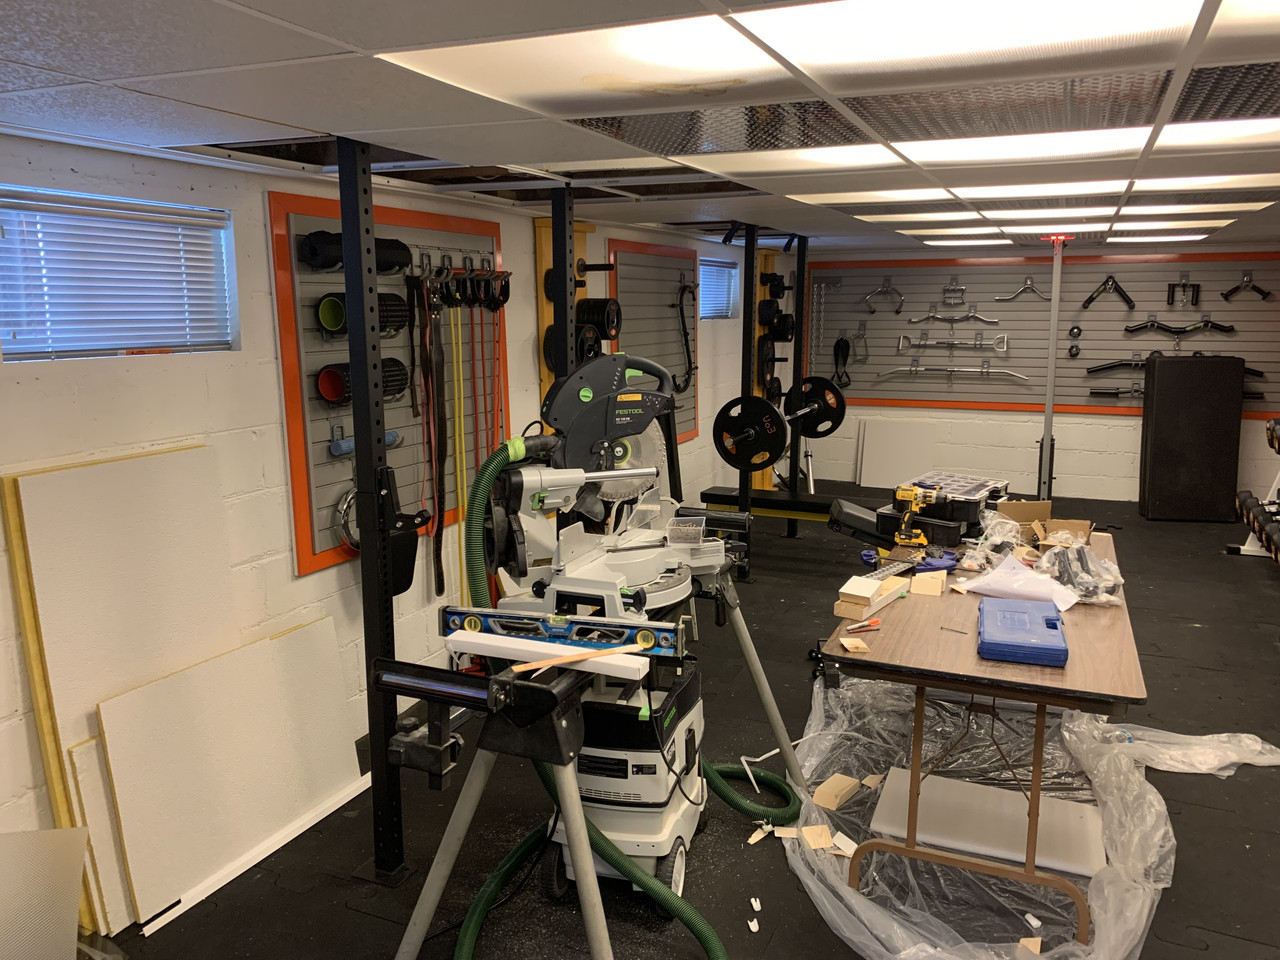
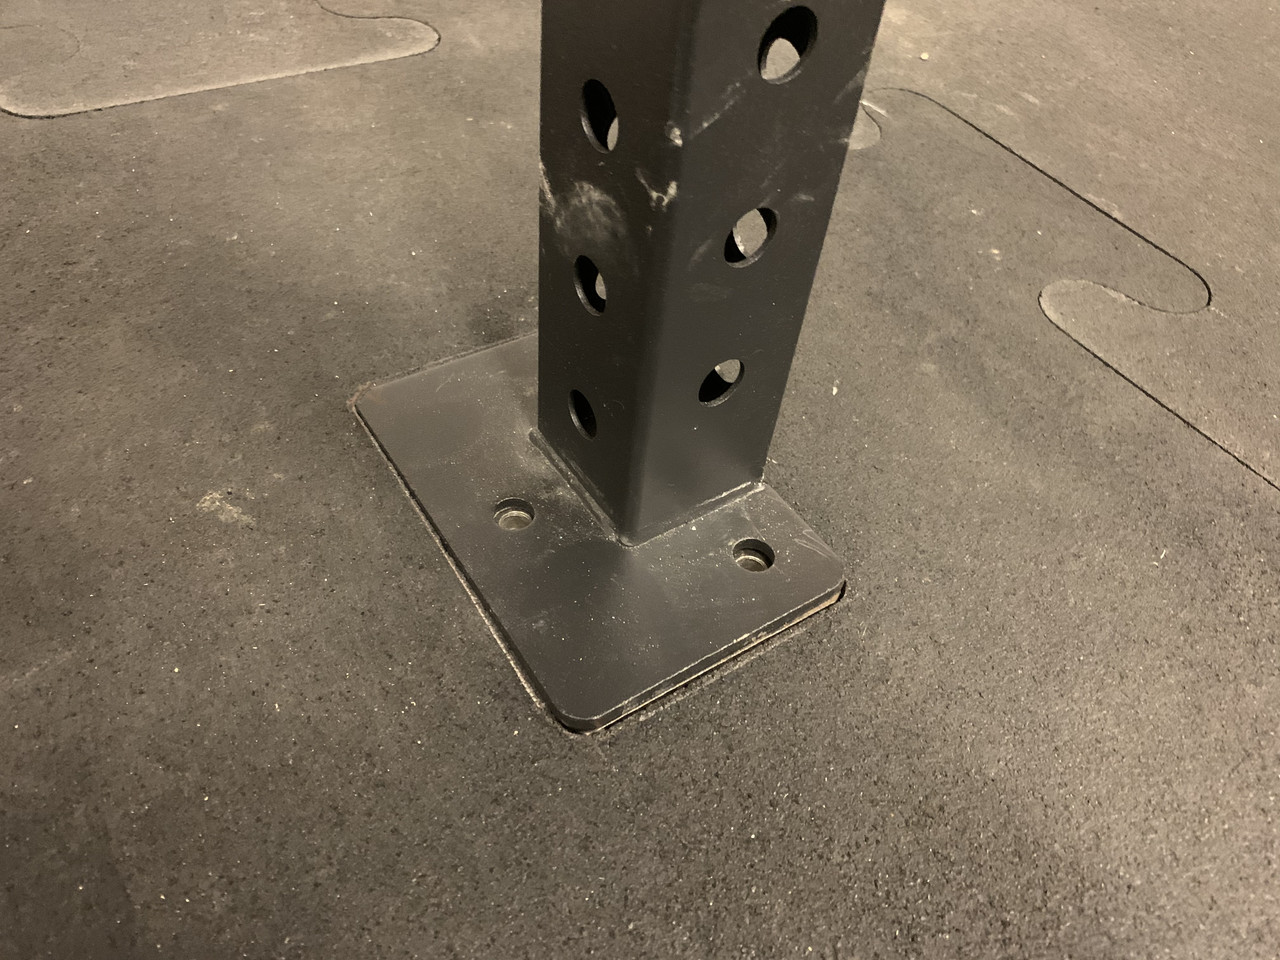
Drilled holes through the floor joists and used 5/8” bolts I believe from memory. The bottom of the posts are anchored into the concrete
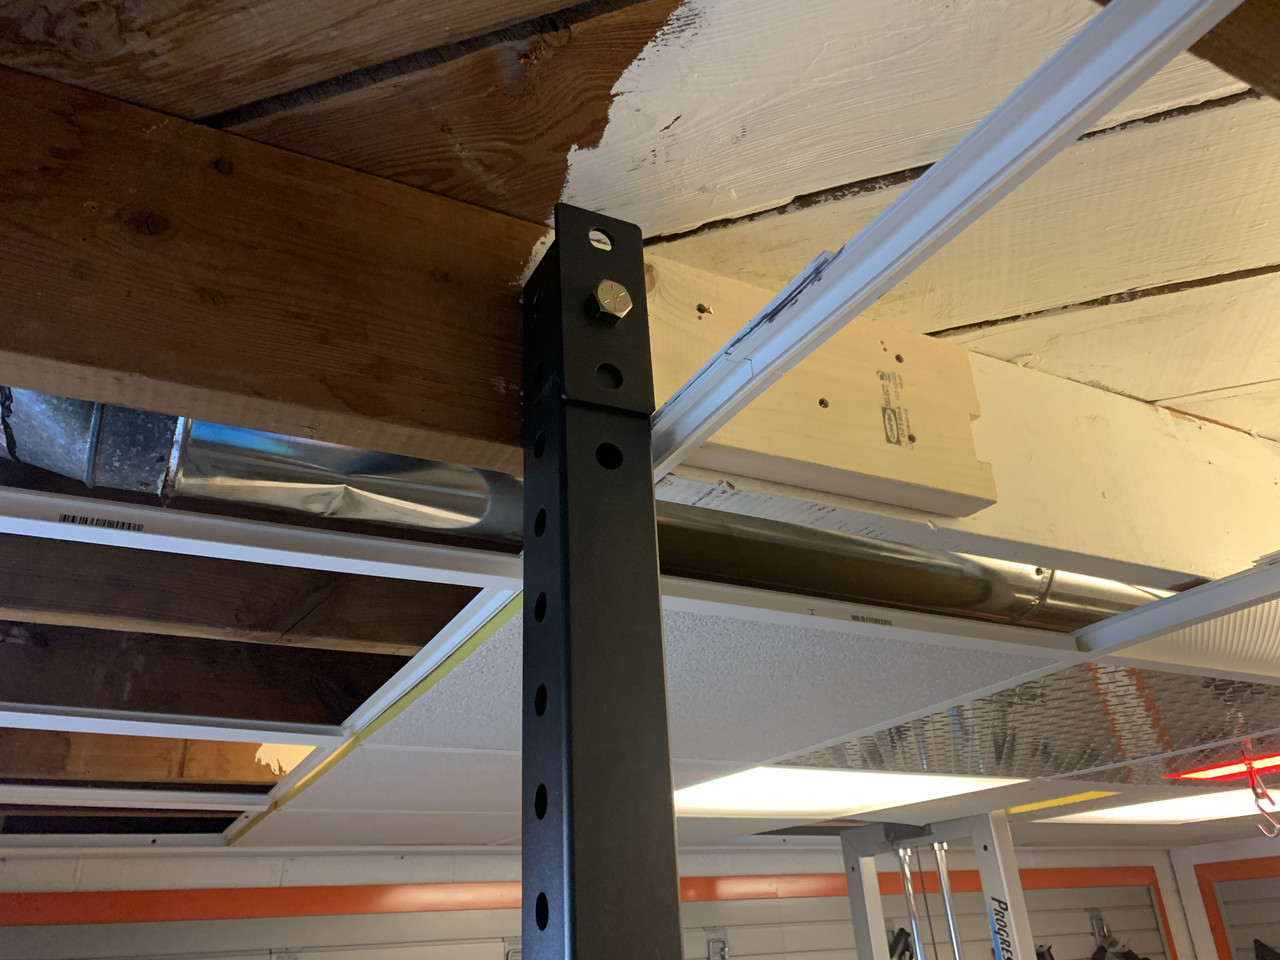
Floor drilled ready for anchors
This is the only upright that was an issue , a big one lol . It involved spacing it out plus relocating duct around it but I managed
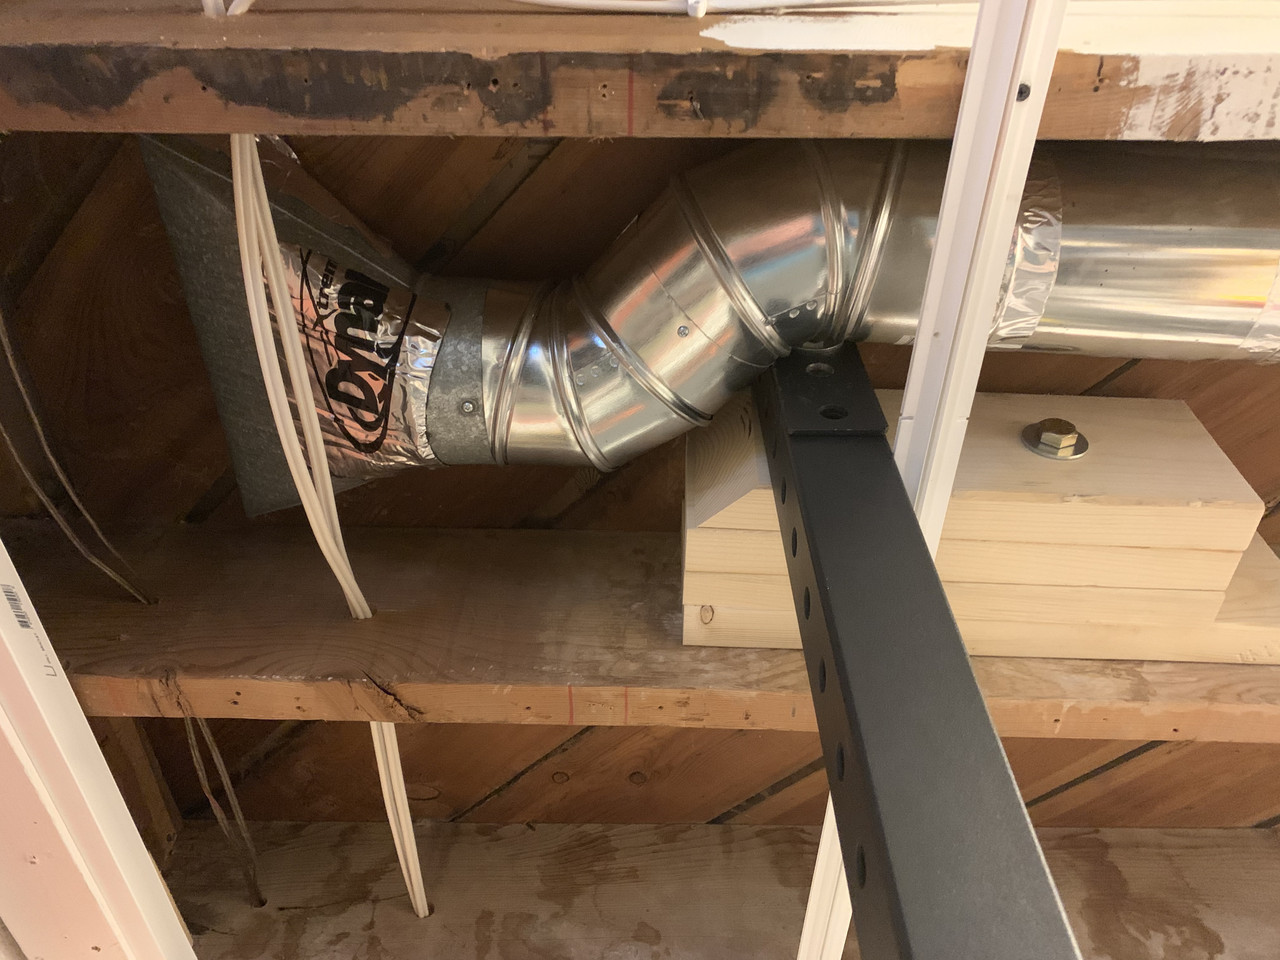
‘
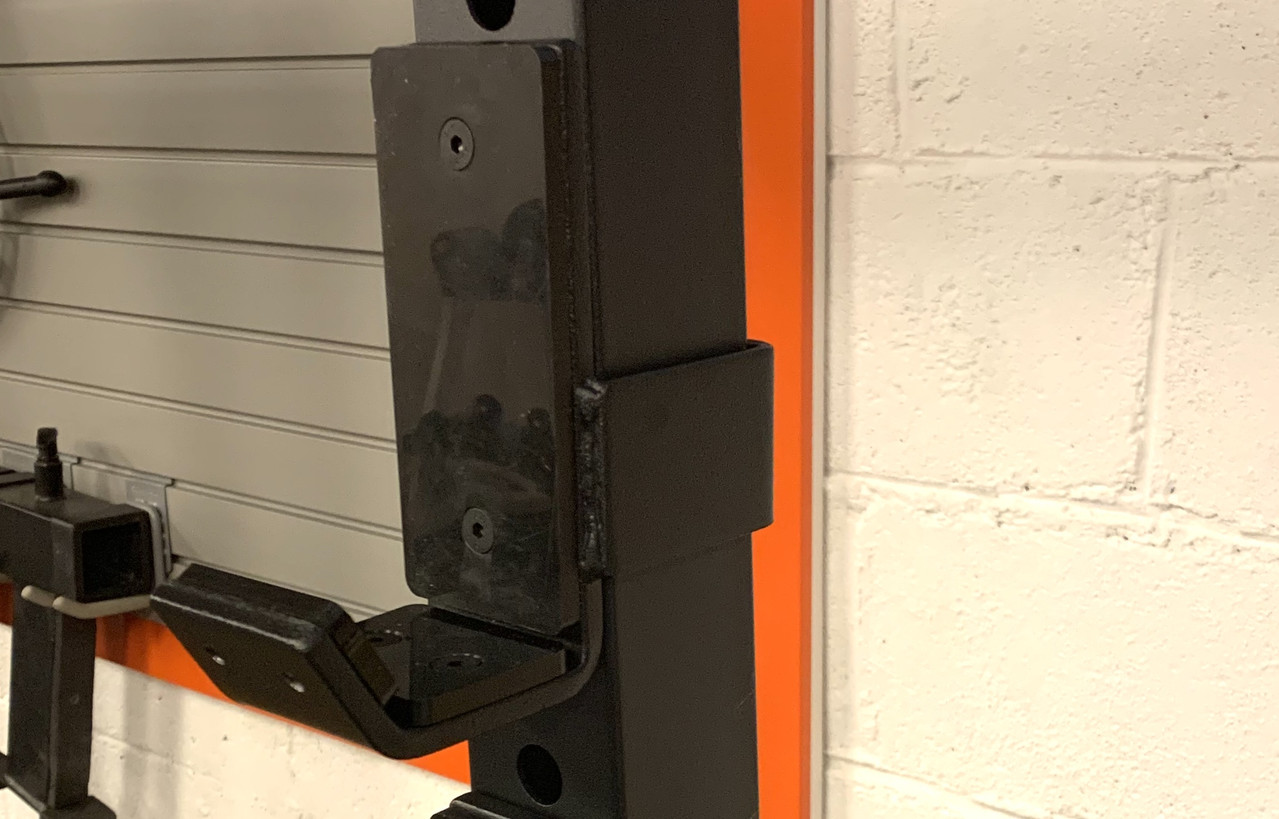
The one huge bonus here is there are tons of accessories for these new uprights , whereas I was not in a good place with the old Powertec racks.
Now I have safeties and everything
So I built two individual squat racks instead . Srs I love having two racks as I use the one on the left for deadlifts and squats and the one on the right for bench pressing and shoulders.
Almost like divine intervention, the uprights were in the perfect position to secure them to the floor joists . They ended up exactly where my previous racks were , and I only had to do accord on the far left upright .
Doing a test fit . Mind blown that it was exactly where the Powertec rack sat , and crazy enough the other joist ended up being exactly where my new racks width was .
Drilled holes through the floor joists and used 5/8” bolts I believe from memory. The bottom of the posts are anchored into the concrete
Floor drilled ready for anchors
This is the only upright that was an issue , a big one lol . It involved spacing it out plus relocating duct around it but I managed
‘
The one huge bonus here is there are tons of accessories for these new uprights , whereas I was not in a good place with the old Powertec racks.
Now I have safeties and everything
Back with my Fam
01-11-2026, 06:49 PM
-
#17
- Pats2022SBwin
- I Love Donald Trump (very srs)
-

- Pats2022SBwin
- I Love Donald Trump (very srs)
- Join Date: Aug 2022
- Age: 42
- Height: 5'10"
- Weight: 170 lbs
- Posts: 10,661
- Rep Power: 123539
-
-
Fuking awesome gym brah.
'08 original Misc join date (Pats55583)
50% Irish 50% Hungarian.
01-11-2026, 06:59 PM
-
#18
- MajorTendonitis
- Join Date: Jan 2016
- Location: East Kootenays BC
- Age: 65
- Height: 5'8"
- Weight: 241 lbs
- Posts: 41,983
- Subscribers: 8
- Rep Power: 715365
-
-
Originally Posted By Pats2022SBwin⏩
Thx bruh appreciate the kind words . I only wish I had a new house with a better starting point . Mirin Flex setup srsFuking awesome gym brah.
Back with my Fam
01-11-2026, 07:01 PM
-
#19
- MajorTendonitis
- Join Date: Jan 2016
- Location: East Kootenays BC
- Age: 65
- Height: 5'8"
- Weight: 241 lbs
- Posts: 41,983
- Subscribers: 8
- Rep Power: 715365
-
-
On to the entertainment stuff again . This was my first attempt at building a tv lift. I have a window in the way and I didn’t want to block it so I put the oled display in a cabinet .
I don’t watch tv when I’m working out , and this is only used when I get rinsed.
Ideally I’d like to design my own lift as I would make it twice as fast at 2 inches per second , but this works .
I swear the toughest part is getting the lid to fit properly. Sometimes you just have to say it’s good enough . The only extremely wood I’m aware of that stays straight and doesn’t warp is maple , but I’m not paying over 100 bucks to make one
Things cleaned up a little
I don’t watch tv when I’m working out , and this is only used when I get rinsed.
Ideally I’d like to design my own lift as I would make it twice as fast at 2 inches per second , but this works .
I swear the toughest part is getting the lid to fit properly. Sometimes you just have to say it’s good enough . The only extremely wood I’m aware of that stays straight and doesn’t warp is maple , but I’m not paying over 100 bucks to make one
Things cleaned up a little
Back with my Fam
01-11-2026, 07:19 PM
-
#20
- MajorTendonitis
- Join Date: Jan 2016
- Location: East Kootenays BC
- Age: 65
- Height: 5'8"
- Weight: 241 lbs
- Posts: 41,983
- Subscribers: 8
- Rep Power: 715365
-
-
Before I get to the more recent entertainment projects I thought I’d show the bumper plate build. I know I already posted it in another thread but I’d like to keep everything together .
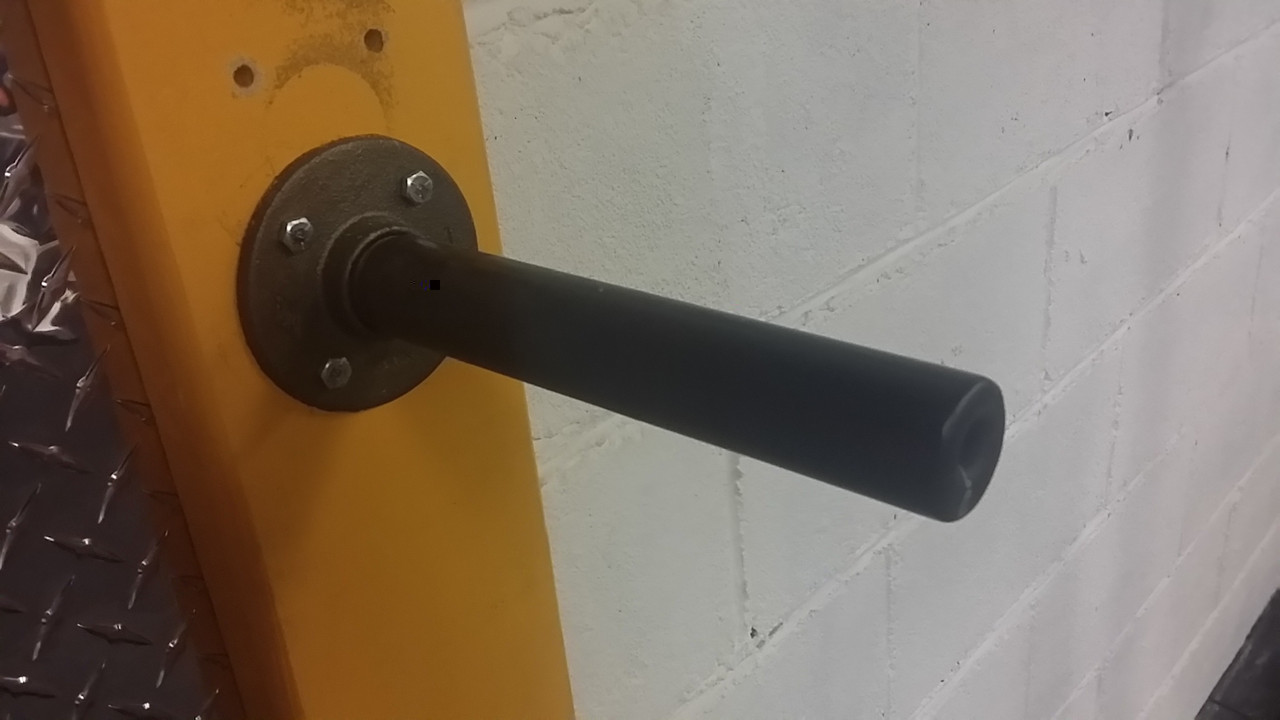
Srs for some reason this is the project I’m most fond of . One day I seen this piece of wood with floor flanges and gas pipe being used to hold a few small plates. I think it was probably a kid who figured it out from the pic , as he only had non Olympic plates like a 5 and a 10 on his rack that was about 2 feet high .
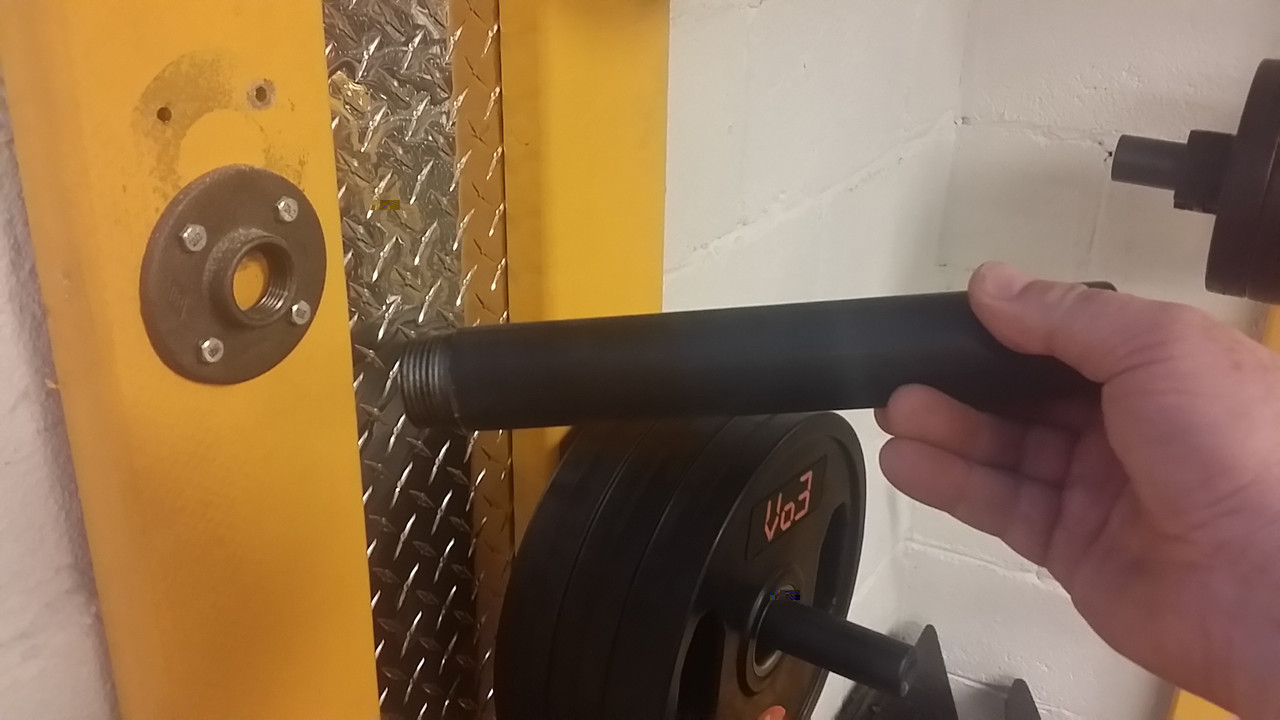
Anyways I’m like kid that’s pure genius. I went to our plumping store and purchased 3/4” gas pipe and there floor flanges and tried building a Ravi using 2/6 wood for the uprights and 2/4 for the bottom .
I don’t really know how to weld very well yet and as I thought welding a half sphere cap on the ends would look great plus not leave a sharp edge.
Then an employee seen it and said why are you not using heat shrink . I’m like duh srs . We use this industrial heat shrink in the communications industry and it worked perfect .
It’s funny as I’m seeing this used now and it’s more common place . I did it back in 2001 though , decades earlier . I can’t really take credit though as a kid figuring it out , I just refined it
This is the final product 2.0
I removed the 2/4 from the top and bottom and welded up some parts . Added adjustable feet to the bottom . First time I’ve had to tap a thread since grade 10 lol
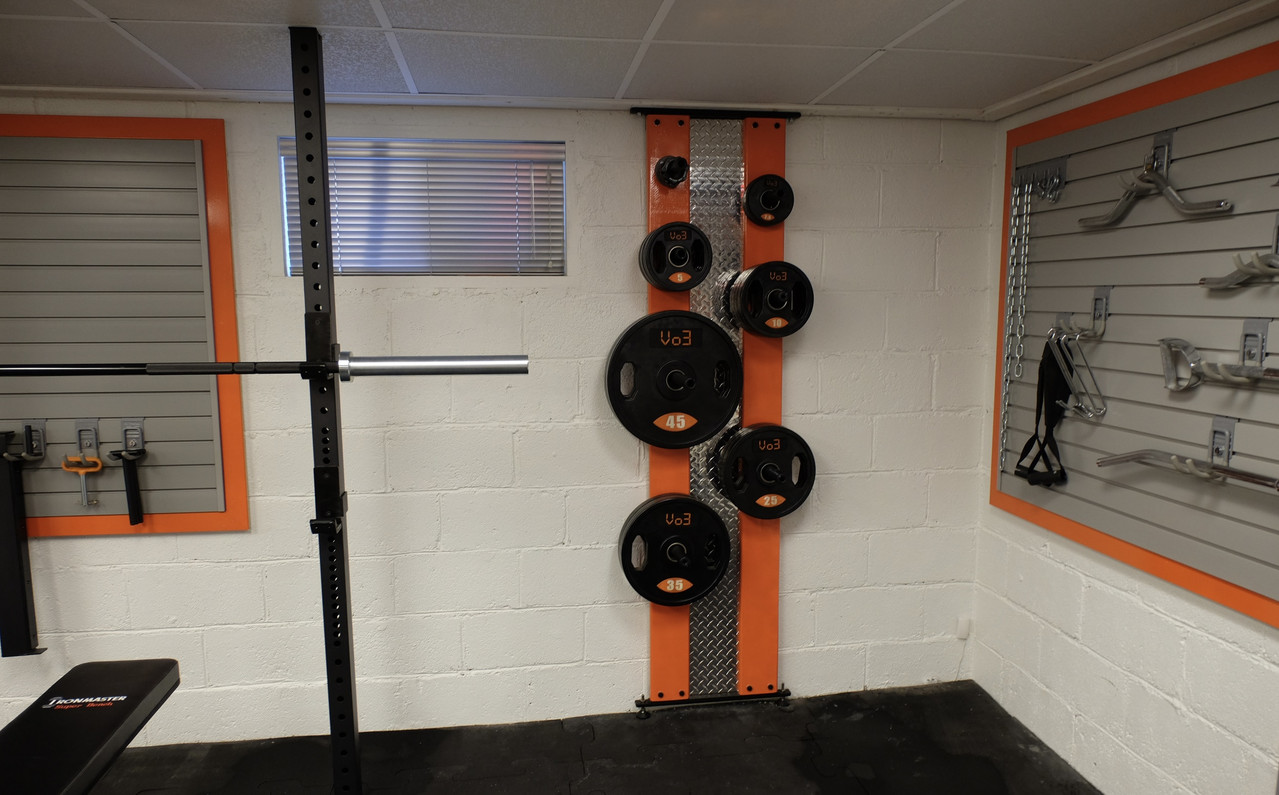
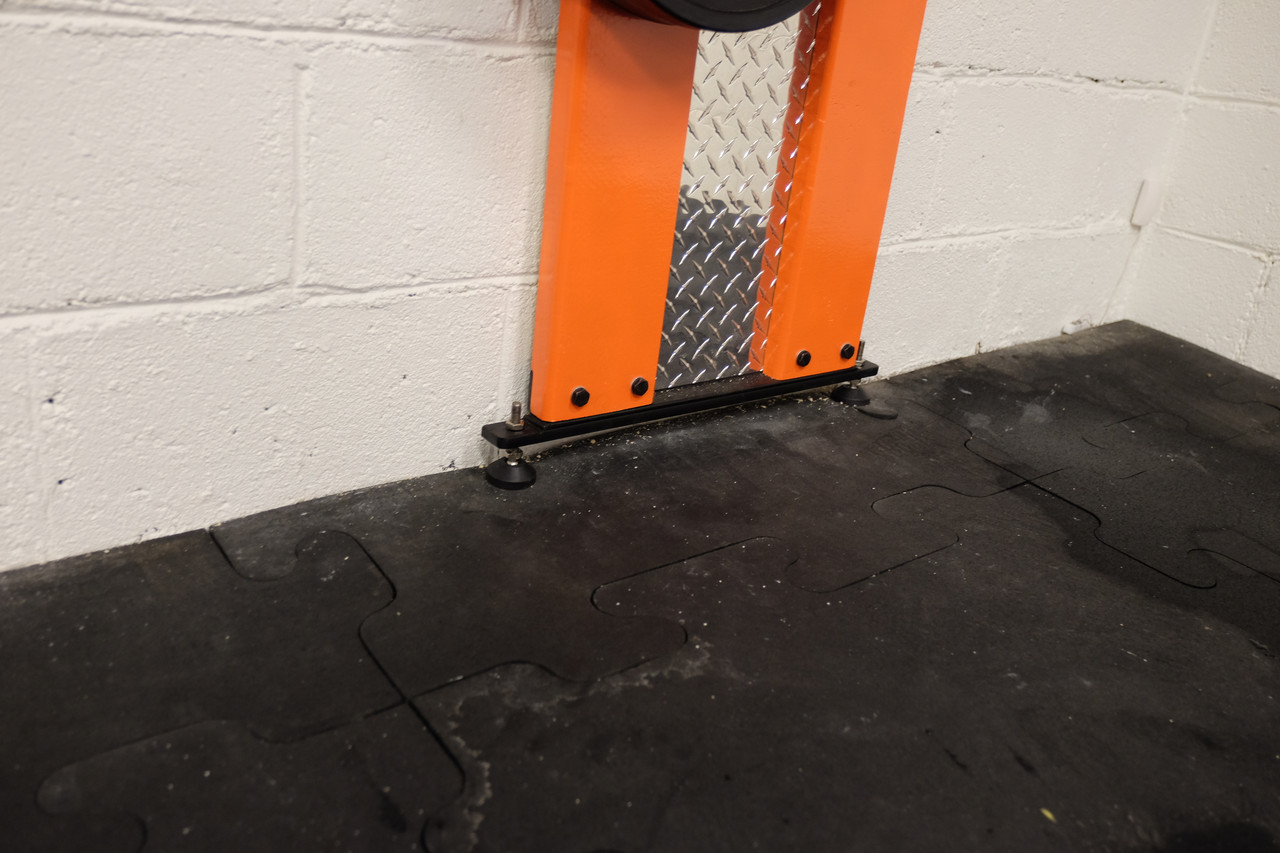
I haven’t gotten around to upgrading the other two bumper racks , so they still have the 2/4’s on their ends . I painted them though as that yellow was clashing bigly
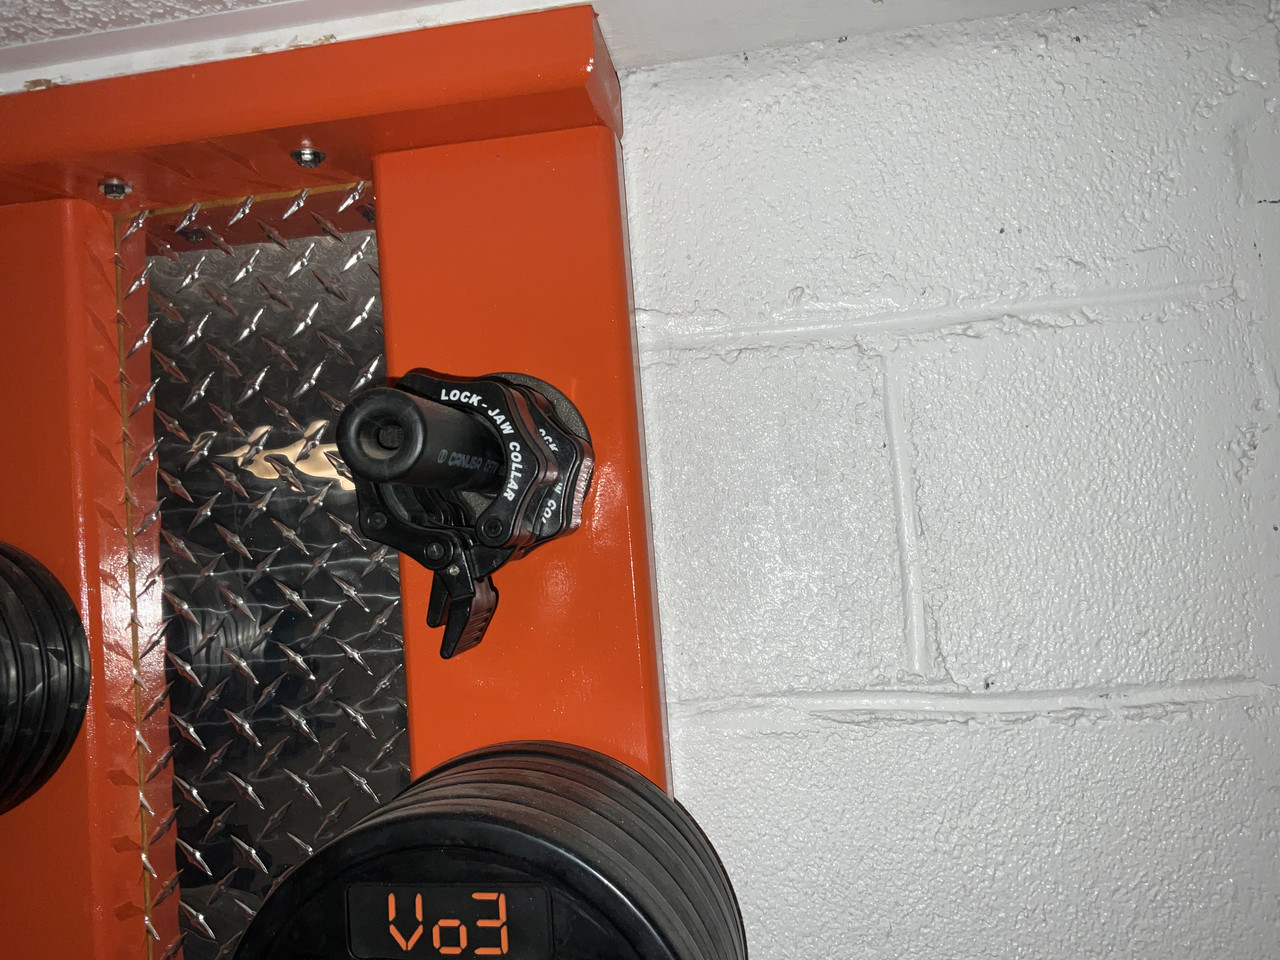
The old holes are from having the posts located so that the bumper plates got smaller numerically as you go lower . I found the 45 at the bottom sucked , so I relocated to the centre .
I’ve had four 45 pound plates each on these pipes with no issues .
Srs for some reason this is the project I’m most fond of . One day I seen this piece of wood with floor flanges and gas pipe being used to hold a few small plates. I think it was probably a kid who figured it out from the pic , as he only had non Olympic plates like a 5 and a 10 on his rack that was about 2 feet high .
Anyways I’m like kid that’s pure genius. I went to our plumping store and purchased 3/4” gas pipe and there floor flanges and tried building a Ravi using 2/6 wood for the uprights and 2/4 for the bottom .
I don’t really know how to weld very well yet and as I thought welding a half sphere cap on the ends would look great plus not leave a sharp edge.
Then an employee seen it and said why are you not using heat shrink . I’m like duh srs . We use this industrial heat shrink in the communications industry and it worked perfect .
It’s funny as I’m seeing this used now and it’s more common place . I did it back in 2001 though , decades earlier . I can’t really take credit though as a kid figuring it out , I just refined it
This is the final product 2.0
I removed the 2/4 from the top and bottom and welded up some parts . Added adjustable feet to the bottom . First time I’ve had to tap a thread since grade 10 lol
I haven’t gotten around to upgrading the other two bumper racks , so they still have the 2/4’s on their ends . I painted them though as that yellow was clashing bigly
The old holes are from having the posts located so that the bumper plates got smaller numerically as you go lower . I found the 45 at the bottom sucked , so I relocated to the centre .
I’ve had four 45 pound plates each on these pipes with no issues .
Back with my Fam
01-12-2026, 01:02 AM
-
#21
- MajorTendonitis
- Join Date: Jan 2016
- Location: East Kootenays BC
- Age: 65
- Height: 5'8"
- Weight: 241 lbs
- Posts: 41,983
- Subscribers: 8
- Rep Power: 715365
-
-
Making progress today. Although I really wanted gloss black trim like the previous tv lift cabinet, it’s too cold to spray and cure the trim outside .
On the most recent StoreWall addition I tried spraying the orange tremclad paint outside in the cold ,then brought the molding into the kitchen to dry .
The off gassing was terrible so I’ve given up on spraying paint till spring . So I found some really nice acrylic latex paint at Sherwood Williams that appears to look pretty good .
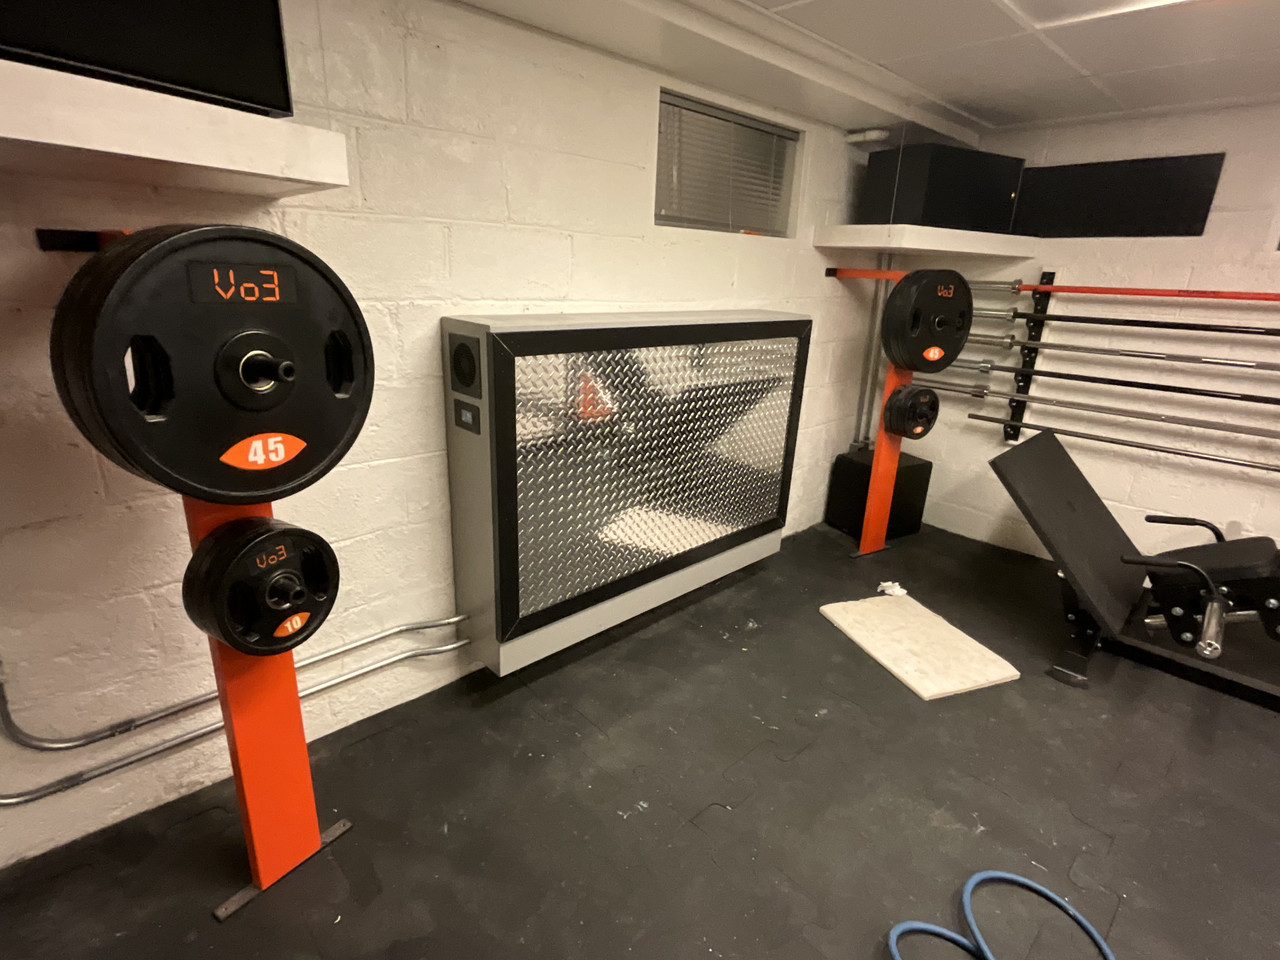
Anyways here’s a pic of the new lift that now accommodates an LG 55 C5 oled . I found the 48 was not quite big enough and the tv lift is designed for 32-55 inch tv’s .
I’m actually not overly disappointed with the trim not being a gloss finish . I put some spackle on the joints and the air nail holes . Will do a final paint coat and get rid of those unsightly gaps tomorrow if all goes well
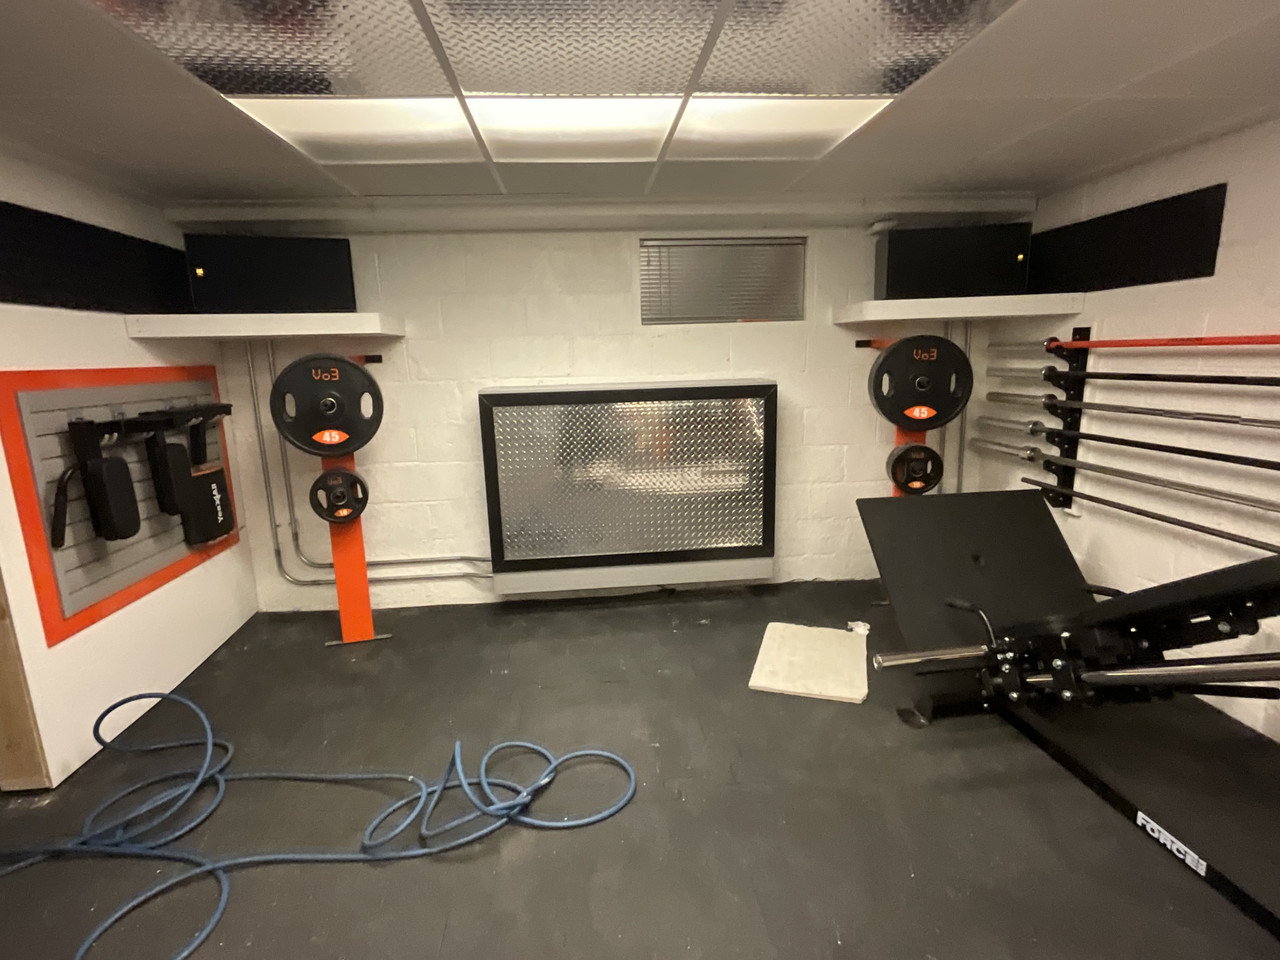
I’m actually happier with the depth of this cabinet as I managed to make it a few inches shallower . The previous cabinet I posted earlier was white with black trim and looked too tuxedo imo , so I went to the paint place and got them to colour match my StoreWall . They got it perfect imo and I prefer the grey over the white bigly
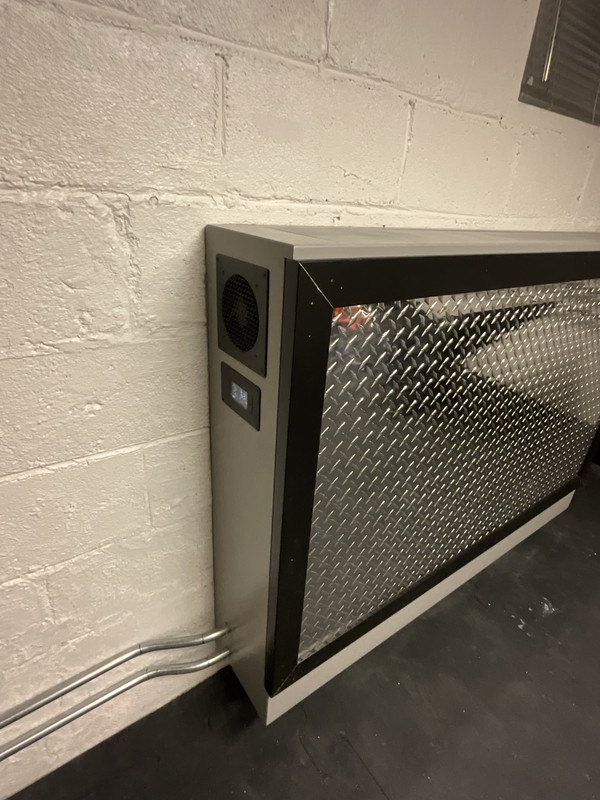
This is going to be controversial but I was concerned with heat when the tv was parked after use , especially if I got rinsed and actually forgot to turn the oled off.
And seeing as I went even tighter this time with the gap on the top (only one millimetre around the perimeter ) there’s literally no air flow inside .
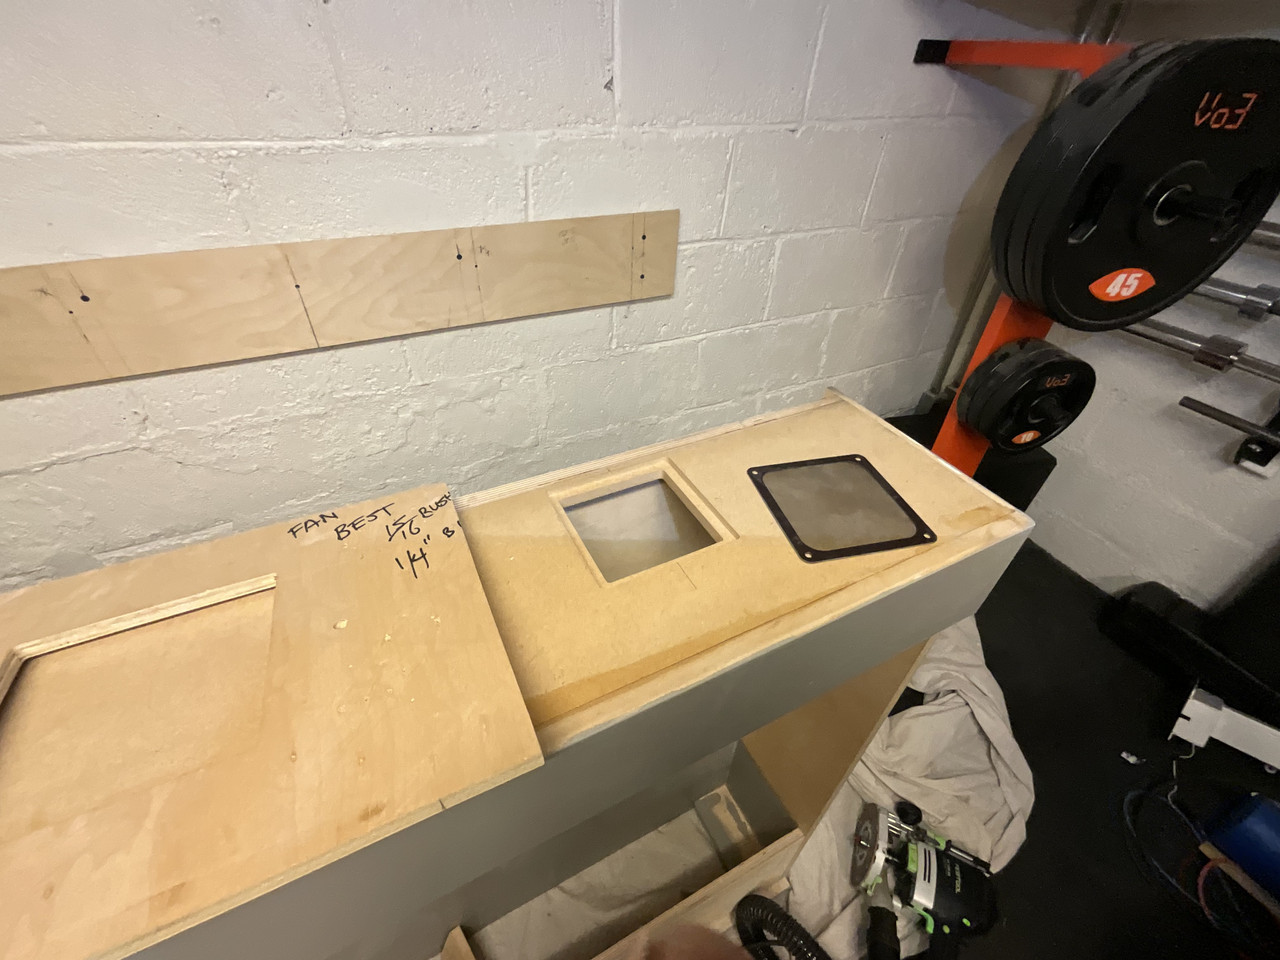
I really like the Infinity fan controllers and fans as I use them on my stereo , so I used the on the cabinet also . For chits and giggles I watched the controller’s temperature to see if anything happens, and the temperature increased 4 degrees F about 5 minutes after I lowered it .
If you look at the bottom I also routed out holes to fit my 120mm fan filters . I didn’t install fans there just filters . Tbh I think all the cabinet needed was vents , but I think the fan system looks kind of cool tbh
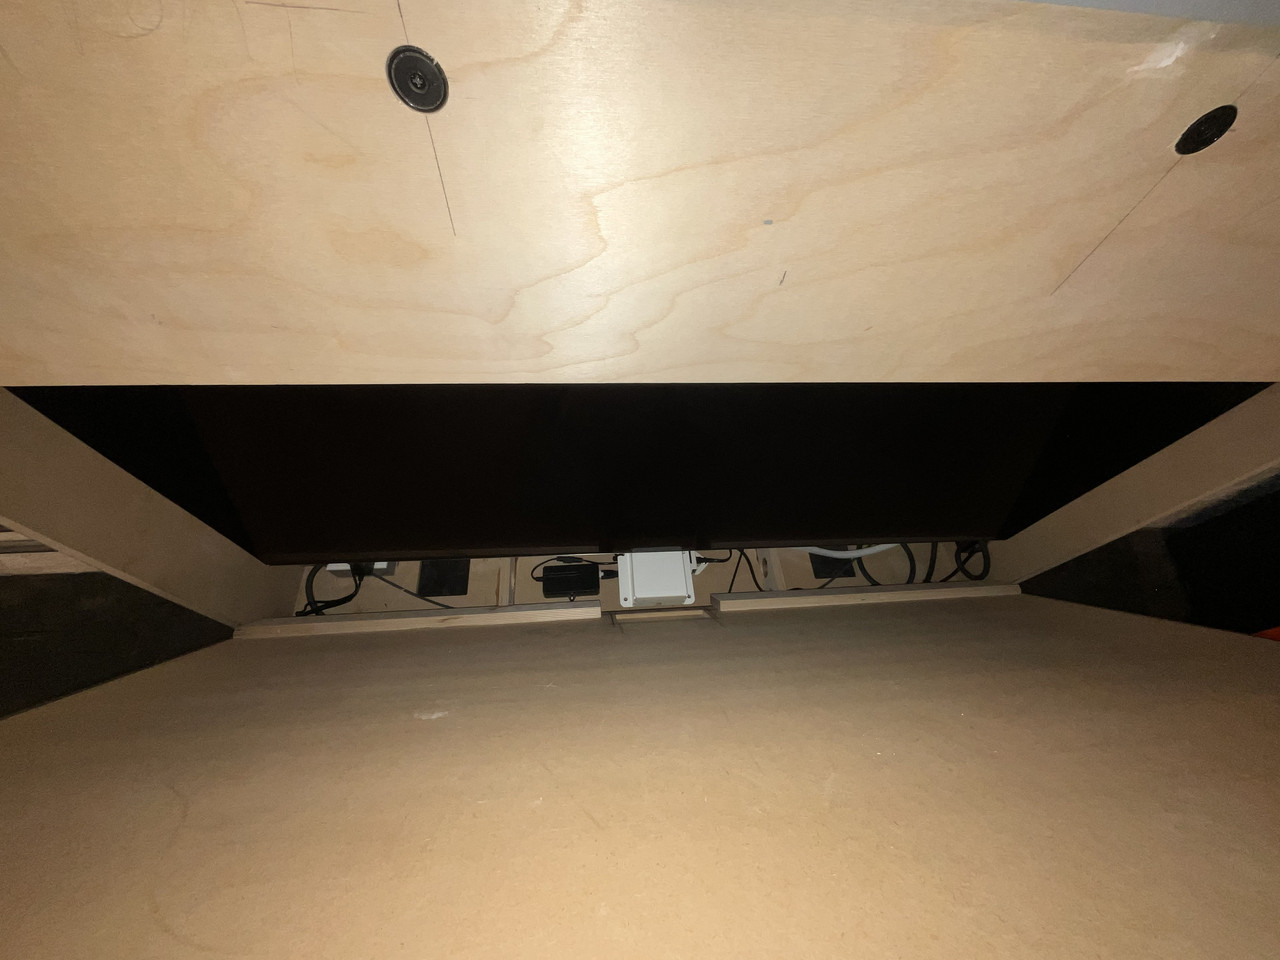
Used my jig I had made previously to route the hole . Then I thought why not change the insert plate on the router and countersink the hole . Not like you’d ever see it
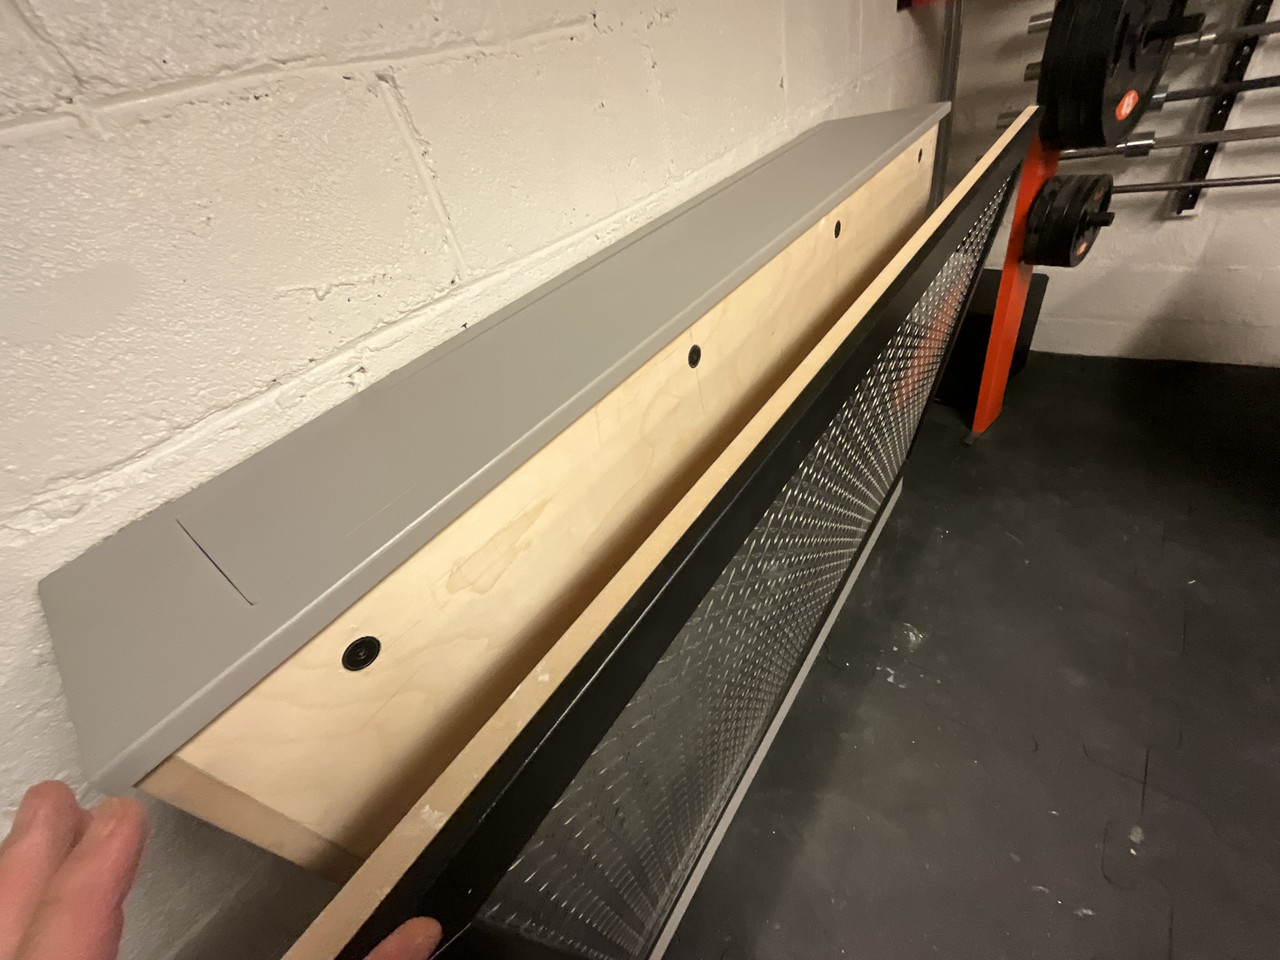
I think it’s rather cool being able to remove the majority of the front panel for access , and no screws as it’s held via magnets
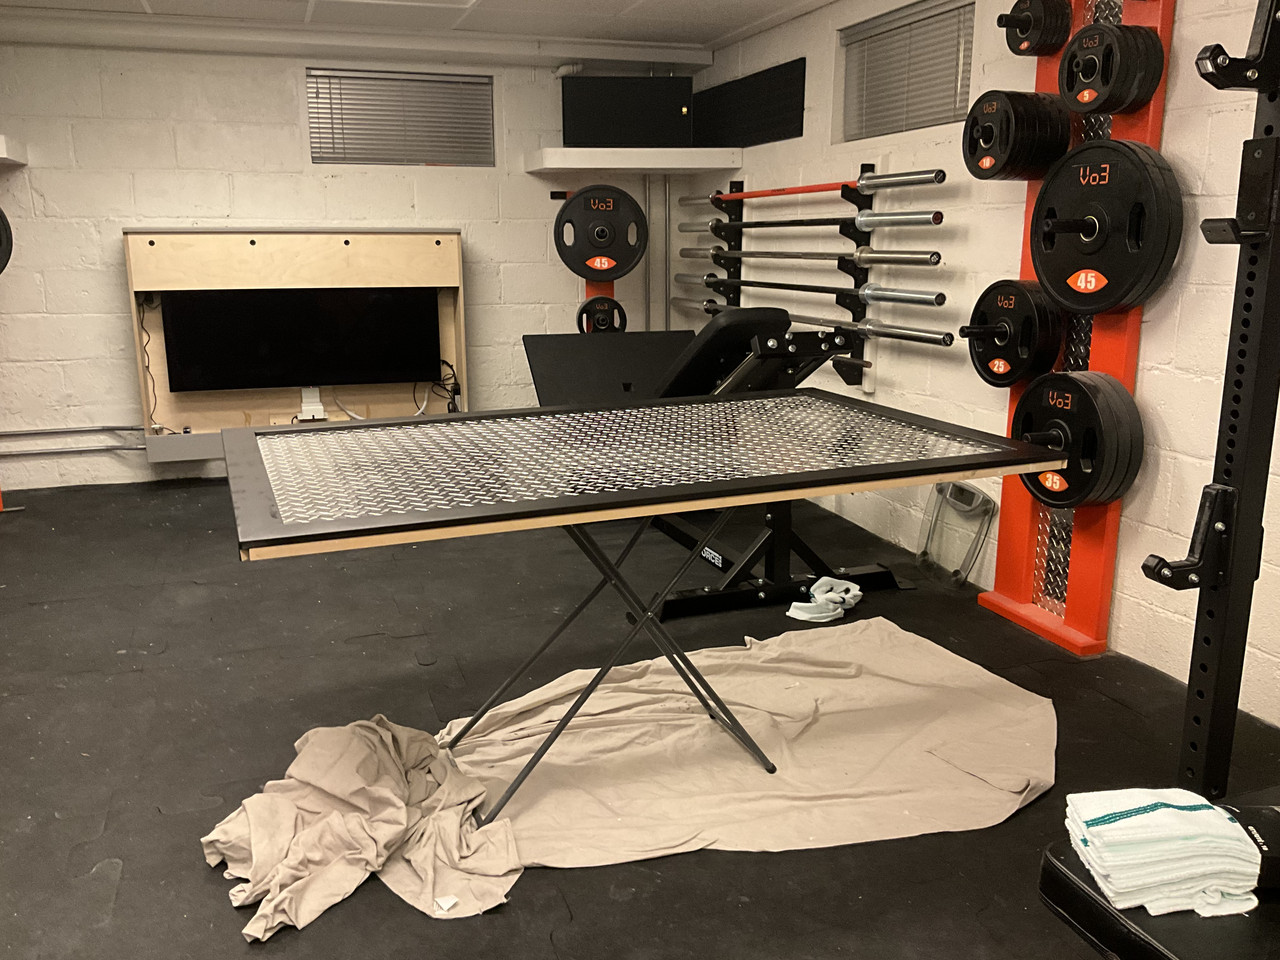
Here’s a video of it raising . Unfortunately it’s leaning a bit to the right when it reaches its top position. I never had an issue with the 48 but the 55 is giving me trouble .
It’s either live with it or figure out an option to fix . One idea was to router out a hole on the top of the lid , then place a steel bar inside to counter balance. It’s either that or a piece of foam at the top to straitened it once it gets to the top ,but I think that’s kind of crude . I could use a spring inside but I don’t want to look at a spring in the gap once it’s raised
On the most recent StoreWall addition I tried spraying the orange tremclad paint outside in the cold ,then brought the molding into the kitchen to dry .
The off gassing was terrible so I’ve given up on spraying paint till spring . So I found some really nice acrylic latex paint at Sherwood Williams that appears to look pretty good .
Anyways here’s a pic of the new lift that now accommodates an LG 55 C5 oled . I found the 48 was not quite big enough and the tv lift is designed for 32-55 inch tv’s .
I’m actually not overly disappointed with the trim not being a gloss finish . I put some spackle on the joints and the air nail holes . Will do a final paint coat and get rid of those unsightly gaps tomorrow if all goes well
I’m actually happier with the depth of this cabinet as I managed to make it a few inches shallower . The previous cabinet I posted earlier was white with black trim and looked too tuxedo imo , so I went to the paint place and got them to colour match my StoreWall . They got it perfect imo and I prefer the grey over the white bigly
This is going to be controversial but I was concerned with heat when the tv was parked after use , especially if I got rinsed and actually forgot to turn the oled off.
And seeing as I went even tighter this time with the gap on the top (only one millimetre around the perimeter ) there’s literally no air flow inside .
I really like the Infinity fan controllers and fans as I use them on my stereo , so I used the on the cabinet also . For chits and giggles I watched the controller’s temperature to see if anything happens, and the temperature increased 4 degrees F about 5 minutes after I lowered it .
If you look at the bottom I also routed out holes to fit my 120mm fan filters . I didn’t install fans there just filters . Tbh I think all the cabinet needed was vents , but I think the fan system looks kind of cool tbh
Used my jig I had made previously to route the hole . Then I thought why not change the insert plate on the router and countersink the hole . Not like you’d ever see it
I think it’s rather cool being able to remove the majority of the front panel for access , and no screws as it’s held via magnets
Here’s a video of it raising . Unfortunately it’s leaning a bit to the right when it reaches its top position. I never had an issue with the 48 but the 55 is giving me trouble .
It’s either live with it or figure out an option to fix . One idea was to router out a hole on the top of the lid , then place a steel bar inside to counter balance. It’s either that or a piece of foam at the top to straitened it once it gets to the top ,but I think that’s kind of crude . I could use a spring inside but I don’t want to look at a spring in the gap once it’s raised
Back with my Fam
01-12-2026, 01:15 AM
-
#22
 01-12-2026, 08:00 AM
-
#23
 01-12-2026, 10:05 AM
-
#24
 01-12-2026, 04:26 PM
-
#25
- LAHipster1
- Registered User
-

- LAHipster1
- Registered User
- Join Date: Oct, 2025
- Posts: 3,185
- Subscribers: 3
- Rep Power: 29177
-
-
impressive srs. this is what I want but mine will be smaller
how much $ have u spent on all this?
how much $ have u spent on all this?
I put effort in all my threads srs
only good vibes crew
always rep back crew
Founder of Maybe Next Life Crew
if ur struggling with reps read my guide https://forum.obnoxiousbrutes.com/showthread.php?t=1000017013&f=19
01-12-2026, 05:20 PM
-
#26
- MajorTendonitis
- Join Date: Jan 2016
- Location: East Kootenays BC
- Age: 65
- Height: 5'8"
- Weight: 241 lbs
- Posts: 41,983
- Subscribers: 8
- Rep Power: 715365
-
-
Originally Posted By LAHipster1⏩
I try not to keep count . I know people who spend 30k on a sled and put another 20k into with mods , so I feel it’s whatever your into to .
impressive srs. this is what I want but mine will be smaller
how much $ have u spent on all this?
how much $ have u spent on all this?
This gives me a lot of satisfaction and keeps me busy modding things all the time , not to mention it’s beneficial health wise.
I live in a pos chit house and tbh though I’m not sure I’d do again unless I was rich and had a mansion with 10’ ceilings .
It’s been a fun journey though
Originally Posted By BigNik78⏩
Dassit meng. Mirin' as always.
Originally Posted By ectobruh⏩
I'm jelly
Originally Posted By Legz422⏩
That for the kind words guysSo jelly of your home gym! It looks awesome!
Back with my Fam
01-12-2026, 09:35 PM
-
#27
- MajorTendonitis
- Join Date: Jan 2016
- Location: East Kootenays BC
- Age: 65
- Height: 5'8"
- Weight: 241 lbs
- Posts: 41,983
- Subscribers: 8
- Rep Power: 715365
-
-
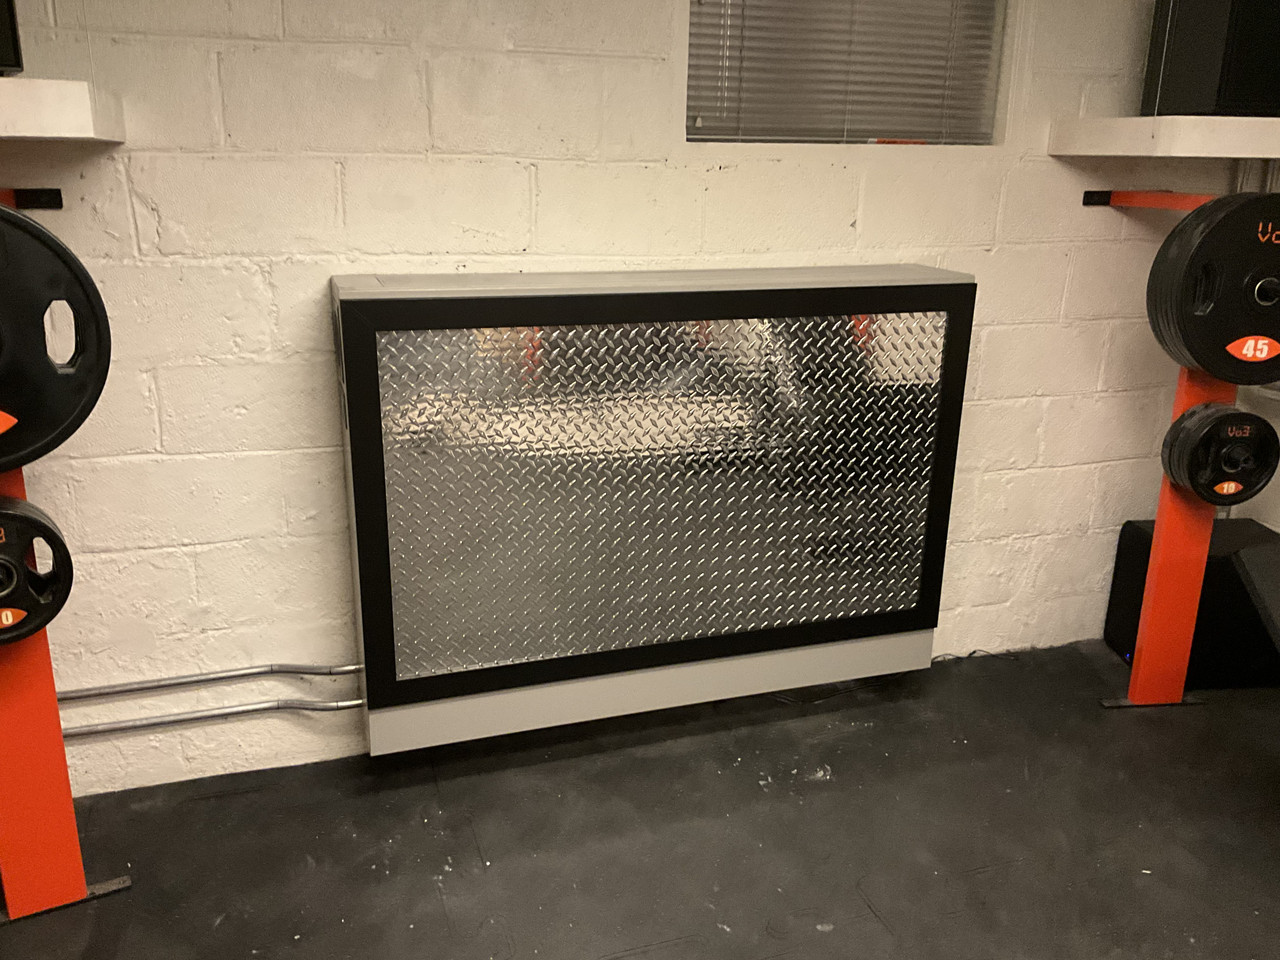
Got the final coat of black on the trim . I think it looks pretty good regardless of not being gloss black

Back with my Fam
01-13-2026, 12:58 AM
-
#28
- RustledJimmies
- Registered Pupper
-
- RustledJimmies
- Registered Pupper
- Join Date: Jan, 2026
- Posts: 2,153
- Subscribers: 1
- Rep Power: 76390
-
-
Post deleted by user
01-13-2026, 01:27 AM
-
#29
- MajorTendonitis
- Join Date: Jan 2016
- Location: East Kootenays BC
- Age: 65
- Height: 5'8"
- Weight: 241 lbs
- Posts: 41,983
- Subscribers: 8
- Rep Power: 715365
-
-
Originally Posted By RustledJimmies⏩
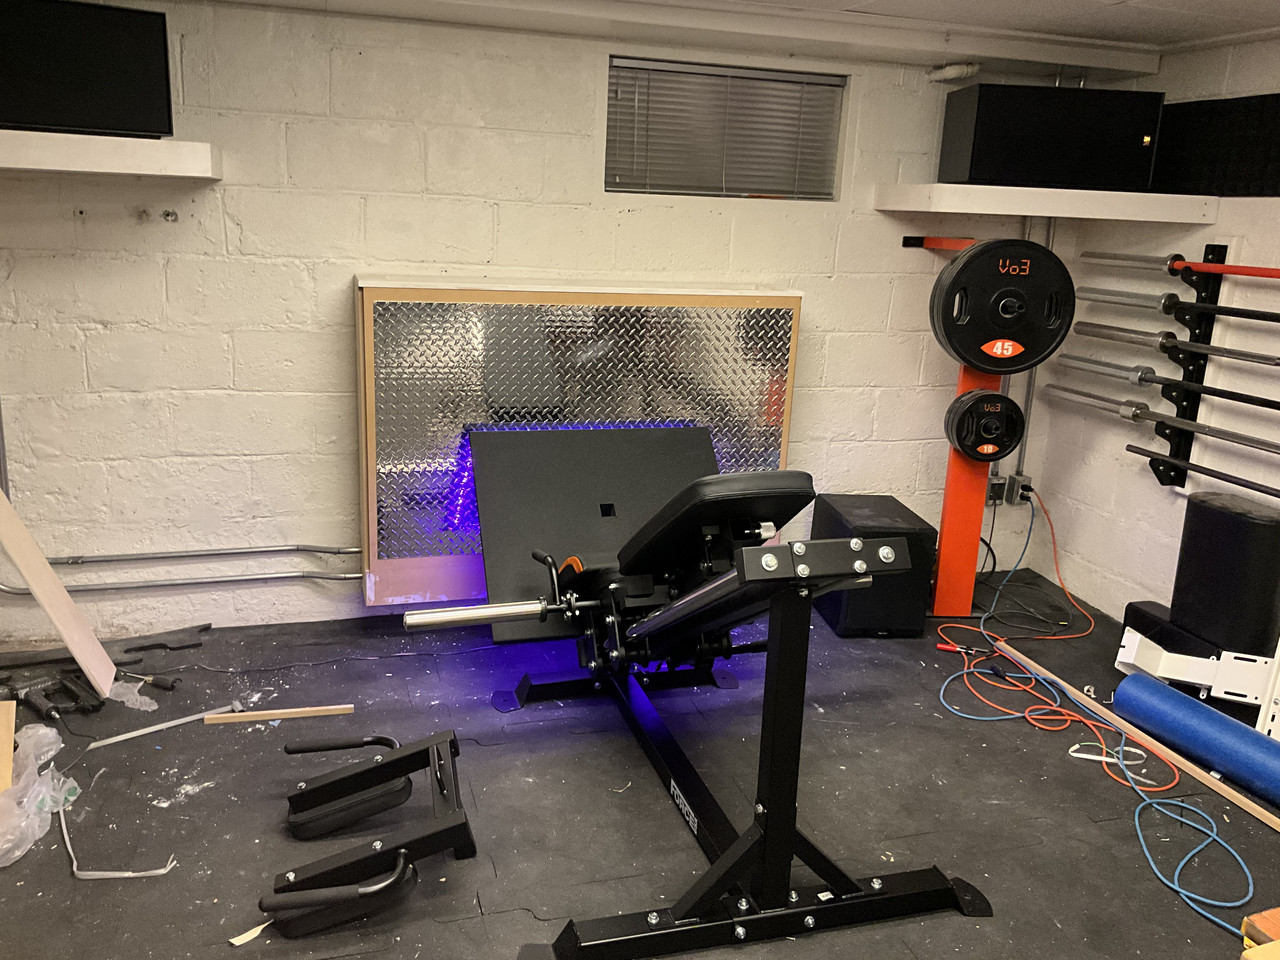
That’s bruh I’m having fun building stuff and updating. My addressable led strip doesn’t arrive till Friday and I’m pretty stoked to install it .
Feel good vibes in here. Das it. Will keep checking in.
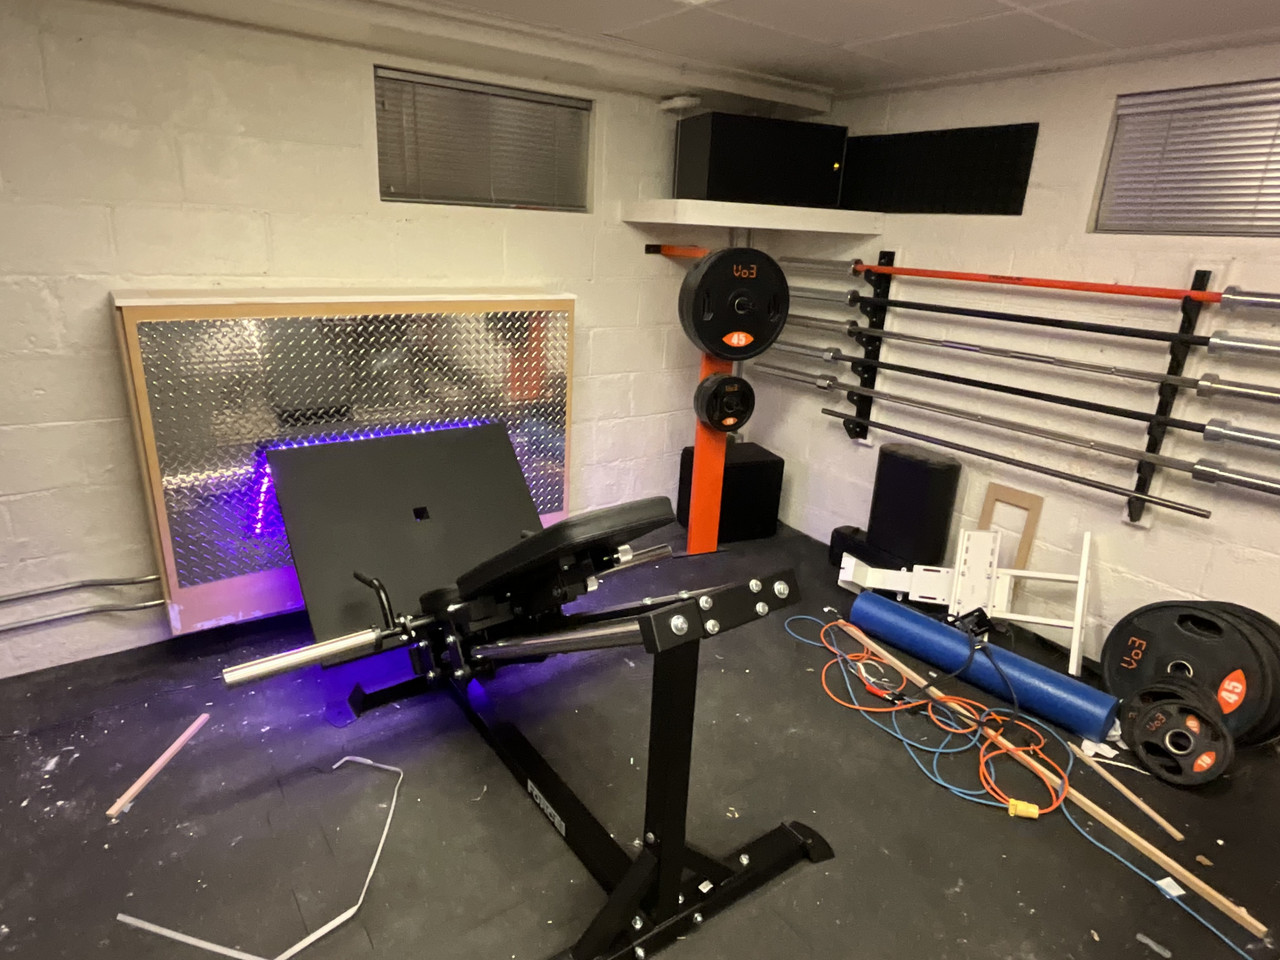
I just wanted regular analog led rgb strips but they’re dam near getting phased out from what I can see , so this boomer’s gotta keep up and learn this addressable setup . I think it’s going to be a great decision in the end .
I’m not happy with this outcome and thought it would look cooler so I have a much better idea . I’m going to cut strips of lexan and install it around the bottom perimeter of the foot plate so it has that same edge lighting effect the stereo does .
I’ll have remove this rgb light strip I installed here and proceed with my lexan install . But this time the leds will be mounted vertically inside the lexan providing some cool edge lighting effect
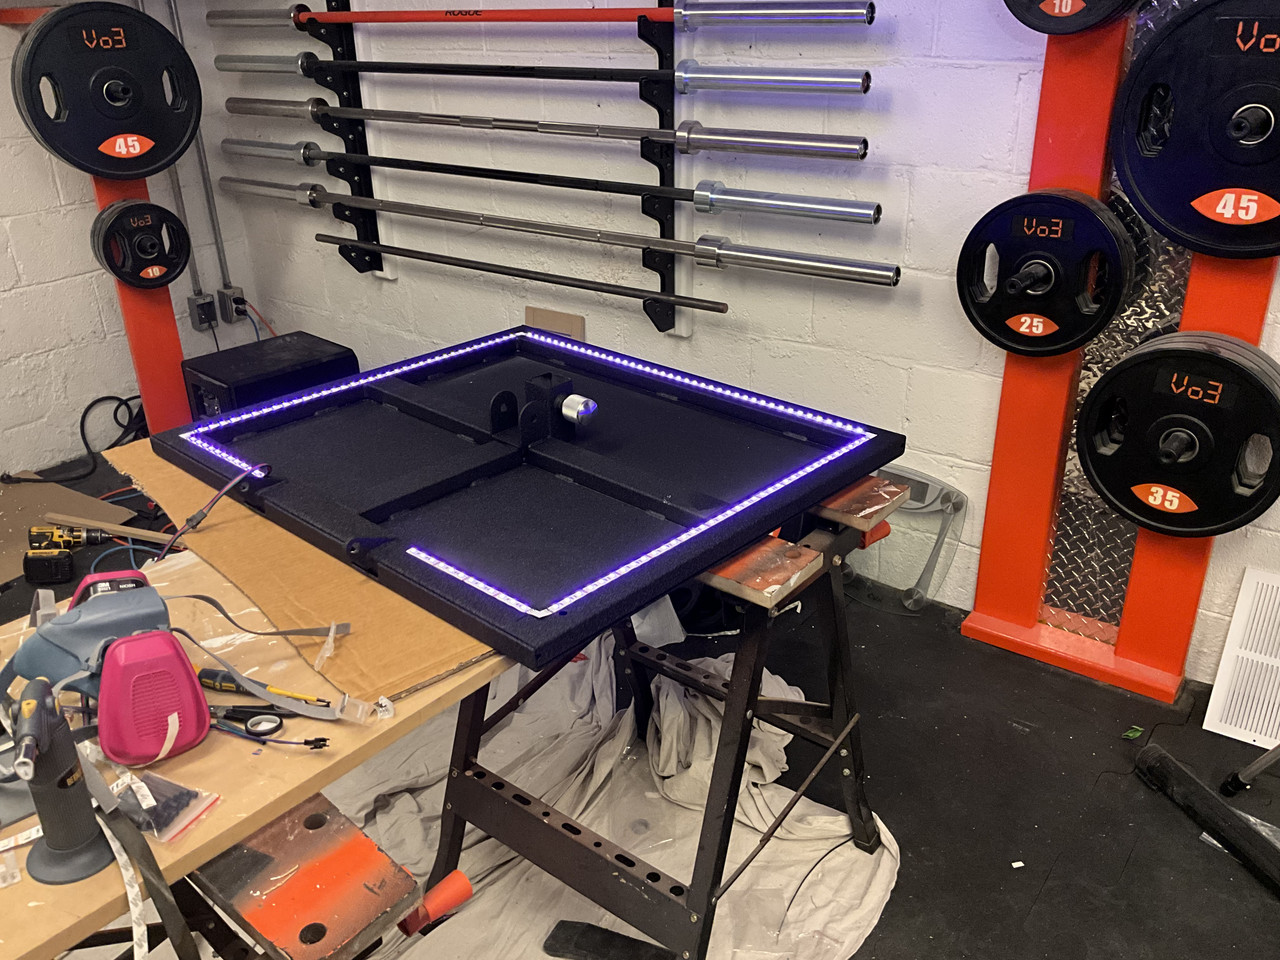
Kinda disappoint . Not much of an effect
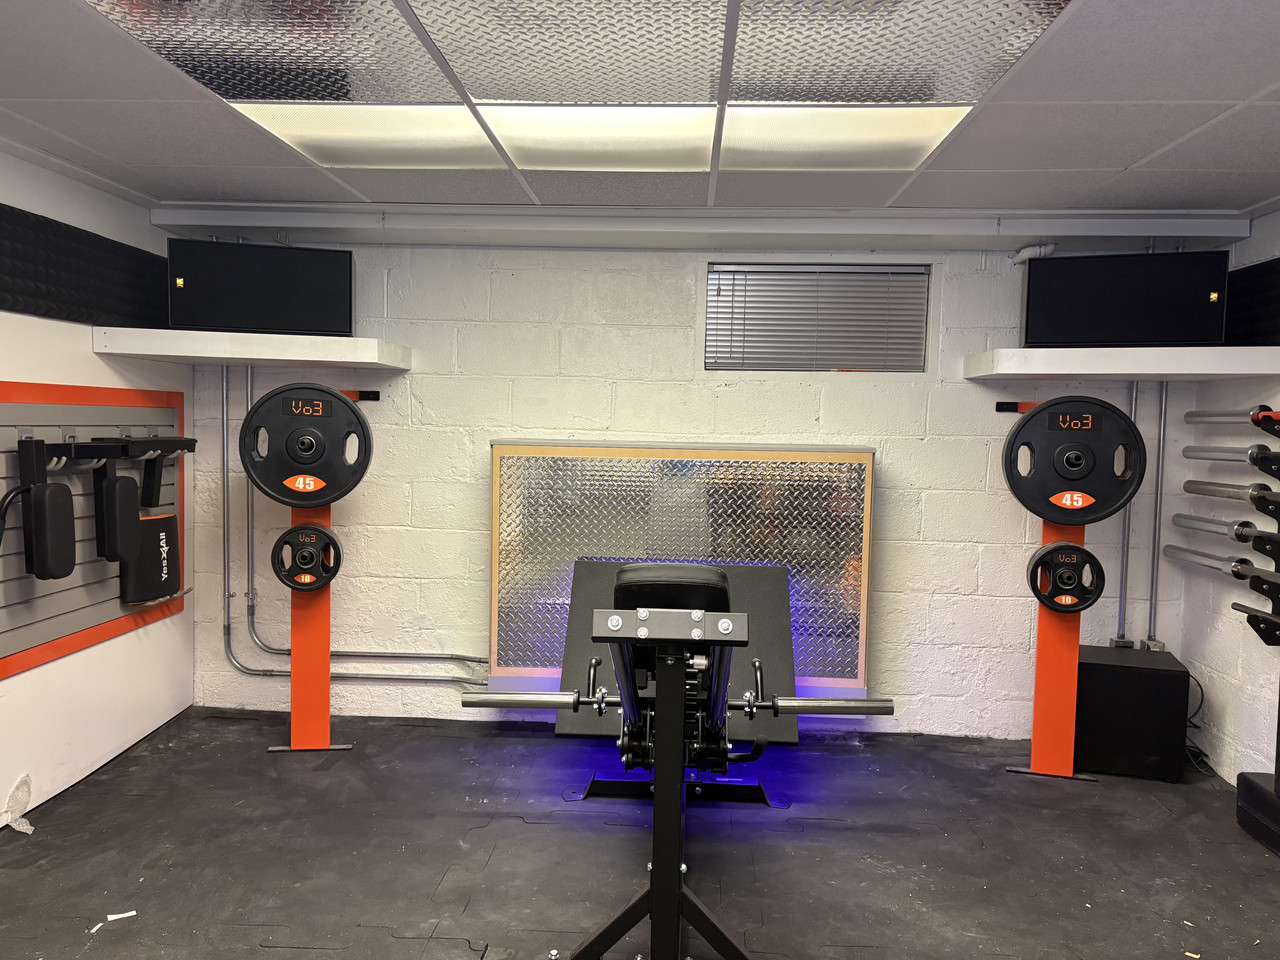
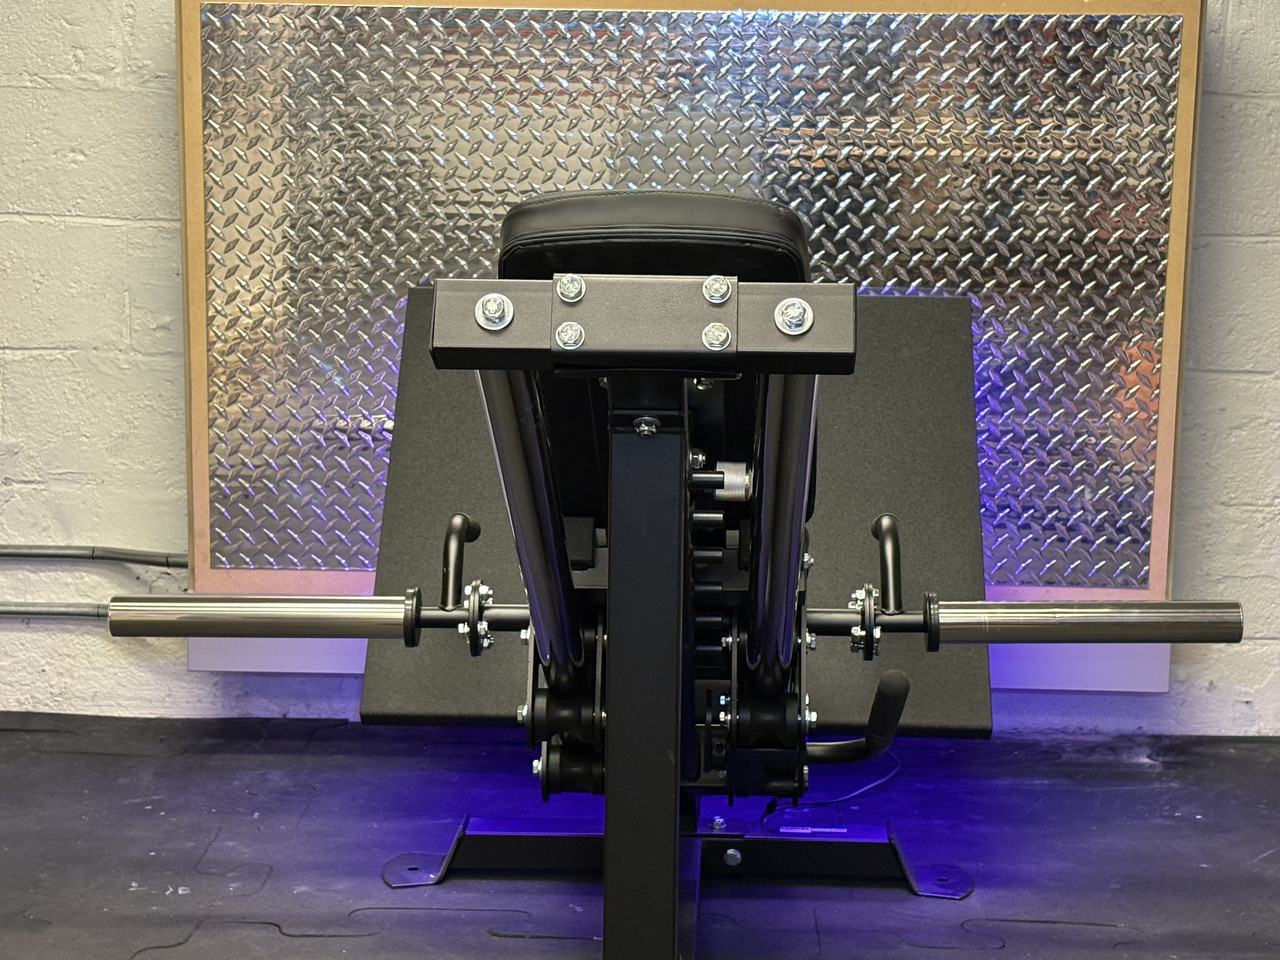
Looks a little cooler profile wise
Back with my Fam
01-14-2026, 02:11 AM
-
#30
- MajorTendonitis
- Join Date: Jan 2016
- Location: East Kootenays BC
- Age: 65
- Height: 5'8"
- Weight: 241 lbs
- Posts: 41,983
- Subscribers: 8
- Rep Power: 715365
-
-
Thought I’d jump to the Wall , my biggest nemesis . I’ve never rebuilt and then taken something apart so many times in my life lol , but I believe I’m getting close to the final time .
This is kind of the entertainment hub of the gym , and it seems as though I always have a new idea .
I couldn’t afford to purchase a separate pre pro and amplifier, so I compromised and went with a Denon X1800X . The nice thing about this receiver is that it has a right and left channel front pre out , this way if I ever had the resources later I could add an external amplifier. Srs I’m not a fan of internal amplifiers , as they generate internal heat and imo don’t have the same specs as a dedicated amp .
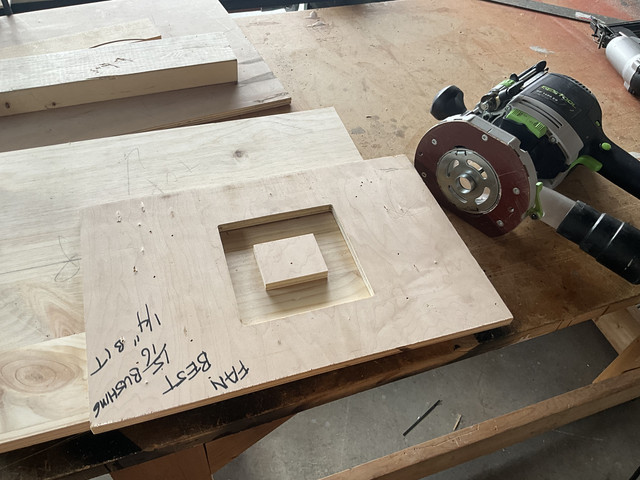
It took me some time but I eventually made a template that fits 120mm fans perfectly. No need to even glue them in as they stay put press fit .
It’s pretty tight in there so I installed 4 fans . The ones on the sides are blowing in and the ones on top are blowing out

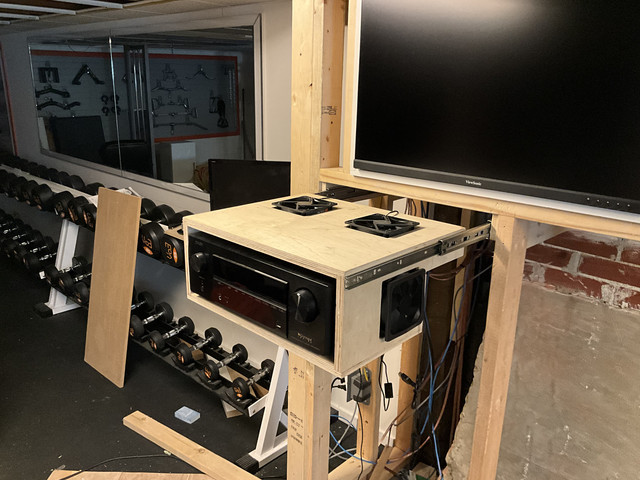
Because of the chimney being in my way I decided to make the rear of the receiver accessible by extending it out 20 inches . Originally I was just going to put a handle on the front and pull it out when needed , but then I thought why not put a linear actuator on it for coolness .
Hooked up and working on the harness here . To think this all got torn apart and redone again
This is kind of the entertainment hub of the gym , and it seems as though I always have a new idea .
I couldn’t afford to purchase a separate pre pro and amplifier, so I compromised and went with a Denon X1800X . The nice thing about this receiver is that it has a right and left channel front pre out , this way if I ever had the resources later I could add an external amplifier. Srs I’m not a fan of internal amplifiers , as they generate internal heat and imo don’t have the same specs as a dedicated amp .
It took me some time but I eventually made a template that fits 120mm fans perfectly. No need to even glue them in as they stay put press fit .
It’s pretty tight in there so I installed 4 fans . The ones on the sides are blowing in and the ones on top are blowing out
Because of the chimney being in my way I decided to make the rear of the receiver accessible by extending it out 20 inches . Originally I was just going to put a handle on the front and pull it out when needed , but then I thought why not put a linear actuator on it for coolness .
Hooked up and working on the harness here . To think this all got torn apart and redone again
Back with my Fam
Bookmarks
-

- Digg
-

- del.icio.us
-

- StumbleUpon
-

-

Posting Permissions
- You may not post new threads
- You may not post replies
- You may not post attachments
- You may not edit your posts