
 03-16-2026, 08:45 PM
-
#1

- MajorTendonitis
- Join Date: Jan 2016
- Location: East Kootenays BC
- Age: 65
- Height: 5'8"
- Weight: 241 lbs
- Posts: 41,950
- Subscribers: 8
- Rep Power: 714162
-
-

Living room LED lit corner shelf project
Well seeing as I have access to the living room wall now , I figured I’d make more work for myself and upgrade my shelf and add a second one above it .
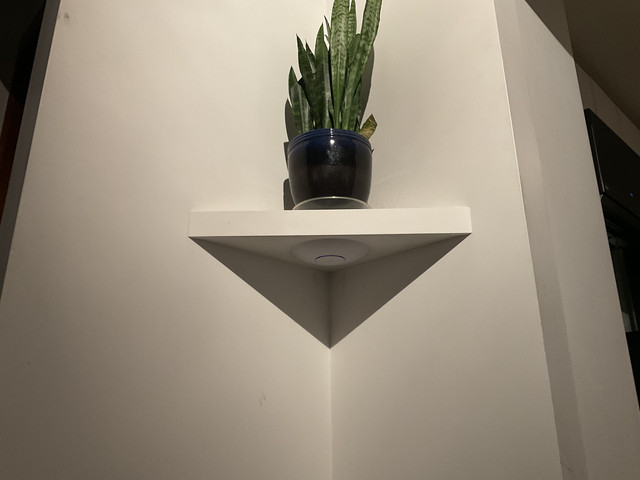
In the past I had my snake plant on the shelf , and although they don’t require a lot of sunlight , they would die in about 5 years . Srs it may not have helped having my Access Point located directly below it . Watched a video on plants and wifi and in close proximity to each other and they ceased to grow .
Below is the shelf I just removed
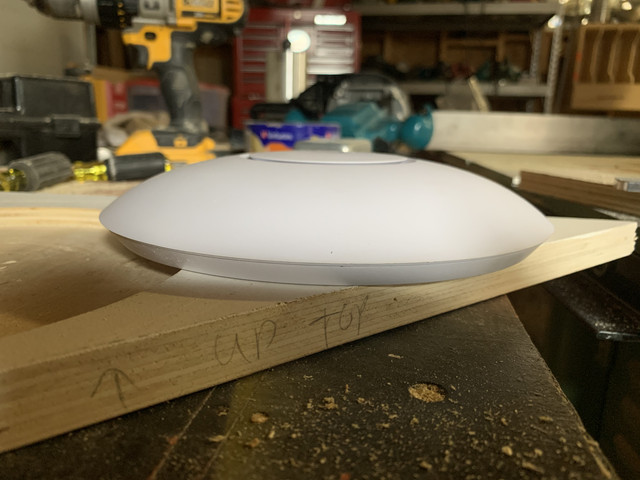
It was a bit tedious , but I didn’t want the AP just stuck on the bottom , so I used a router with a circle jig to countersink it for more professional look .

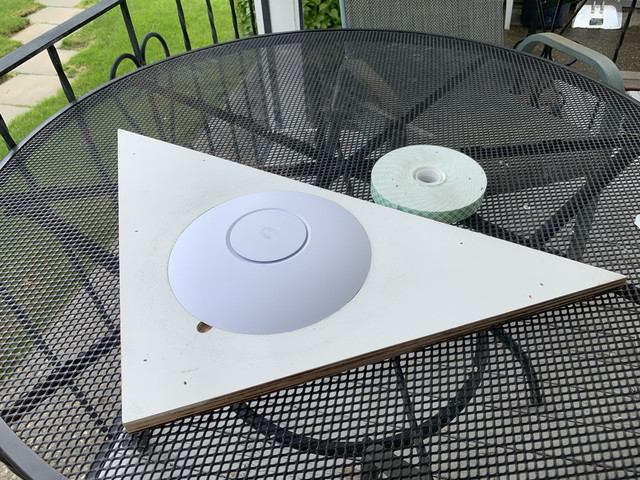
Btw the new shelf I’m building is larger than the old one it’s replacing below
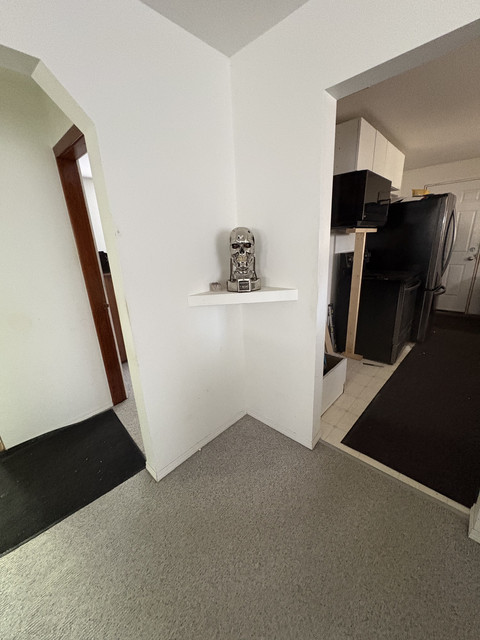
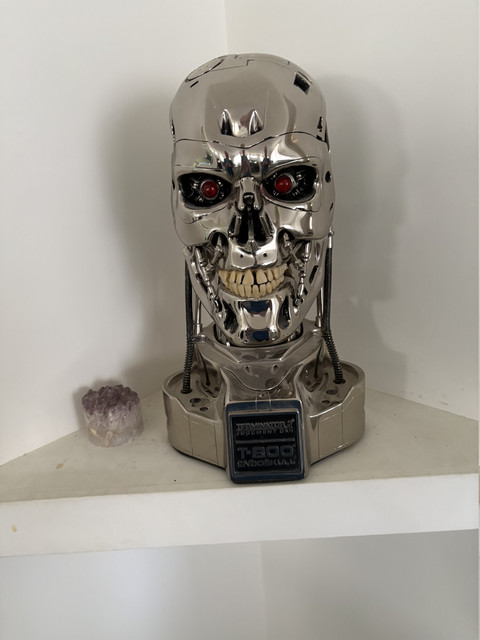
So now I’ve torn it apart and want to put my Terminator head on the shelf instead . But my buddy thought it looked kind of mundane , then it came to me , install led lighting .
In the past I had my snake plant on the shelf , and although they don’t require a lot of sunlight , they would die in about 5 years . Srs it may not have helped having my Access Point located directly below it . Watched a video on plants and wifi and in close proximity to each other and they ceased to grow .
Below is the shelf I just removed
It was a bit tedious , but I didn’t want the AP just stuck on the bottom , so I used a router with a circle jig to countersink it for more professional look .
Btw the new shelf I’m building is larger than the old one it’s replacing below
So now I’ve torn it apart and want to put my Terminator head on the shelf instead . But my buddy thought it looked kind of mundane , then it came to me , install led lighting .
Back with my Fam
03-16-2026, 08:47 PM
-
#2
- MajorTendonitis
- Join Date: Jan 2016
- Location: East Kootenays BC
- Age: 65
- Height: 5'8"
- Weight: 241 lbs
- Posts: 41,950
- Subscribers: 8
- Rep Power: 714162
-
-
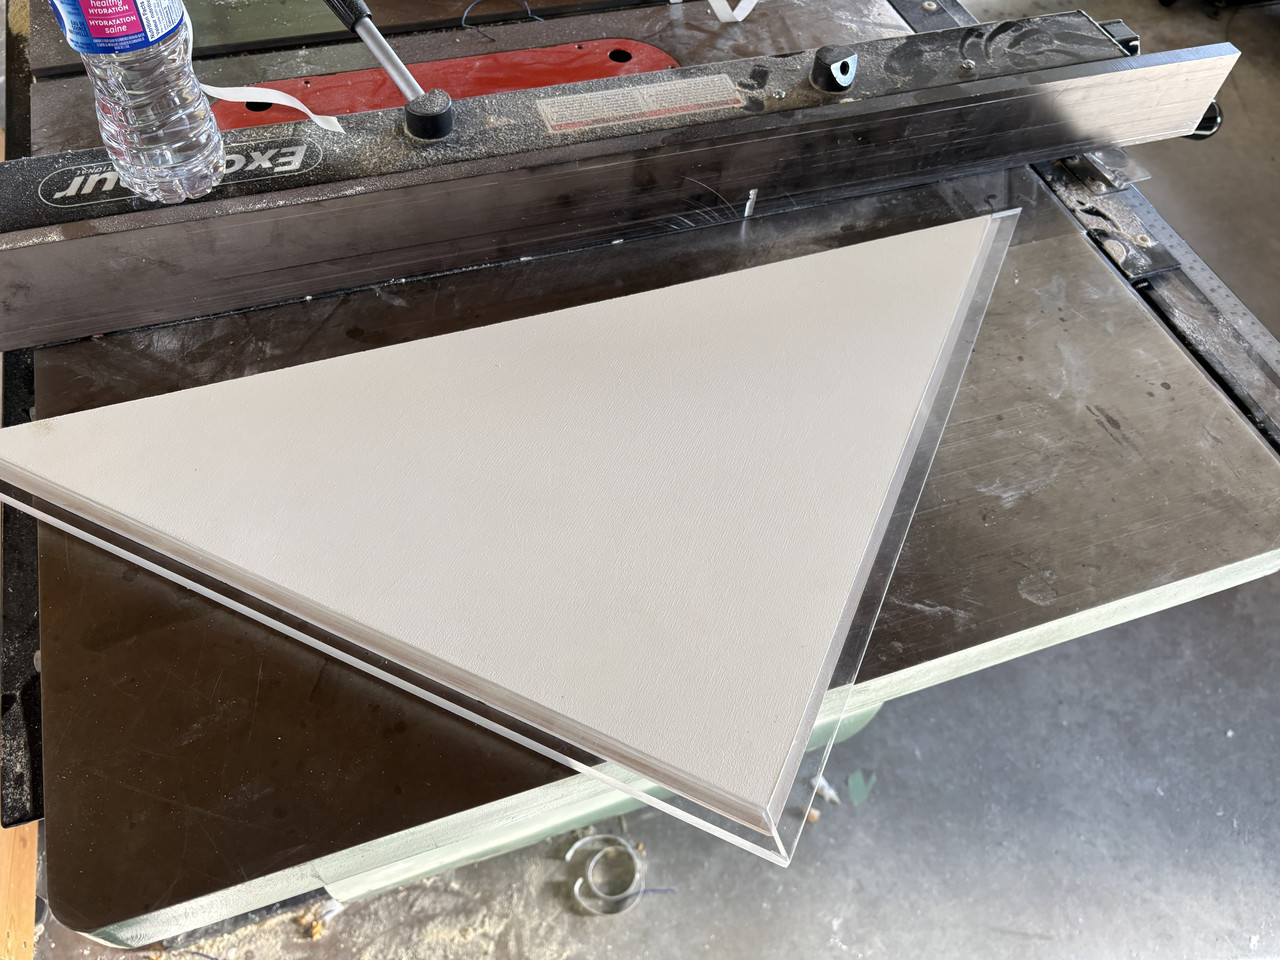
So the shelf in the first post is removed , and I just cut some plexi glass to go in the back

I have no idea how I fked up , but the top is supposed to be a little bit proud of that edge . I was hoping to glue the plexiglass to the wood top tonight , but now I have to cut another top before I can proceed .
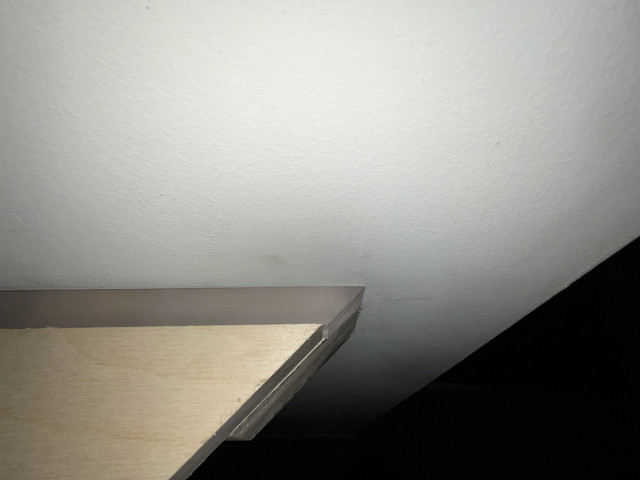

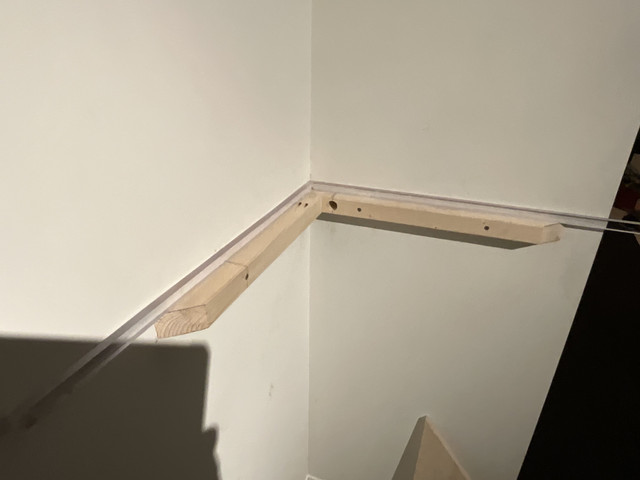
So I’ll remove the wood supports attached to the wall and use a dado blade on my table saw to recess slots underneath the plexiglass that will provide room for the led strips
I have no idea how I fked up , but the top is supposed to be a little bit proud of that edge . I was hoping to glue the plexiglass to the wood top tonight , but now I have to cut another top before I can proceed .
So I’ll remove the wood supports attached to the wall and use a dado blade on my table saw to recess slots underneath the plexiglass that will provide room for the led strips
Back with my Fam
03-16-2026, 08:52 PM
-
#3
- RustledJimmies
- Registered Pupper
-

- RustledJimmies
- Registered Pupper
- Join Date: Jan, 2026
- Posts: 2,153
- Subscribers: 1
- Rep Power: 76390
-
-

Post deleted by user
03-16-2026, 08:59 PM
-
#4
- MajorTendonitis
- Join Date: Jan 2016
- Location: East Kootenays BC
- Age: 65
- Height: 5'8"
- Weight: 241 lbs
- Posts: 41,950
- Subscribers: 8
- Rep Power: 714162
-
-
Originally Posted By RustledJimmies⏩
Srs you know what would be cool . At some point I was going to pull the electronics out at the bottom of the bust and hopefully I have access to the wires to the eyes. As it is now you push a button and the eyes light up and it plays music . Not really liking that tbh .
Now listen to me very carefully.

Mirin' hard Majorbrah.
Mirin' hard Majorbrah.
Then I’ll hook up an ardruino and have the eyes go on and off randomly. Would be cool if they ramped up and down , not just switch fully off and on .
May use a sensor also so that when you get near the eyes light up .
It would be even better if the head was on a platter with a servo to turn the head so it’s tracking you , but that’s a little too time consuming atm ,plus I’d have to do some more studying .
Back with my Fam
03-16-2026, 09:05 PM
-
#5
- RustledJimmies
- Registered Pupper
-
- RustledJimmies
- Registered Pupper
- Join Date: Jan, 2026
- Posts: 2,153
- Subscribers: 1
- Rep Power: 76390
-
-
Post deleted by user
03-16-2026, 09:11 PM
-
#6
- MajorTendonitis
- Join Date: Jan 2016
- Location: East Kootenays BC
- Age: 65
- Height: 5'8"
- Weight: 241 lbs
- Posts: 41,950
- Subscribers: 8
- Rep Power: 714162
-
-
Originally Posted By RustledJimmies⏩
Thanks that’s exactly what I was thinking , probably set the LEDs to red ideally . It may not be very impressive when done , but whatever the outcome is that’s what I’m going with . I think best case scenario would be LEDs shooting at the bust so that you get some cool reflections on the wall .
That chit would look awesome on a night as red ambience lighting brah. Anything is possible, will be watching with interest.
I guess if it sucks I can always tear apart someday .
I will be using a blue tooth led controller from the gym , as the Gyms LEDs are being upgraded to digital led strips controlled by an ESP32 .
So I’ll run low voltage (12v dc) from a power outlet in the gym , and mount the controller inside this shelf . I think it’s pretty cool controlling the strips from my iPad instead of having yet another remote . Btw I’m hoping to use magnets to hold the top section of the shelf in place .
I was going to install the Access Point higher up in the second shelf this time , but I did speed tests and it doesn’t seem to change whatsoever even when it’s laying on the floor , so I’ll just reinstall it in the bottom shelf again so it’s not very visible.
I wish I had access to a RF meter to monitor its RF output to be certain , but they’re hard to come buy . I could probably beg the head end guy where I used to work to borrow their spectrum analyzer , but if it was stolen or I broke it the replacement cost is 50K lol
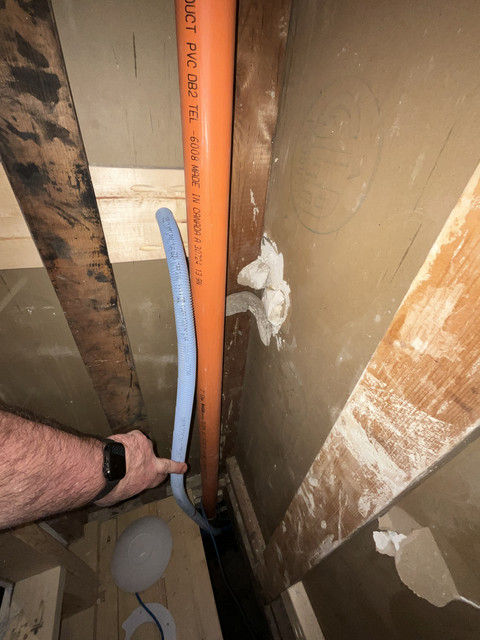
It’s nice having access to the inside wall now. I installed 2/6’s so that I had something to secure to . And now I can run some ENT conduit for the Cat6
Back with my Fam
03-17-2026, 06:23 AM
-
#7
- MajorTendonitis
- Join Date: Jan 2016
- Location: East Kootenays BC
- Age: 65
- Height: 5'8"
- Weight: 241 lbs
- Posts: 41,950
- Subscribers: 8
- Rep Power: 714162
-
-
Ideally this would be perfect to put on the shelf above the T-800 bust (not in the box) . Wish I was into this stuff when Side Show first released them , as they’re expensive as hell to get now.
I may just have to source a replica , and to think I had the unpainted kit and threw it away

Ok this guy from Hungary in the link below makes kits with metal . Very tempting but I wish it was chrome and not the weathered look , as they’re expensive bust is chrome and not weathered
https://www.etsy.com/ca/listing/1842441731/terminator-t-800-endoskeleton-arm-diy?ls=r&ref=related-3&sts=1&content_source=b77ac05e8a38a3b4a93909729822db60%253ALT2e614cd39218df76bc8dc4cf44728d39cbf37802&logging_key=b77ac05e8a38a3b4a93909729822db60%3ALT2e614cd39218df76bc8dc4cf44728d39cbf37802
I may just have to source a replica , and to think I had the unpainted kit and threw it away
Ok this guy from Hungary in the link below makes kits with metal . Very tempting but I wish it was chrome and not the weathered look , as they’re expensive bust is chrome and not weathered
https://www.etsy.com/ca/listing/1842441731/terminator-t-800-endoskeleton-arm-diy?ls=r&ref=related-3&sts=1&content_source=b77ac05e8a38a3b4a93909729822db60%253ALT2e614cd39218df76bc8dc4cf44728d39cbf37802&logging_key=b77ac05e8a38a3b4a93909729822db60%3ALT2e614cd39218df76bc8dc4cf44728d39cbf37802
Back with my Fam
03-17-2026, 07:05 AM
-
#8
 03-17-2026, 03:26 PM
-
#9
- MajorTendonitis
- Join Date: Jan 2016
- Location: East Kootenays BC
- Age: 65
- Height: 5'8"
- Weight: 241 lbs
- Posts: 41,950
- Subscribers: 8
- Rep Power: 714162
-
-
Ok was looking at this again and maybe that fk up was a good thing as I have a new idea . I’m going to use double side tape to hold the plexi to the wall instead of gluing it to the shelf .
This way the diffusers stay in place when you pull the top shelf off . The reason the shelf needs to come apart is there will be electronics stored inside . The only problem I can see is that the wall is bowed a tiny bit . Maybe I’ll have to use that thicker tape ,dunno .
I also have to counter sink some magnets to keep the top of the shelf from moving
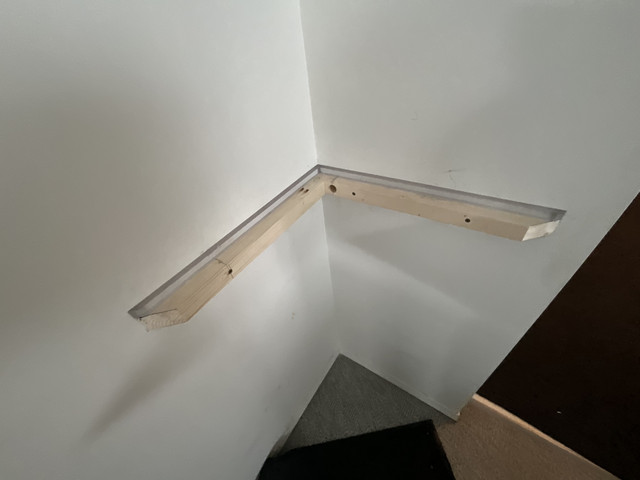
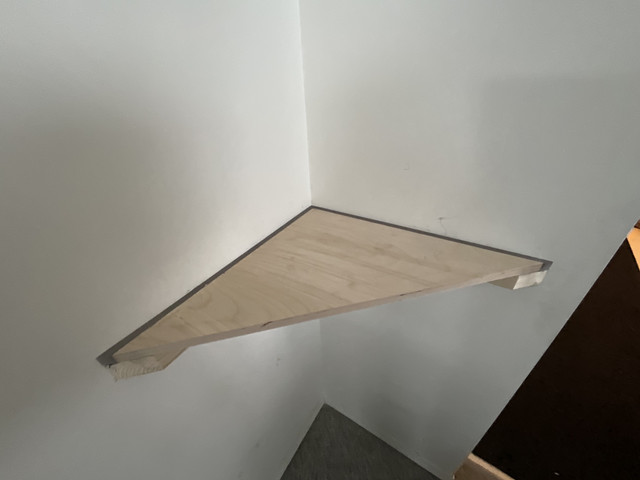
This way the diffusers stay in place when you pull the top shelf off . The reason the shelf needs to come apart is there will be electronics stored inside . The only problem I can see is that the wall is bowed a tiny bit . Maybe I’ll have to use that thicker tape ,dunno .
I also have to counter sink some magnets to keep the top of the shelf from moving
Back with my Fam
03-17-2026, 03:29 PM
-
#10
 03-17-2026, 03:35 PM
-
#11
- MajorTendonitis
- Join Date: Jan 2016
- Location: East Kootenays BC
- Age: 65
- Height: 5'8"
- Weight: 241 lbs
- Posts: 41,950
- Subscribers: 8
- Rep Power: 714162
-
-
Originally Posted By allfather⏩
Thx .
Looks very nice. Following.
I’m actually kind of stoked to see the end results. I may be disappoint but whatever . I use 240 grit sandpaper on an orbital sander on the diffusers , and I’m almost thinking ideally they should be clear . I can still sand them and get them extremely close to clear , but not sure if I should or not .
Another question is how long should the led strip be underneath. I don’t think the entire length is going to look right and may be overwhelming, so I’m debating to just do half like in this pic below
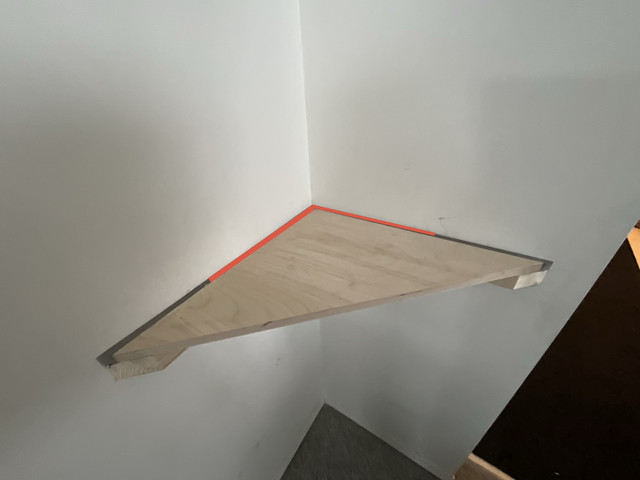
Back with my Fam
03-17-2026, 03:48 PM
-
#12
- Jaster
- aka MikeOxlong
-

- Jaster
- aka MikeOxlong
- Join Date: Apr 2007
- Location: Port Angus
- Posts: 510
- Rep Power: 11066
-
-
In on MajorTendonitis DIY thread, always enjoy these.
a) horizontal or vertical orientation (makes sense looking at the RF patterns)
b) Performance above and below the AP once you've got to a sufficient distance away that the downward-facing donut pattern comes into effect
c) being so close with such a high power level that the client side radio gets overloaded, but that's unusual.
Used to do all my chit both corporate and home with unifi gear. Still have it at home, but did an install for someone else recently using the TP-Link Omada system and I gotta say I really liked it. No cloud BS required, controller runs nicely on a cheap purpose-built box instead of an expensive cloud key thing (also used RPis and dedicated linux machines in the past but that's above the average home user), and best of all the UI on the controller is like the Unifi UI used to be ten years ago, i.e. much better.
Edit: one other interesting thing I remember is that setting the AP radio power to 'Auto' doesn't actually do what you'd think it does, instead it just runs at maximum power all the time, which may or may not have implications if you have overlapping APs and you want smooth migration between them.
Originally Posted By MajorTendonitis⏩
Unifi have pretty good documentation for their APs with data for the radios, antenna RF patterns etc. In my experience though the only tangible differences are:
I was going to install the Access Point higher up in the second shelf this time , but I did speed tests and it doesn’t seem to change whatsoever even when it’s laying on the floor , so I’ll just reinstall it in the bottom shelf again so it’s not very visible.
I wish I had access to a RF meter to monitor its RF output to be certain , but they’re hard to come buy . I could probably beg the head end guy where I used to work to borrow their spectrum analyzer , but if it was stolen or I broke it the replacement cost is 50K lol
I wish I had access to a RF meter to monitor its RF output to be certain , but they’re hard to come buy . I could probably beg the head end guy where I used to work to borrow their spectrum analyzer , but if it was stolen or I broke it the replacement cost is 50K lol
a) horizontal or vertical orientation (makes sense looking at the RF patterns)
b) Performance above and below the AP once you've got to a sufficient distance away that the downward-facing donut pattern comes into effect
c) being so close with such a high power level that the client side radio gets overloaded, but that's unusual.
Used to do all my chit both corporate and home with unifi gear. Still have it at home, but did an install for someone else recently using the TP-Link Omada system and I gotta say I really liked it. No cloud BS required, controller runs nicely on a cheap purpose-built box instead of an expensive cloud key thing (also used RPis and dedicated linux machines in the past but that's above the average home user), and best of all the UI on the controller is like the Unifi UI used to be ten years ago, i.e. much better.
Edit: one other interesting thing I remember is that setting the AP radio power to 'Auto' doesn't actually do what you'd think it does, instead it just runs at maximum power all the time, which may or may not have implications if you have overlapping APs and you want smooth migration between them.
♞♞♞ Misc Horse Head Crew ♞♞♞
- Strength Industrialist Crew
- Cold Turkey on Jack3D Crew
- Not in the AM Crew
- Ancient Dolphin From The 70s Crew
- List My Crews In My Sig Crew
03-17-2026, 03:55 PM
-
#13
- MajorTendonitis
- Join Date: Jan 2016
- Location: East Kootenays BC
- Age: 65
- Height: 5'8"
- Weight: 241 lbs
- Posts: 41,950
- Subscribers: 8
- Rep Power: 714162
-
-
Originally Posted By Jaster⏩
Thx 4 the reply . Srs I love their gear and the reason I went with them is no monthly subscription. Touch wood but so far the system has operated flawlessly with the exception of one View Port.
In on MajorTendonitis DIY thread, always enjoy these.
Unifi have pretty good documentation for their APs with data for the radios, antenna RF patterns etc. In my experience though the only tangible differences are:
a) horizontal or vertical orientation (makes sense looking at the RF patterns)
b) Performance above and below the AP once you've got to a sufficient distance away that the downward-facing donut pattern comes into effect
c) being so close with such a high power level that the client side radio gets overloaded, but that's unusual.
Used to do all my chit both corporate and home with unifi gear. Still have it at home, but did an install for someone else recently using the TP-Link Omada system and I gotta say I really liked it. No cloud BS required, controller runs nicely on a cheap purpose-built box instead of an expensive cloud key thing (also used RPis and dedicated linux machines in the past but that's above the average home user), and best of all the UI on the controller is like the Unifi UI used to be ten years ago, i.e. much better.
Unifi have pretty good documentation for their APs with data for the radios, antenna RF patterns etc. In my experience though the only tangible differences are:
a) horizontal or vertical orientation (makes sense looking at the RF patterns)
b) Performance above and below the AP once you've got to a sufficient distance away that the downward-facing donut pattern comes into effect
c) being so close with such a high power level that the client side radio gets overloaded, but that's unusual.
Used to do all my chit both corporate and home with unifi gear. Still have it at home, but did an install for someone else recently using the TP-Link Omada system and I gotta say I really liked it. No cloud BS required, controller runs nicely on a cheap purpose-built box instead of an expensive cloud key thing (also used RPis and dedicated linux machines in the past but that's above the average home user), and best of all the UI on the controller is like the Unifi UI used to be ten years ago, i.e. much better.
I did have one View Port that gave me issues . I never even sent it back to Toronto and just ordered another .
Was a lot of fun installing everything into a rack . I have since moved the rack because I want to see all the pretty lights when I get down the stairs lol .
Adding a bunch of additional Cat6 in the very near future . The living room stereo Cat6 feeds and the ones going to my computer room is too short now ,so lots of work
Here’s a pic b4 I moved it

Back with my Fam
03-17-2026, 04:27 PM
-
#14
- Jaster
- aka MikeOxlong
-
- Jaster
- aka MikeOxlong
- Join Date: Apr 2007
- Location: Port Angus
- Posts: 510
- Rep Power: 11066
-
-
Nice, one of the few instances where it's both correct and appropriate to say that I am mirin' another man's rack
♞♞♞ Misc Horse Head Crew ♞♞♞
- Strength Industrialist Crew
- Cold Turkey on Jack3D Crew
- Not in the AM Crew
- Ancient Dolphin From The 70s Crew
- List My Crews In My Sig Crew
03-22-2026, 08:28 PM
-
#15
- MajorTendonitis
- Join Date: Jan 2016
- Location: East Kootenays BC
- Age: 65
- Height: 5'8"
- Weight: 241 lbs
- Posts: 41,950
- Subscribers: 8
- Rep Power: 714162
-
-
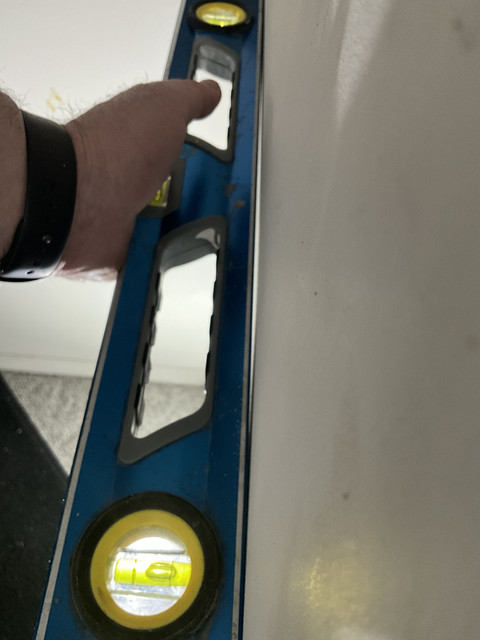
So I looked at the plexiglass and thought I better not diffuse it so I’ll go with clear . I abandoned the first idea and cut a dado groove into the shelf and will attach the plexi to the shelf with double sided tape after it’s painted.
By creating a step it gives me a place to install the leds underneath. I think I’m going to dado the wood and drop the led strips further down seeing as the plexi won’t be sanded and I would prefer not to physically see the led strip
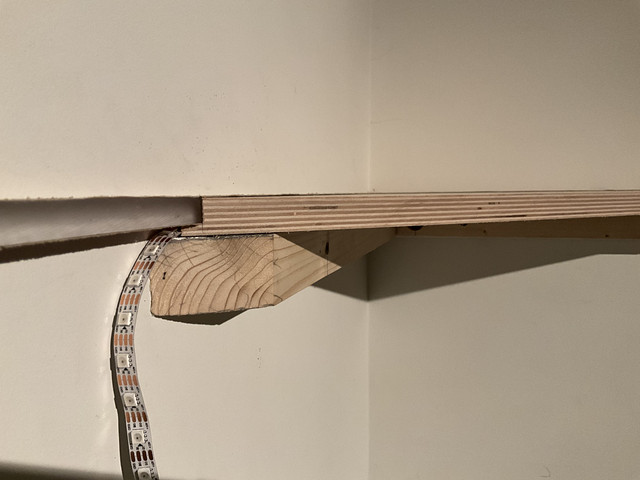
The protective paper is still on the plexi till I do the final cutting.

This is driving me crazy . I can live with the walls not being a perfect right angle as I can compensate for that , but too boot they are warped and the plexiglass will not sit flush against the wall . So I guess I’ll start mudding tomorrow and prep the wall before installing the shelves
By creating a step it gives me a place to install the leds underneath. I think I’m going to dado the wood and drop the led strips further down seeing as the plexi won’t be sanded and I would prefer not to physically see the led strip
The protective paper is still on the plexi till I do the final cutting.
This is driving me crazy . I can live with the walls not being a perfect right angle as I can compensate for that , but too boot they are warped and the plexiglass will not sit flush against the wall . So I guess I’ll start mudding tomorrow and prep the wall before installing the shelves
Back with my Fam
03-22-2026, 08:29 PM
-
#16
- explosiveMidget
- Always creepin never sleepin
-

- explosiveMidget
- Always creepin never sleepin
- Join Date: Mar 2014
- Location: IRELAND
- Age: 35
- Height: 5'6"
- Weight: 203 lbs
- Posts: 28,789
- Subscribers: 11
- Rep Power: 275850
-
-
Das it mane
03-22-2026, 08:58 PM
-
#17
 04-10-2026, 11:50 AM
-
#18
- MajorTendonitis
- Join Date: Jan 2016
- Location: East Kootenays BC
- Age: 65
- Height: 5'8"
- Weight: 241 lbs
- Posts: 41,950
- Subscribers: 8
- Rep Power: 714162
-
-
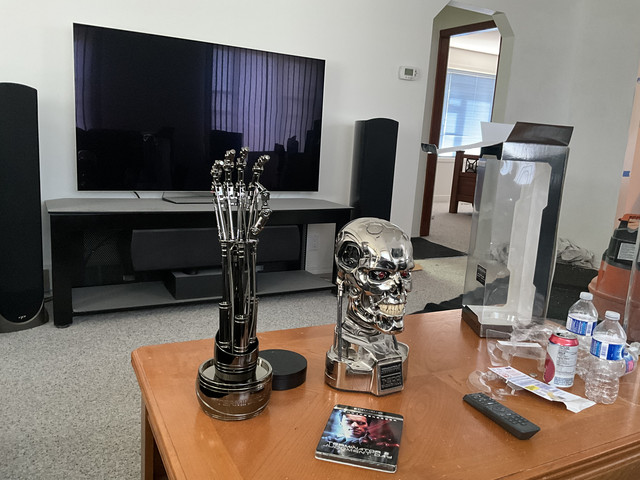
Good news , my Terminator arm showed up today , so now I have everything to proceed . I have gotten badly side tracked so won’t be on the shelf rebuild till next week when my hangover is gone .
More goods news , after putting a gallon and a half of drywall mud on the walls , I think they are straight enough to proceed . Plus my addressable LED controller showed up , so I have lots of work
That black thing to the lower right of the arm is that powered turn table to slowly spin the arm
More goods news , after putting a gallon and a half of drywall mud on the walls , I think they are straight enough to proceed . Plus my addressable LED controller showed up , so I have lots of work
That black thing to the lower right of the arm is that powered turn table to slowly spin the arm
Back with my Fam
05-11-2026, 09:20 PM
-
#19
- MajorTendonitis
- Join Date: Jan 2016
- Location: East Kootenays BC
- Age: 65
- Height: 5'8"
- Weight: 241 lbs
- Posts: 41,950
- Subscribers: 8
- Rep Power: 714162
-
-
My bad , I'm having second thoughts Misc . My theory now is that the terminator bust and arm is not really conducive to the living room .
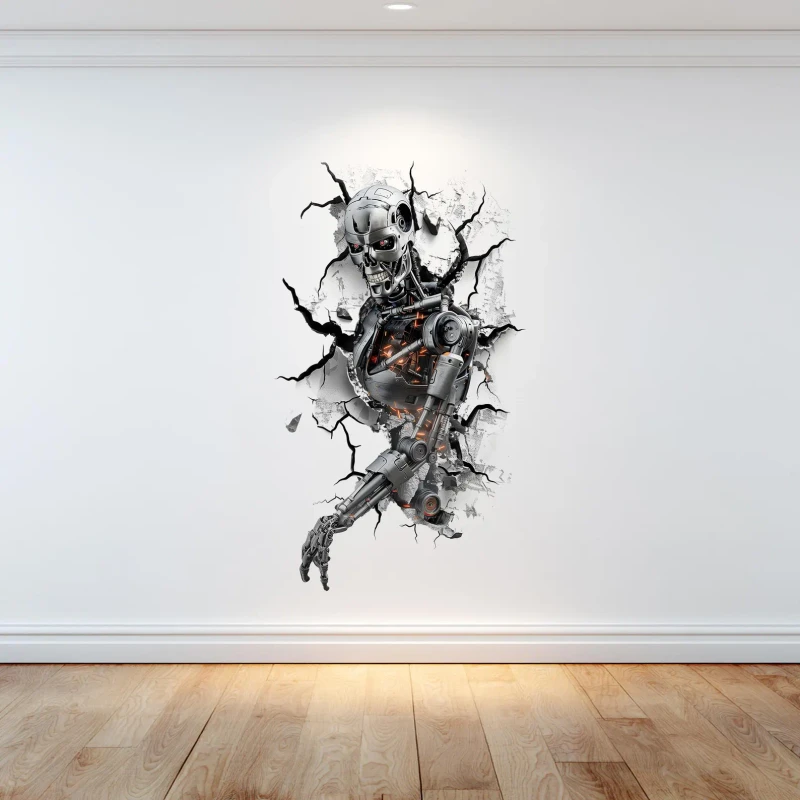
I was going to put that large terminator decal above the desk also , but now I’m thinking that seeing as this is a photo editing suite , that maybe I should be putting the gaming machine in the living room instead , as it goes more with the theme?
The gaming machine is in the unfinished spare bedroom atm , and the long game was to have that spare room dedicated to a gaming platform.
So what I’m getting at is I don’t think a living room is conducive to a gaming theme , so I think it’s back to the drawing board . I’m thinking of dedicating these shelves to my camera gear instead , raise the bottom shelf up a foot and put my camera on the turntable, and the lenses up top .
Then someday when I get my spare room drywalled , I’ll build more corner shelves for the arm and bust .
Anyways here’s a short video of beta testing . The shelves are only partially done while I assess the situation. Would look really cool once the back lighting was done
Here’s the decal I purchased to put above the computer. I’m thinking it may look tacky in a living room now?
Not a great pic but you get the idea . But that’s the photo editing station there now . If I put the decal on and dedicate the shelves to my gaming theme instead , I’ll put the gaming machine back
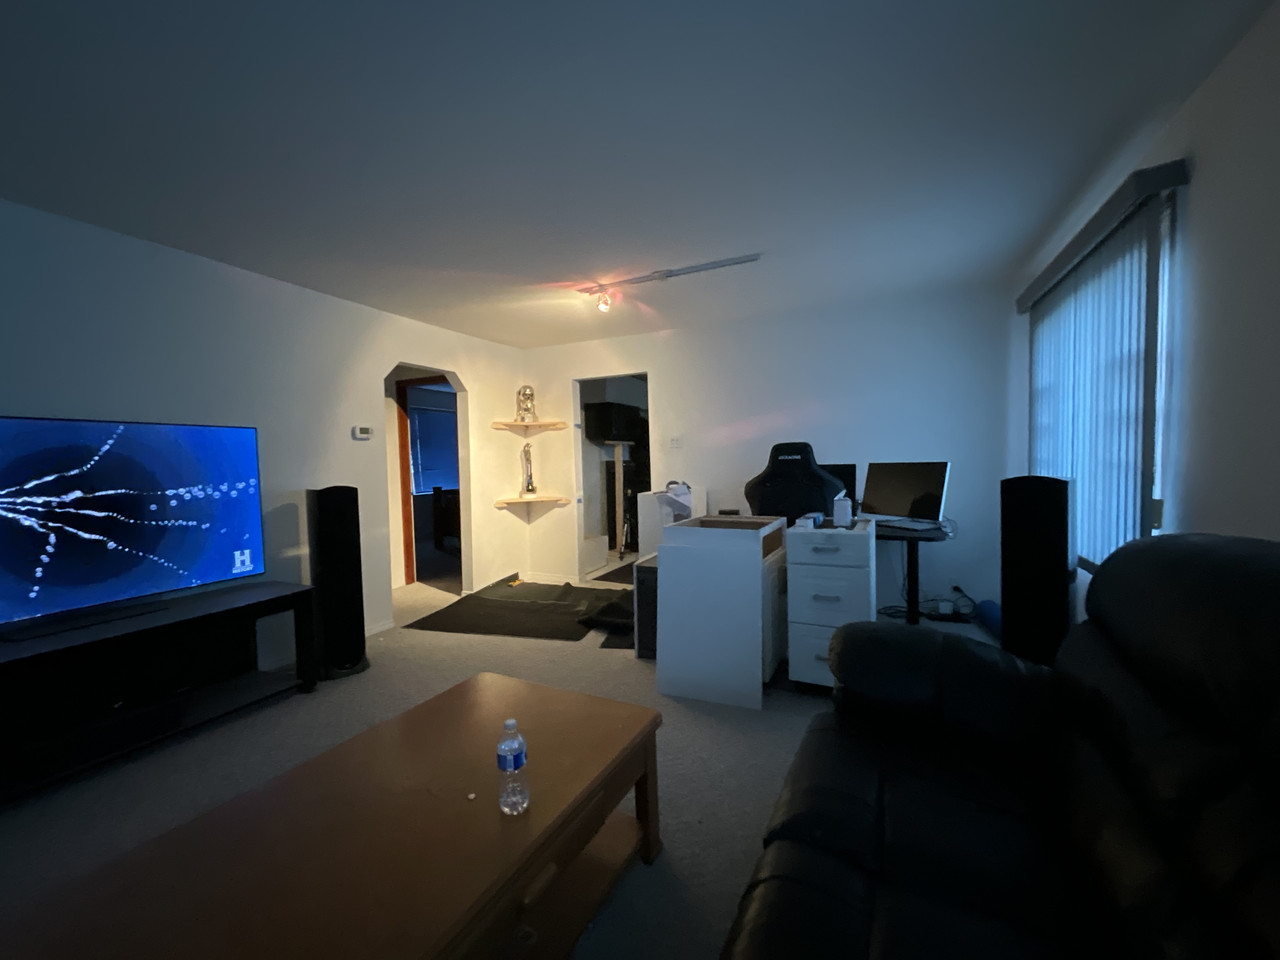
Here’s what it looked like when the gaming machine was there . Do you guys think a gaming machine should really be in a living room?
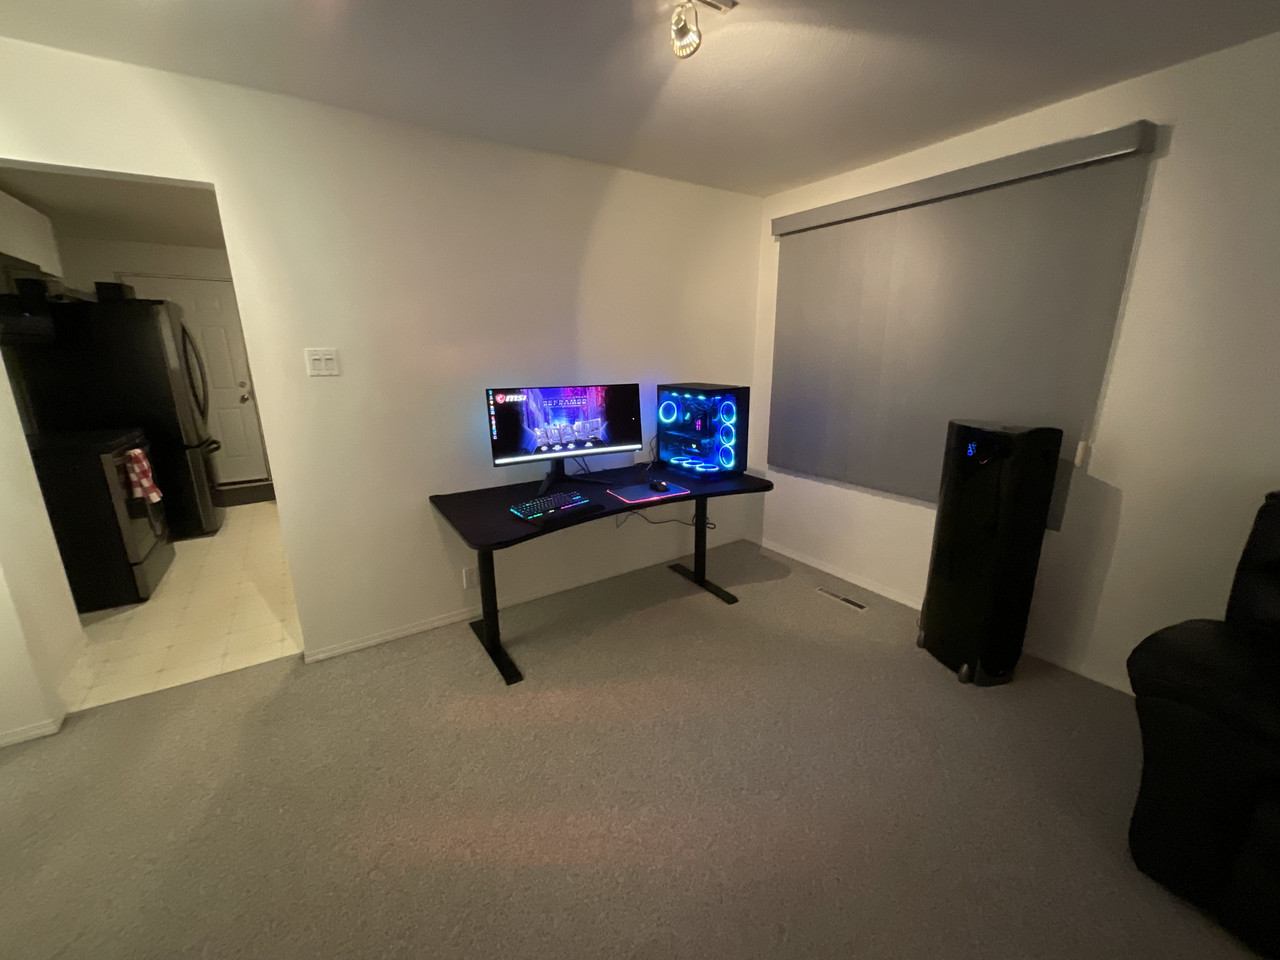
I was going to put that large terminator decal above the desk also , but now I’m thinking that seeing as this is a photo editing suite , that maybe I should be putting the gaming machine in the living room instead , as it goes more with the theme?
The gaming machine is in the unfinished spare bedroom atm , and the long game was to have that spare room dedicated to a gaming platform.
So what I’m getting at is I don’t think a living room is conducive to a gaming theme , so I think it’s back to the drawing board . I’m thinking of dedicating these shelves to my camera gear instead , raise the bottom shelf up a foot and put my camera on the turntable, and the lenses up top .
Then someday when I get my spare room drywalled , I’ll build more corner shelves for the arm and bust .
Anyways here’s a short video of beta testing . The shelves are only partially done while I assess the situation. Would look really cool once the back lighting was done
Here’s the decal I purchased to put above the computer. I’m thinking it may look tacky in a living room now?
Not a great pic but you get the idea . But that’s the photo editing station there now . If I put the decal on and dedicate the shelves to my gaming theme instead , I’ll put the gaming machine back
Here’s what it looked like when the gaming machine was there . Do you guys think a gaming machine should really be in a living room?
Back with my Fam
06-13-2026, 10:56 AM
-
#20
- MajorTendonitis
- Join Date: Jan 2016
- Location: East Kootenays BC
- Age: 65
- Height: 5'8"
- Weight: 241 lbs
- Posts: 41,950
- Subscribers: 8
- Rep Power: 714162
-
-
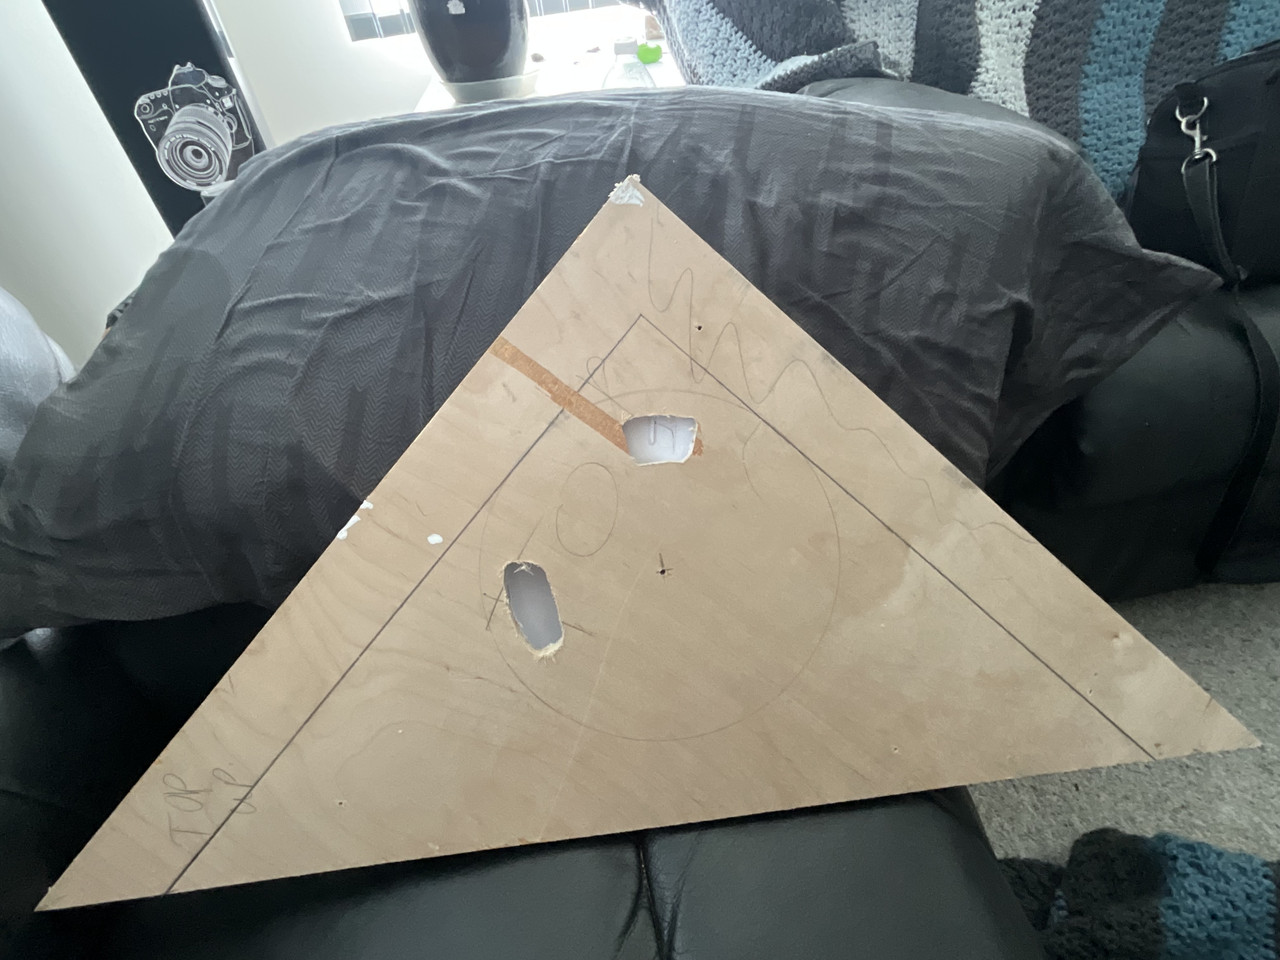
Ok I’m finally making some headway as I’ve been side tracked a lot lately . Used my circle jig on my Makita router to make the holes perimeter, then finished off with a conventional router . This is the bottom section of the top shelf , and besides led lighting I also located the Access Point for my internet there . I did the same b4 in the first pics posted , but because I’m doing two shelves I could raise the AP this time for better coverage .
I didn’t have to route that hole , but I think the AP looks much more refined when it’s countersunk a bit . It’s the little touches that matter
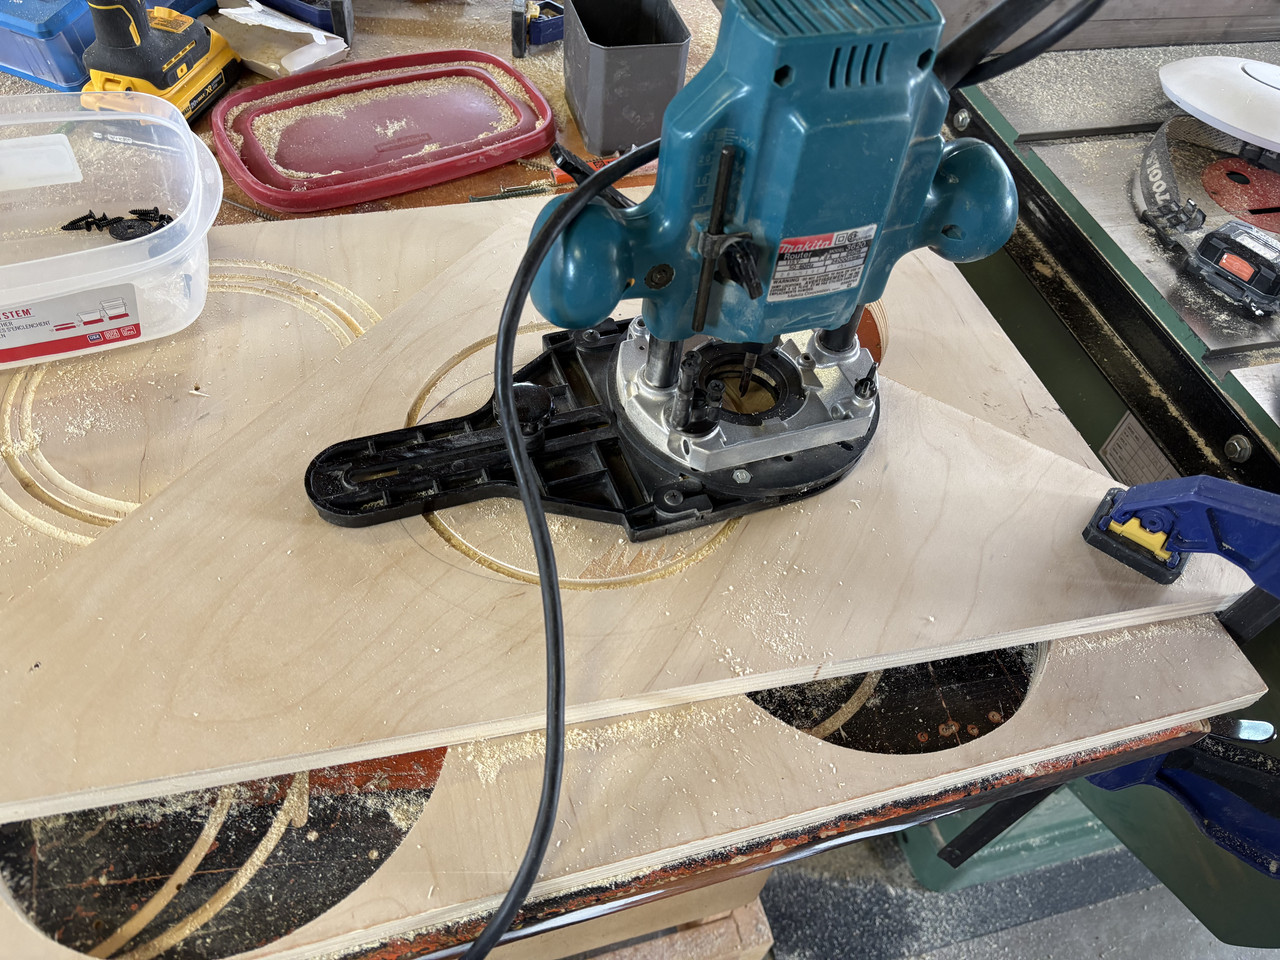
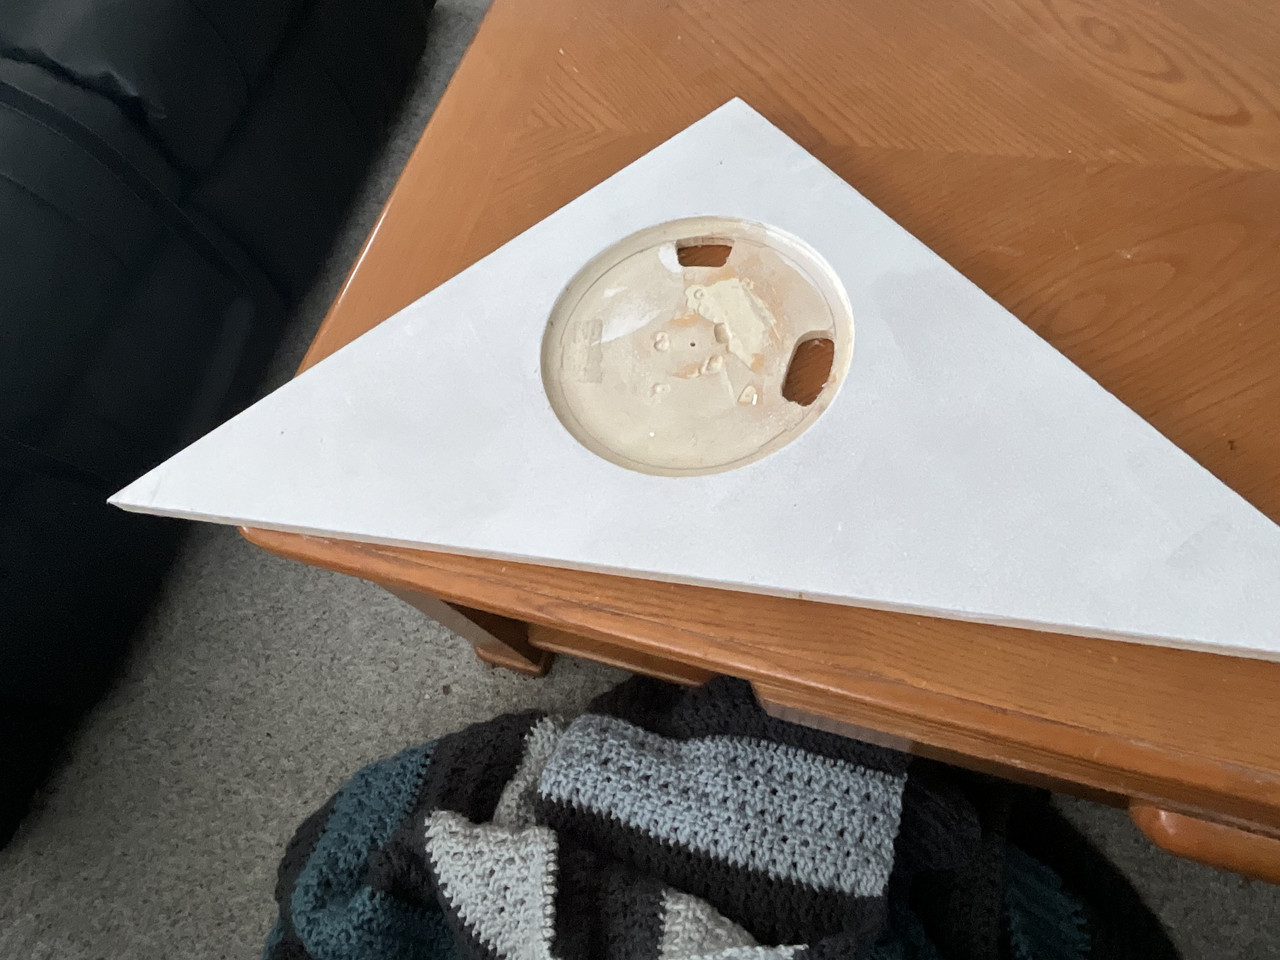
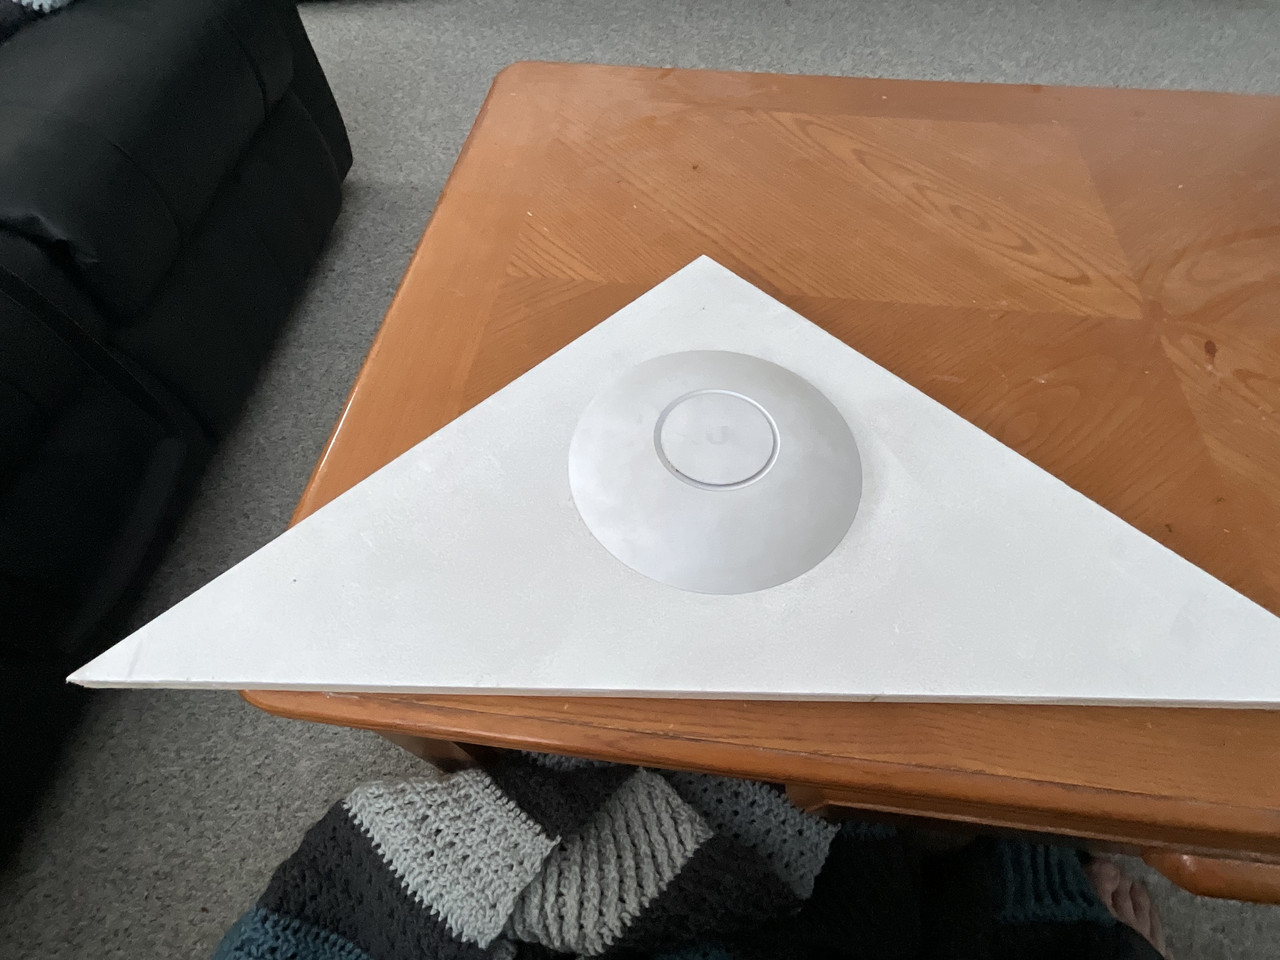
Because the top’s of both shelves will be magnetically coupled I can remove them if necessary . This will give me access so I can remove the AP much easier . I free handed the cut outs on my router table .
The left cut out is for the network cable , and the top cut out gives me access to the AP’s locking mechanism
I didn’t have to route that hole , but I think the AP looks much more refined when it’s countersunk a bit . It’s the little touches that matter
Because the top’s of both shelves will be magnetically coupled I can remove them if necessary . This will give me access so I can remove the AP much easier . I free handed the cut outs on my router table .
The left cut out is for the network cable , and the top cut out gives me access to the AP’s locking mechanism
Back with my Fam
06-20-2026, 06:40 PM
-
#21
- MajorTendonitis
- Join Date: Jan 2016
- Location: East Kootenays BC
- Age: 65
- Height: 5'8"
- Weight: 241 lbs
- Posts: 41,950
- Subscribers: 8
- Rep Power: 714162
-
-
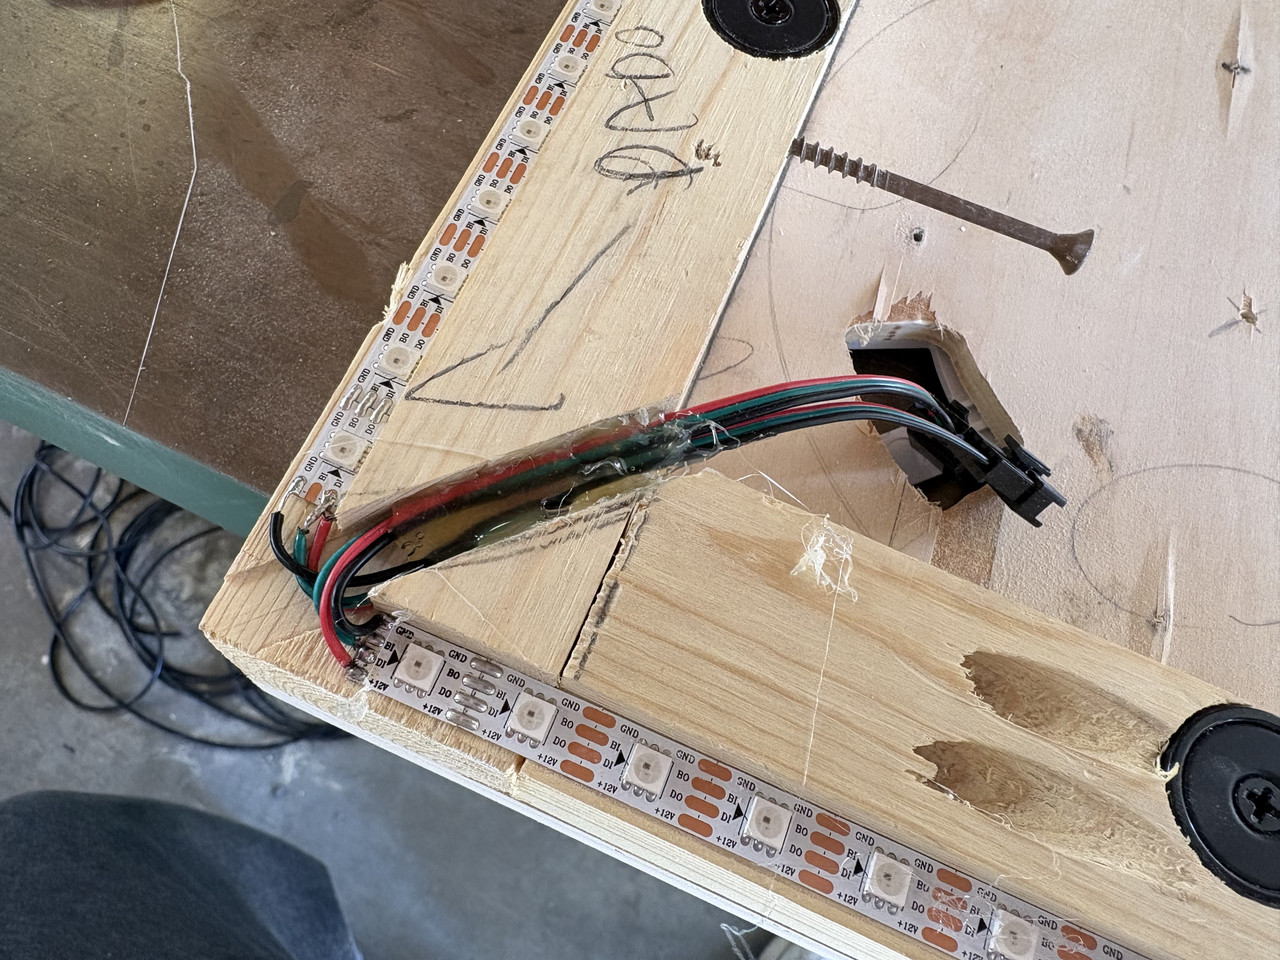
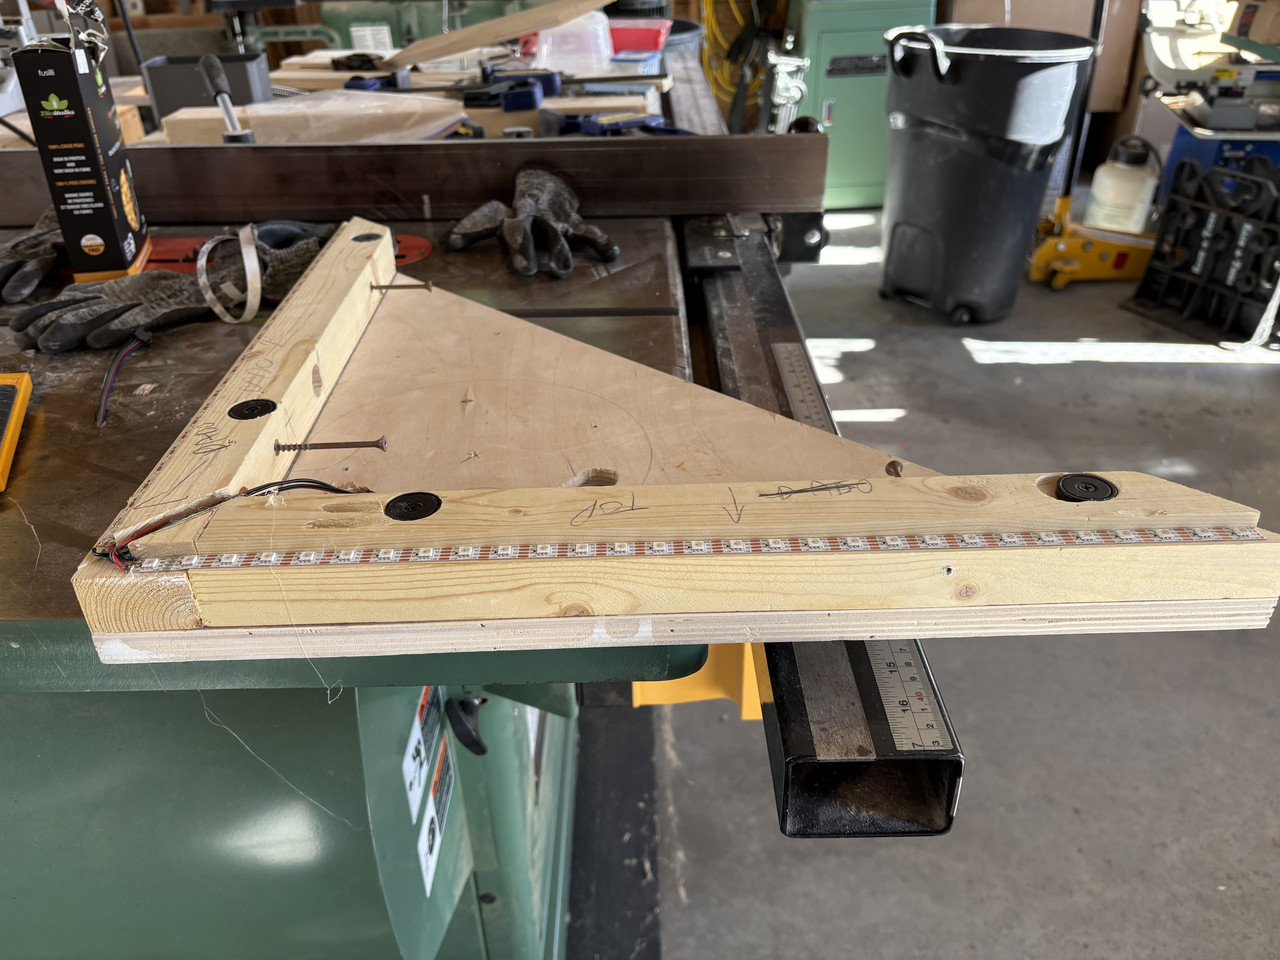
Ok got LEDs installed and wired to basement. Going to attach the plexi to the top shelf tonight and hopefully see it in action .
I wasn’t going to but I wired them independently, as the controller does have 4 separate zones .
I wasn’t going to but I wired them independently, as the controller does have 4 separate zones .
Back with my Fam
06-20-2026, 06:44 PM
-
#22
- MajorTendonitis
- Join Date: Jan 2016
- Location: East Kootenays BC
- Age: 65
- Height: 5'8"
- Weight: 241 lbs
- Posts: 41,950
- Subscribers: 8
- Rep Power: 714162
-
-
I didn’t want to but I wired each strip independently to the basement, as the controller has 4 separate zones . The AP is on top atm while I paint the bottom of the shelf
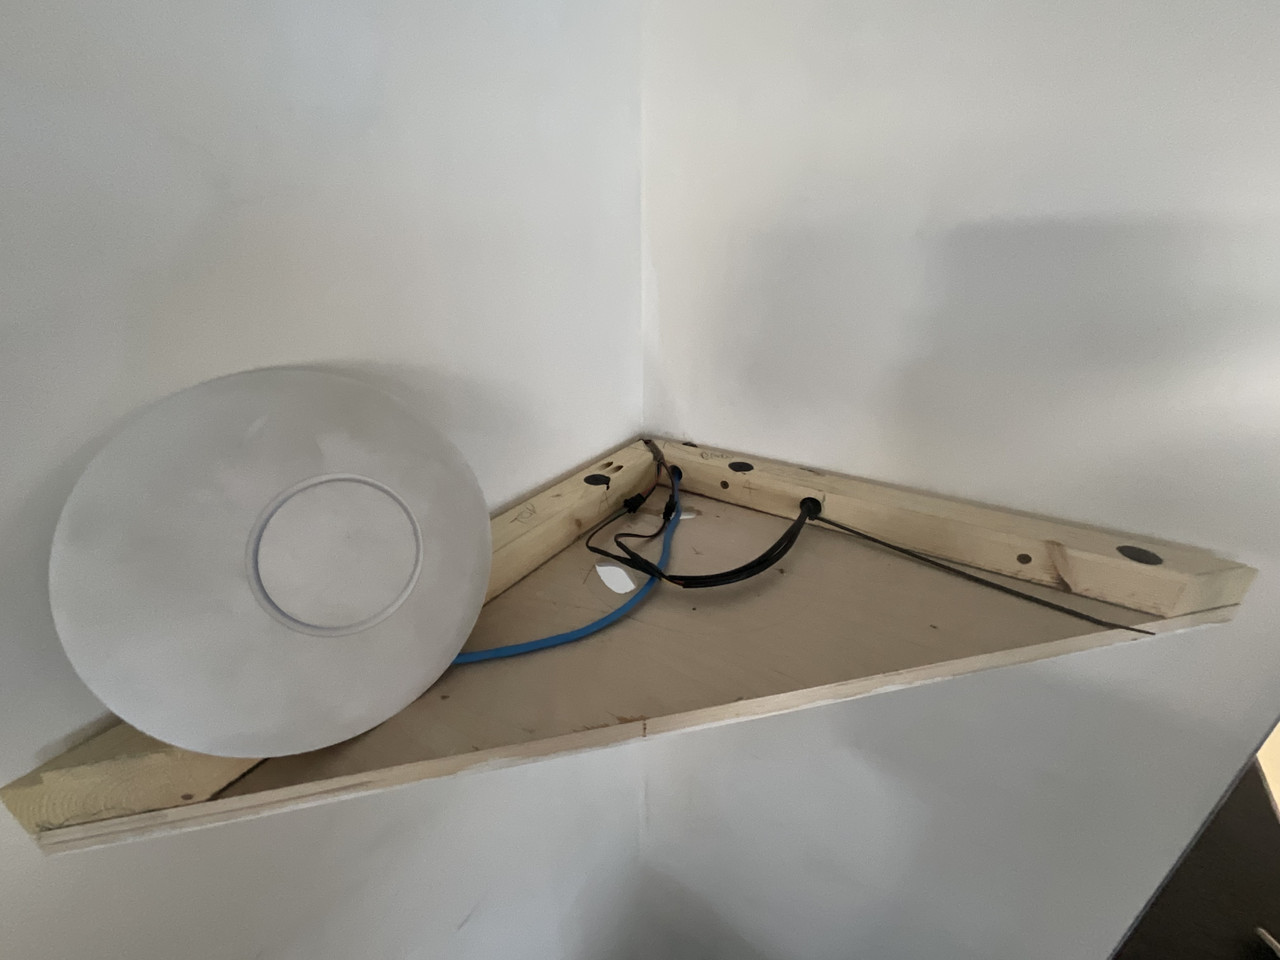
This is the open area behind the shelf where I installed that Smurf tubing to get to the basement where the controller is located . Each shelf is going to have two conduits , as I don’t want the network cable ran beside a cable providing power . It’s only 12v dc to power the led strip ,but it’s still going to bother my ocd
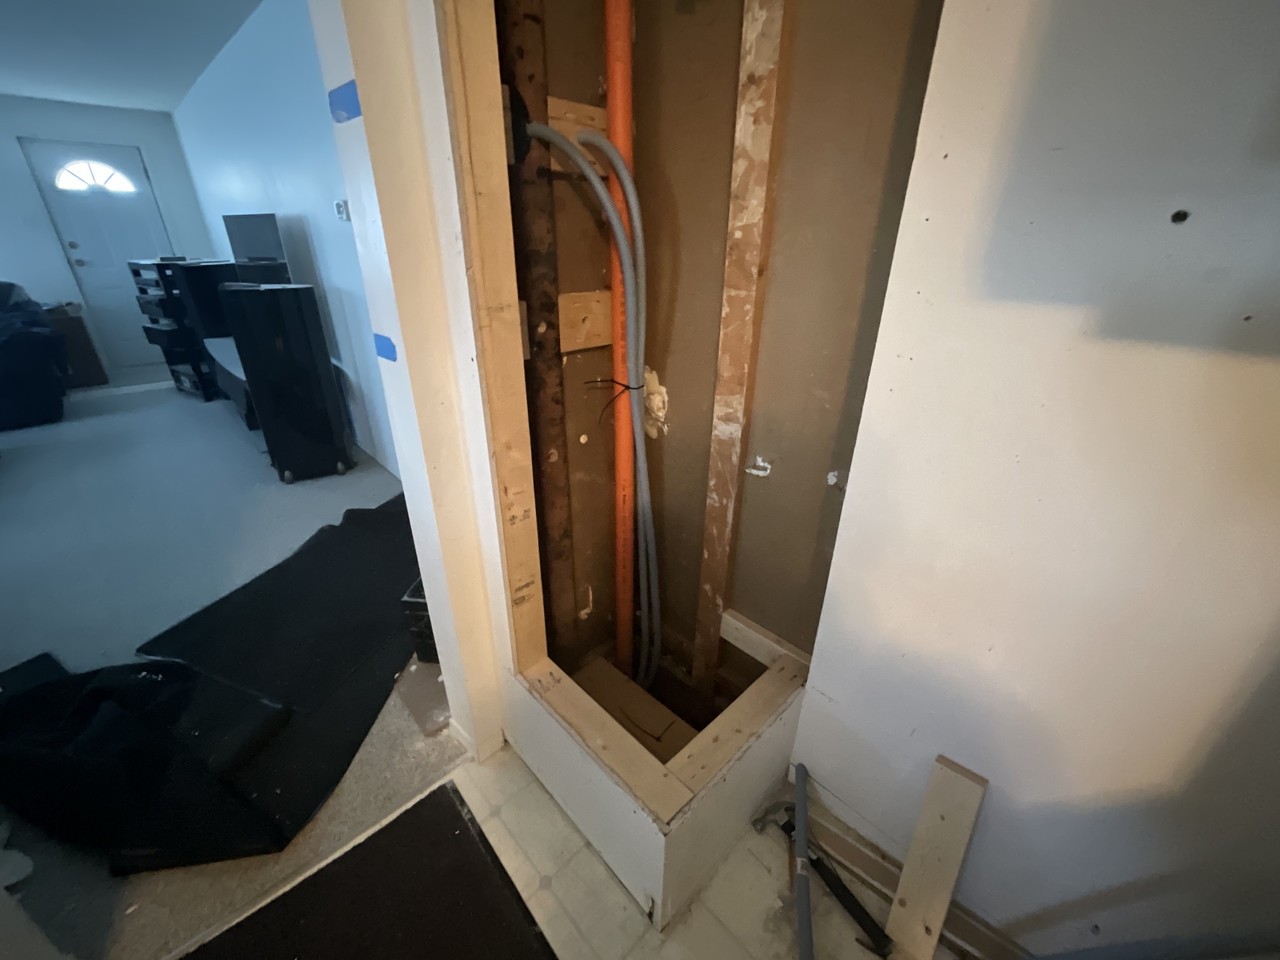
This is the open area behind the shelf where I installed that Smurf tubing to get to the basement where the controller is located . Each shelf is going to have two conduits , as I don’t want the network cable ran beside a cable providing power . It’s only 12v dc to power the led strip ,but it’s still going to bother my ocd
Back with my Fam
06-20-2026, 07:25 PM
-
#23
 06-20-2026, 08:57 PM
-
#24
- MajorTendonitis
- Join Date: Jan 2016
- Location: East Kootenays BC
- Age: 65
- Height: 5'8"
- Weight: 241 lbs
- Posts: 41,950
- Subscribers: 8
- Rep Power: 714162
-
-
Originally Posted By wasp9166⏩
Yes the threads gotten old as I keep getting fking side tracked a lot along the way , building fences and other chit . I’m dedicated everything into this now regardless of how hard people are going to try and side track me .
Trace the wall onto the plexi,then shave plexi
Oh ,this is quite old
Carry on ,nice tho
Oh ,this is quite old
Carry on ,nice tho
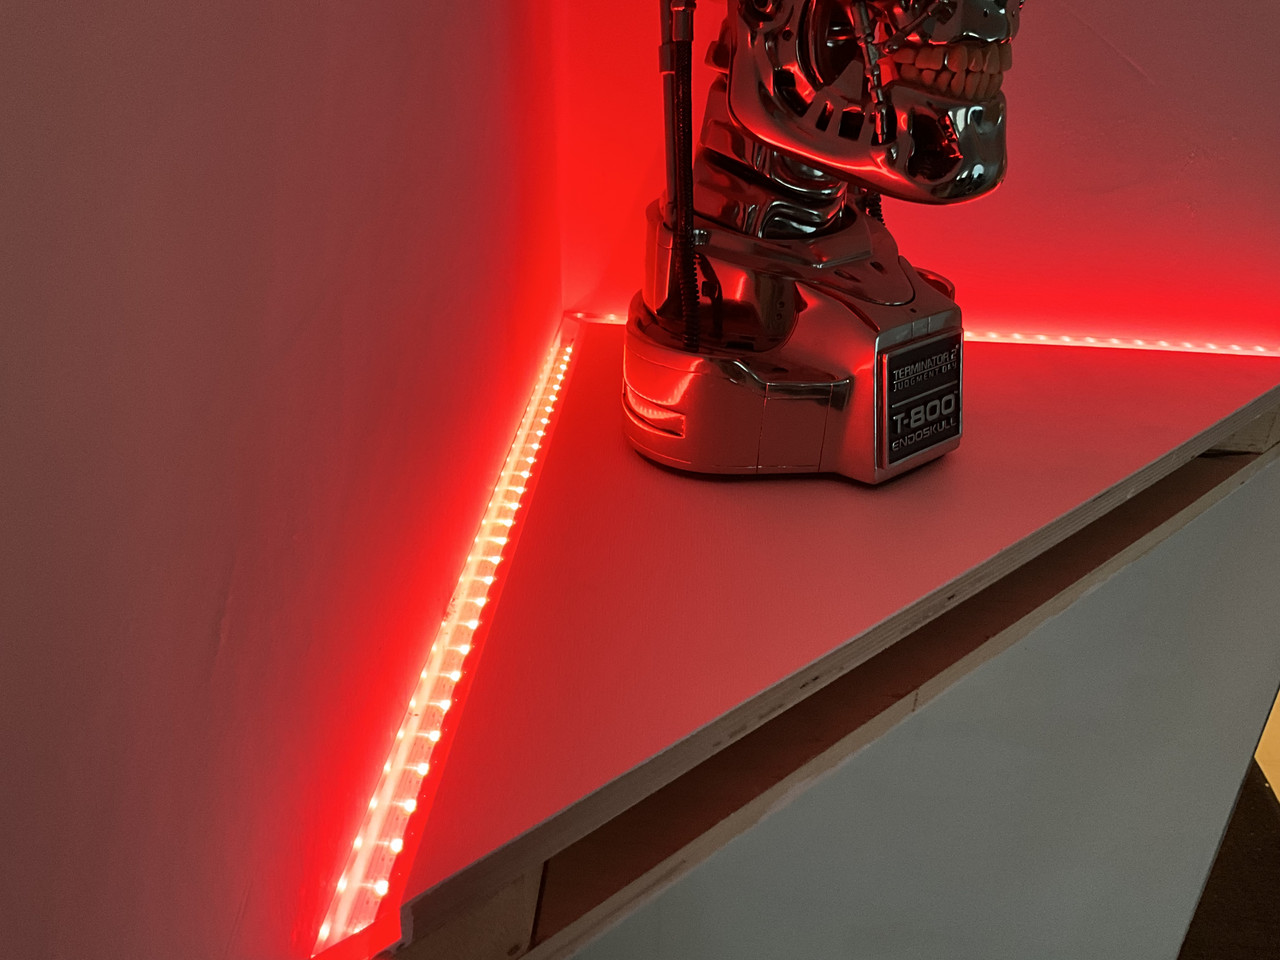
Anyways I almost have the first shelf completed . It still needs a front piece installed , so I purchased a nice piece of birch and will stain it grey to cover the front. Then I have to build the lower shelf , which is going to be a little more complicated as it’s going to have a rotisserie spinning the camera around
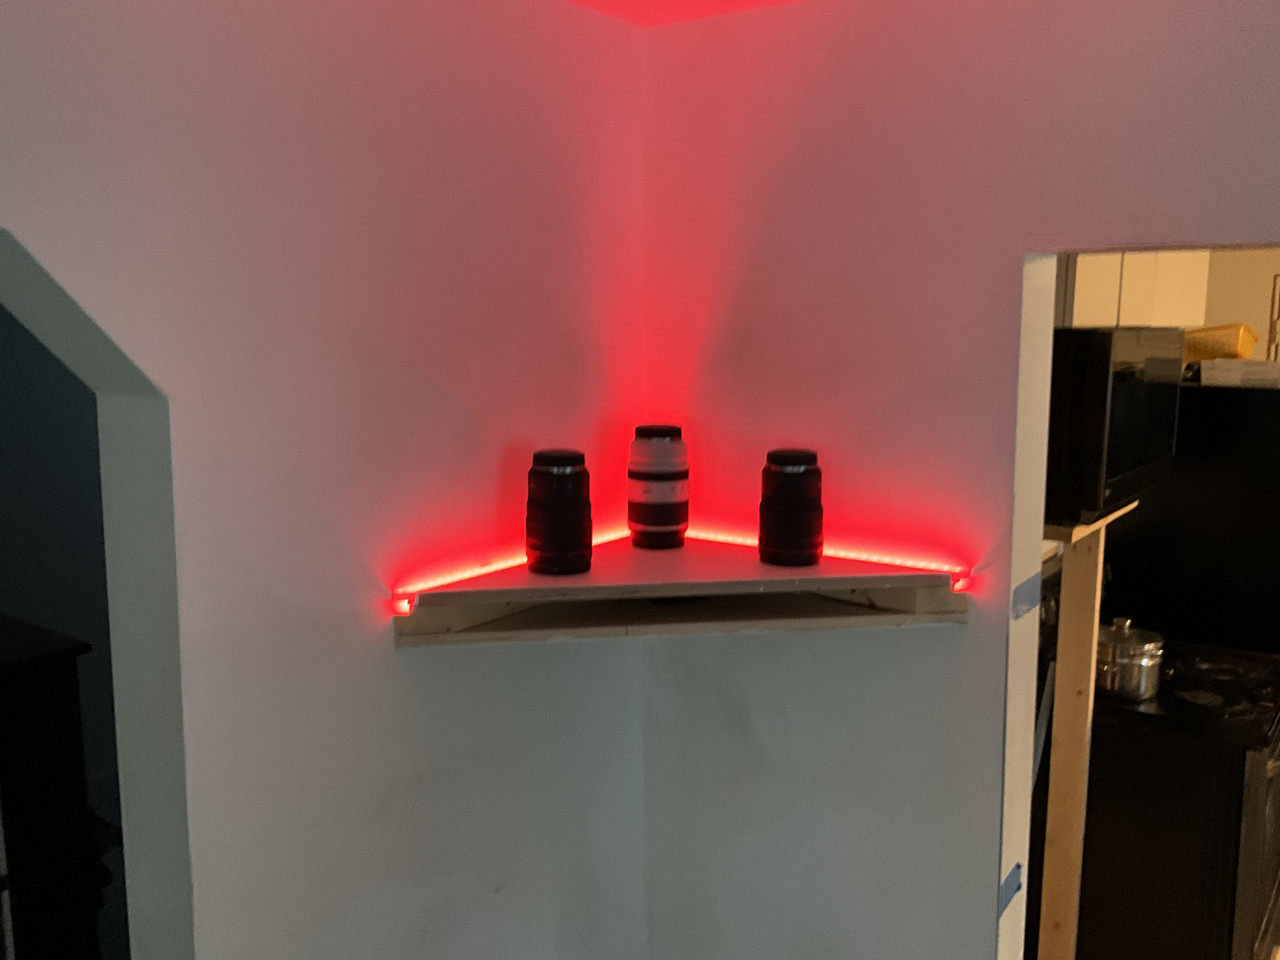
Ok this looks pretty cool tbh . These led strips are addressable, but I just have them set to solid red atm
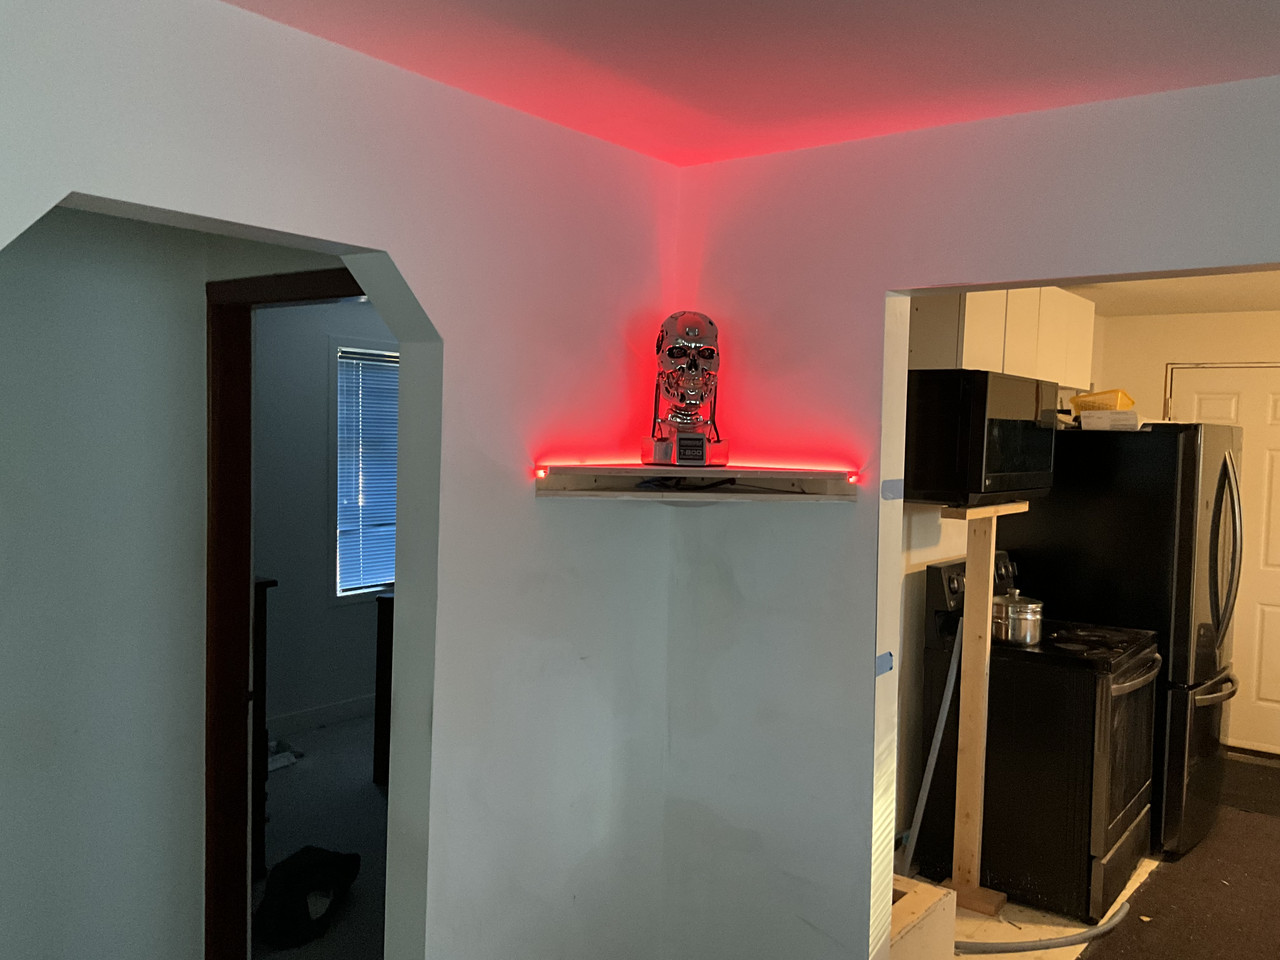
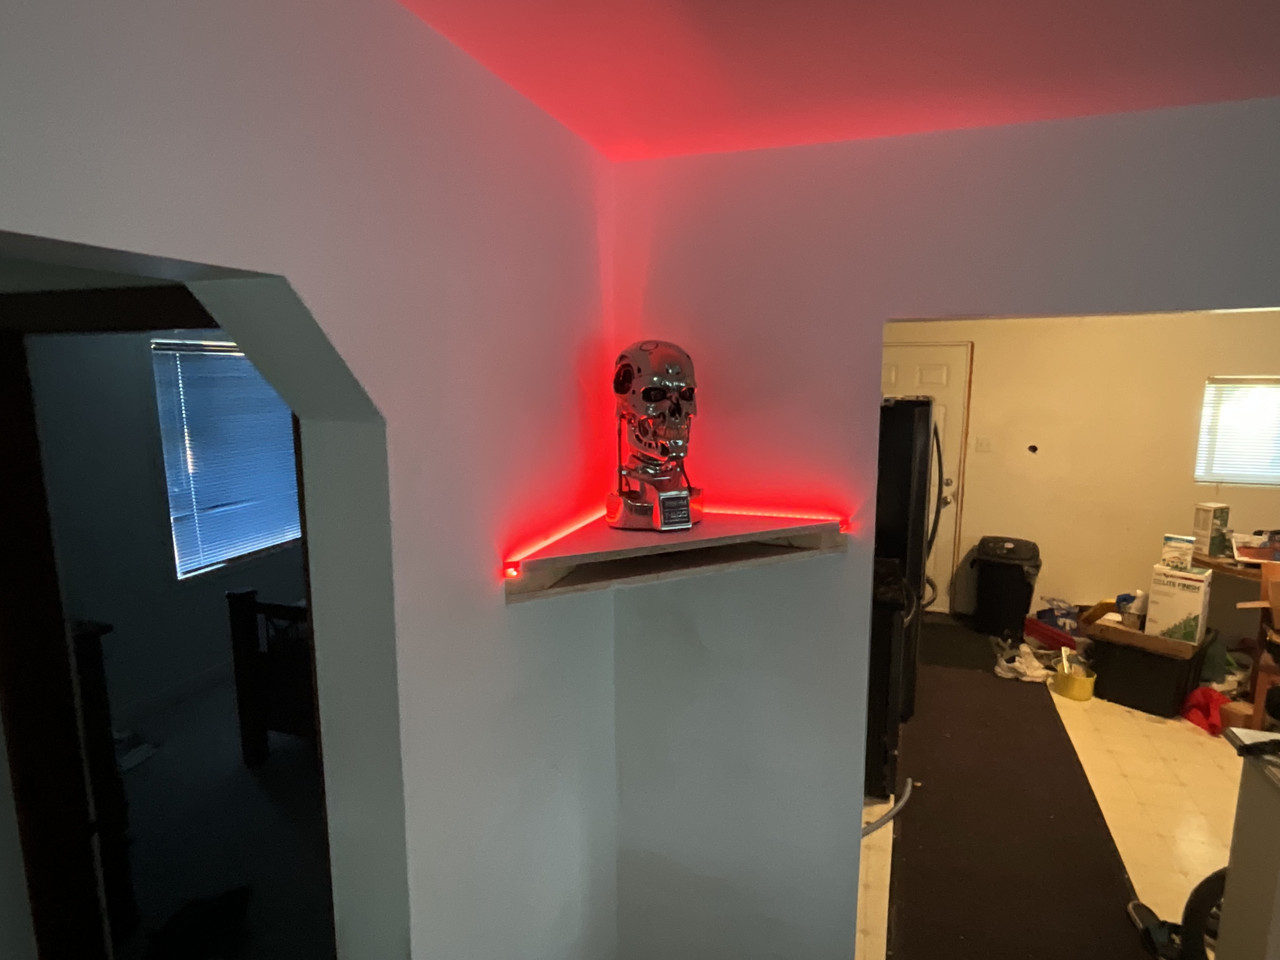
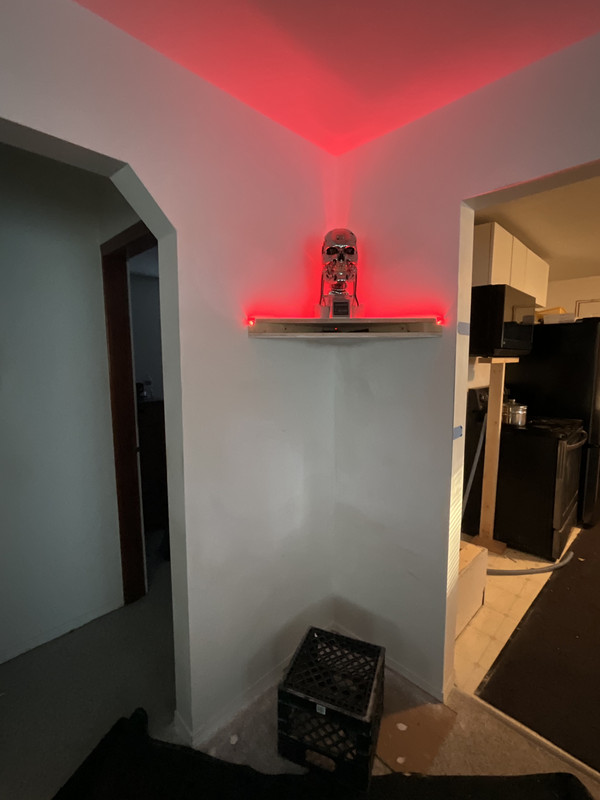
If you get up high enough you can see the led strip . That’s a no no imo , but I think if I diffuse them with sone 400 sand paper that they may not let enough light through , so I left the plexiglass diffusers clear for now . You can’t really see them very well as this shelf is fairly high , but I suspect I may be able to see the led strips on the lower shelf .
If it’s to distracting I’ll take them apart and try using my palm sander to diffuse them a bit . This is all experimental atm , so trial and error
So I’ve abandoned the Terminator theme in favour of my camera gear , so this top shelf will be for storing my camera lenses .
I plan on replicating these shelf’s in the spare computer room for the Terminator's Head and arm some day
Back with my Fam
06-20-2026, 09:53 PM
-
#25
- MajorTendonitis
- Join Date: Jan 2016
- Location: East Kootenays BC
- Age: 65
- Height: 5'8"
- Weight: 241 lbs
- Posts: 41,950
- Subscribers: 8
- Rep Power: 714162
-
-
Back with my Fam
06-21-2026, 06:48 AM
-
#26
 06-21-2026, 08:49 AM
-
#27
- MajorTendonitis
- Join Date: Jan 2016
- Location: East Kootenays BC
- Age: 65
- Height: 5'8"
- Weight: 241 lbs
- Posts: 41,950
- Subscribers: 8
- Rep Power: 714162
-
-
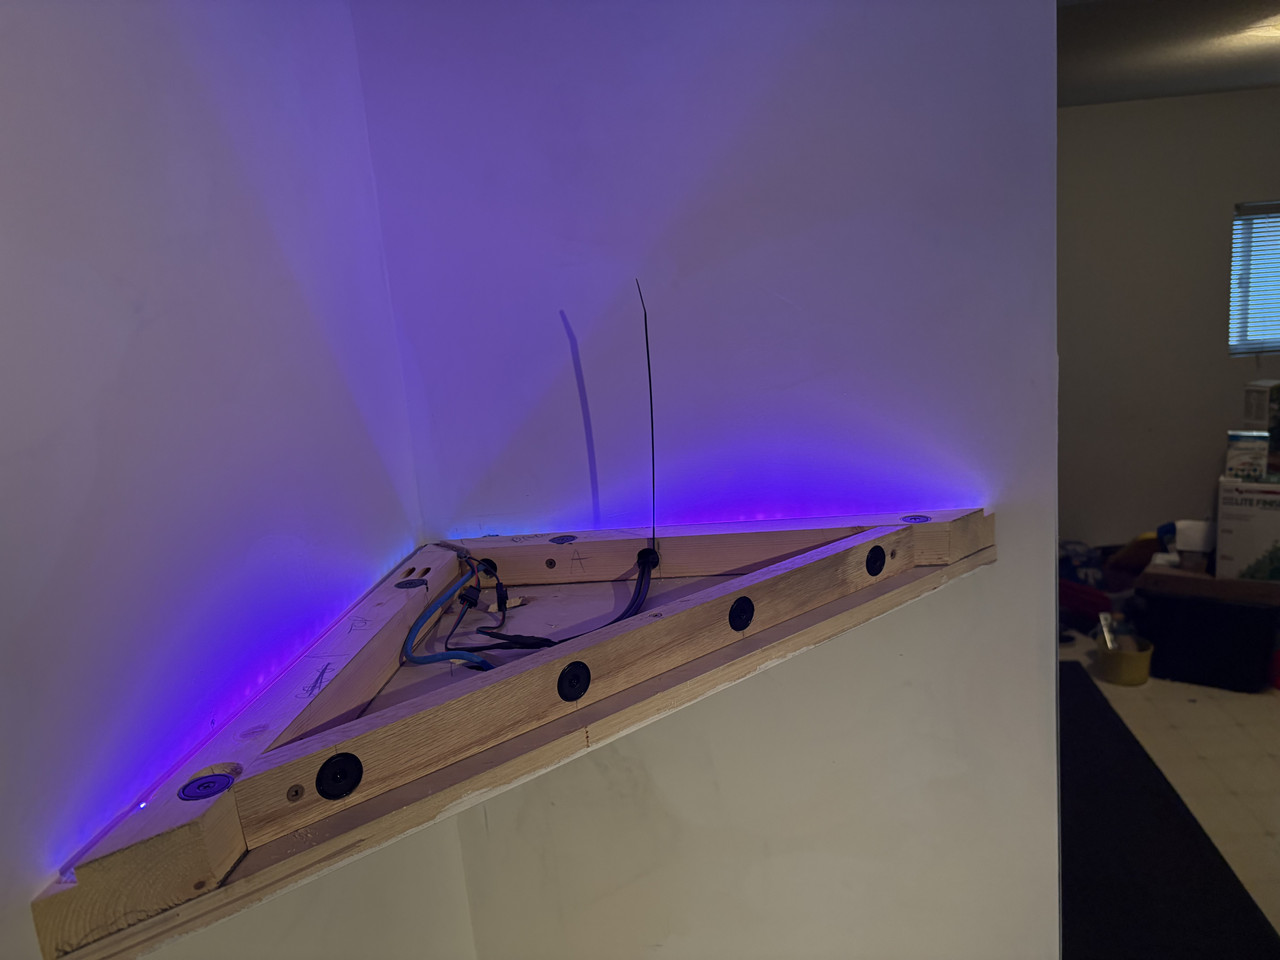
I forgot to post when I was adding the plexi that I cut to the top . I used double sided tape , and it appears to be working, but I missed by a millimetre and have to do it again as one side is protruding a millimetre and will effect the fit of the front piece that I need to add .
Speaking of which , I think I’m going to make the front cover/bezel attach magnetically too , that way it can be changed if I don’t like the colour of the stain in the future
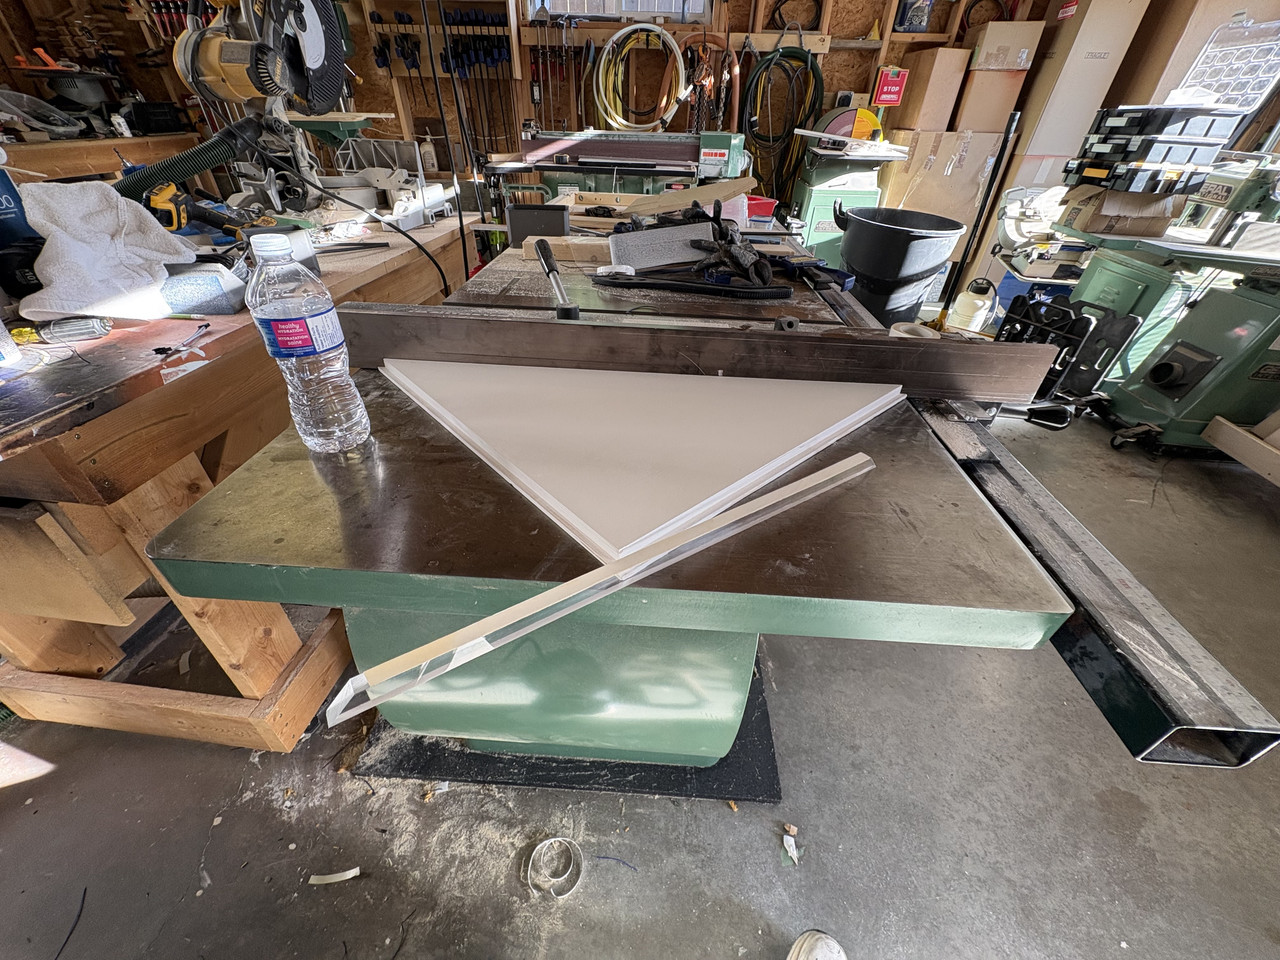
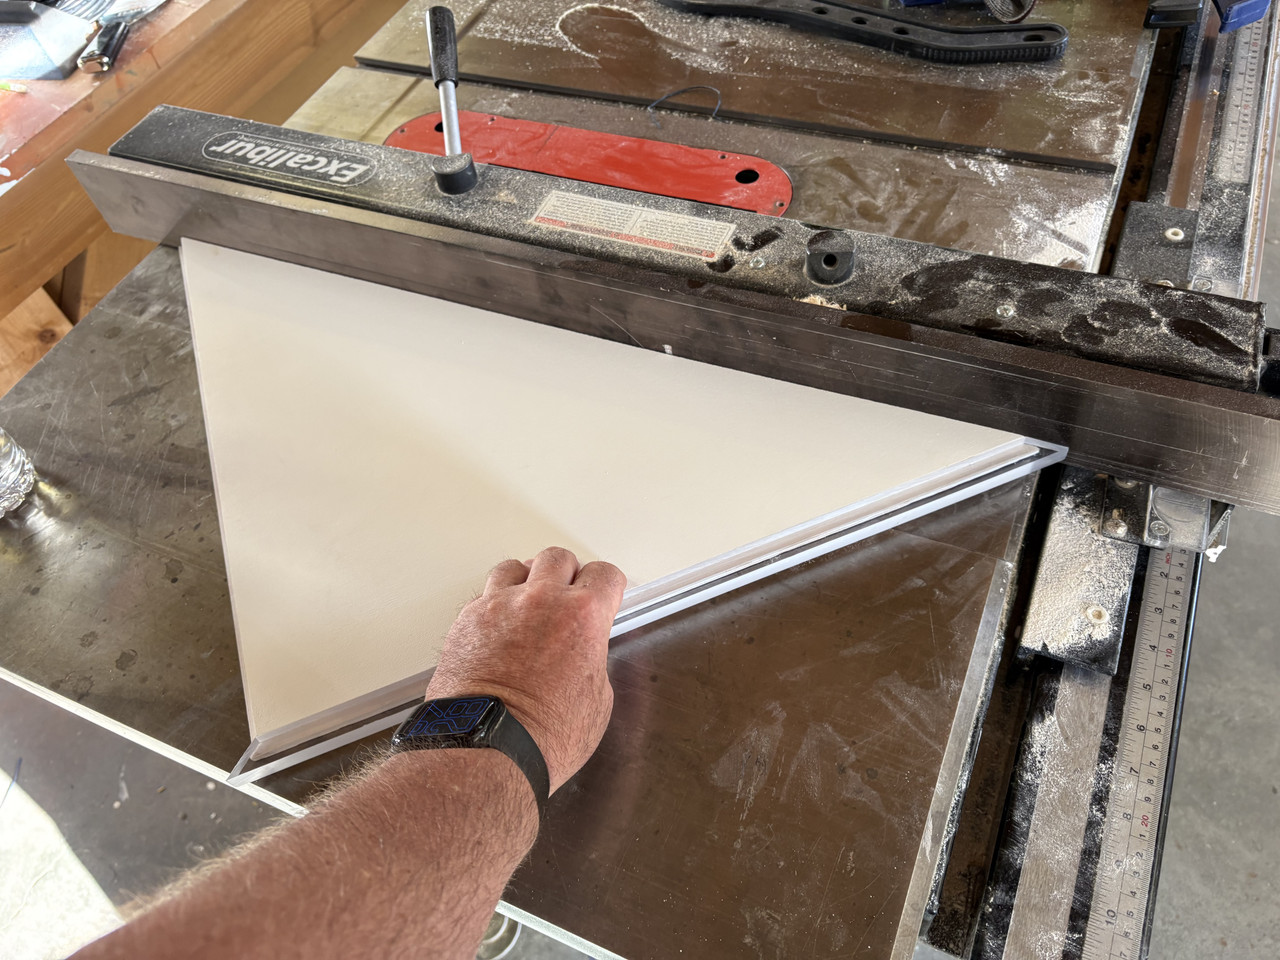
Speaking of which , I think I’m going to make the front cover/bezel attach magnetically too , that way it can be changed if I don’t like the colour of the stain in the future
Back with my Fam
06-21-2026, 09:01 PM
-
#28
- MajorTendonitis
- Join Date: Jan 2016
- Location: East Kootenays BC
- Age: 65
- Height: 5'8"
- Weight: 241 lbs
- Posts: 41,950
- Subscribers: 8
- Rep Power: 714162
-
-
Ok I’ve been at it for hours trying to make it as complicated as possible to attach a front face .Originally I was going to air nail and glue the face to the top removable section , then I thought what if at some point I don’t like the colour of the stain .
So I’m building it so it’s magnetically coupled with the same rare earth magnets that I used on the top . Hopefully everything lines up ok .
I’m using four magnets to hold the front bezel on . Will be cutting it tomorrow. I suspect 4 magnets is overkill and I probably should have gone with 3 .
I can however recess the magnets or the plates to lesson their pull strength in case is starts pulling itself apart when I try to remove the front bezel
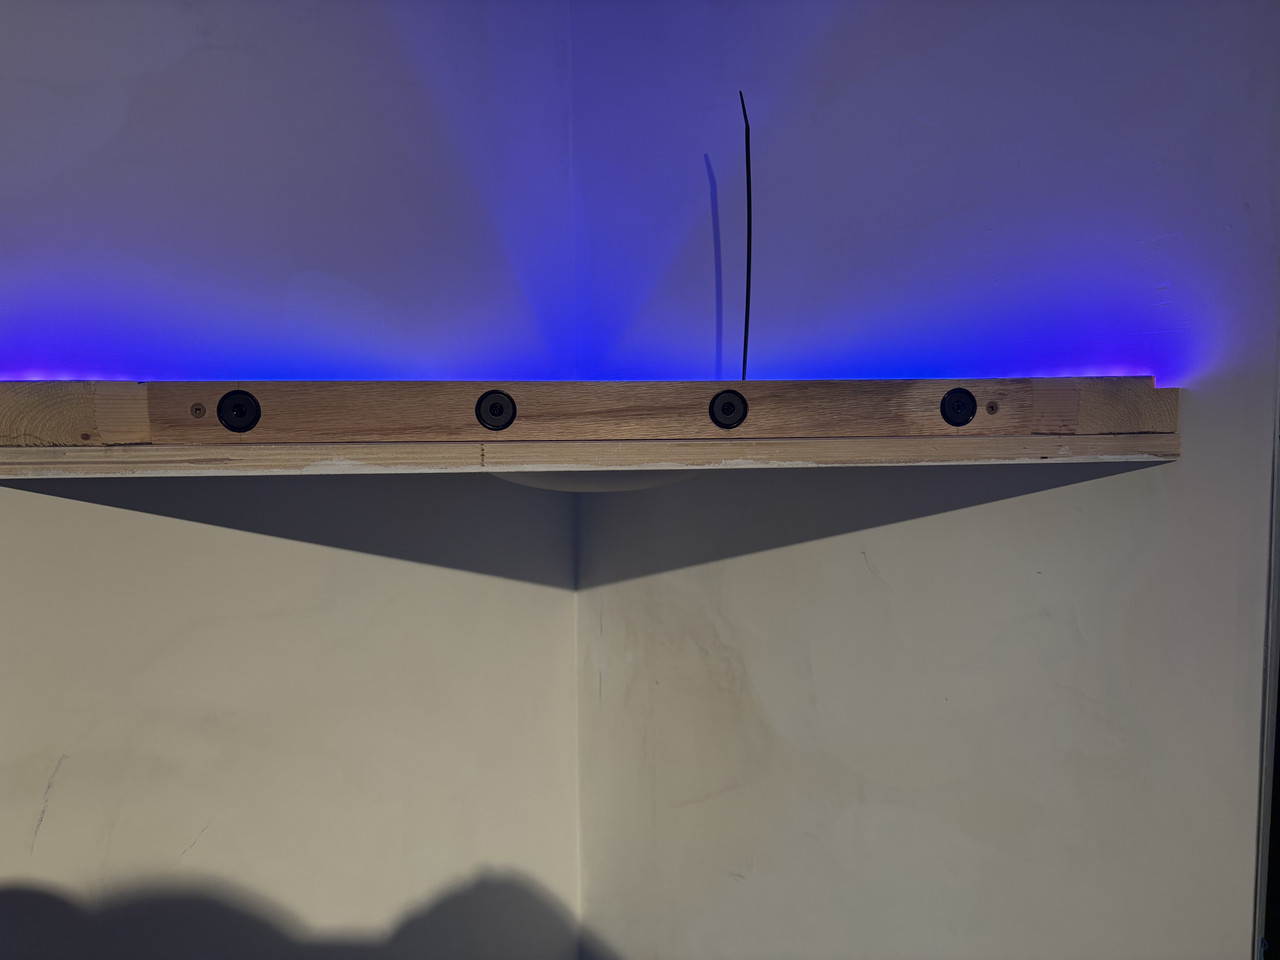
This is Gradient on the LED App. I chose red and white and I think it looks cool AF . In the beginning I really didn’t want to jump into addressable digital LEDs , but now I’m glad I did . Even cooler is you control everything with your tablet
So I’m building it so it’s magnetically coupled with the same rare earth magnets that I used on the top . Hopefully everything lines up ok .
I’m using four magnets to hold the front bezel on . Will be cutting it tomorrow. I suspect 4 magnets is overkill and I probably should have gone with 3 .
I can however recess the magnets or the plates to lesson their pull strength in case is starts pulling itself apart when I try to remove the front bezel
This is Gradient on the LED App. I chose red and white and I think it looks cool AF . In the beginning I really didn’t want to jump into addressable digital LEDs , but now I’m glad I did . Even cooler is you control everything with your tablet
Back with my Fam
06-22-2026, 07:19 AM
-
#29

Bookmarks
-

- Digg
-

- del.icio.us
-

- StumbleUpon
-

-

Posting Permissions
- You may not post new threads
- You may not post replies
- You may not post attachments
- You may not edit your posts