
 06-22-2026, 09:55 AM
-
#31

- MajorTendonitis
- Join Date: Jan 2016
- Location: East Kootenays BC
- Age: 65
- Height: 5'8"
- Weight: 241 lbs
- Posts: 41,952
- Subscribers: 8
- Rep Power: 714162
-
-

Originally Posted By ExPatriot⏩
Mirin hard AF...
Originally Posted By leoaa777⏩
Thx guys srs . I don’t exactly have a blue print as it’s just ideas of conjured up in my head , but it seems to coming together well so far .
Mirin craftsmanship srs
Srs can’t wait to build the other one below with the carousel so that the camera spins around .
I’m going to use my circle jig and build a plate that sits on top of the carousel so that it’s flush with base of the shelf , as I think it’s going to look tacky just throwing the carousel on the shelf itself .
I have Adriano micro controllers , and at some point I want to control the motor via my iPad
Back with my Fam
06-22-2026, 06:35 PM
-
#32
- MajorTendonitis
- Join Date: Jan 2016
- Location: East Kootenays BC
- Age: 65
- Height: 5'8"
- Weight: 241 lbs
- Posts: 41,952
- Subscribers: 8
- Rep Power: 714162
-
-
Ok so I messed up and damaged my birch , and unfortunately they had no more in stock . Was fking bummed about that , especially when I couldn’t find any wood that was straight enough to use . I ended up opting for one of those posts you use on a staircase and cut it an inch thick .
Anyways it went fairly well after that .
I have a small gap from the magnets so they are not pulling as hard as I’d like ,but the front is certainly not falling off .
I purchased some grey stain and plan on staining the front bezel asap .
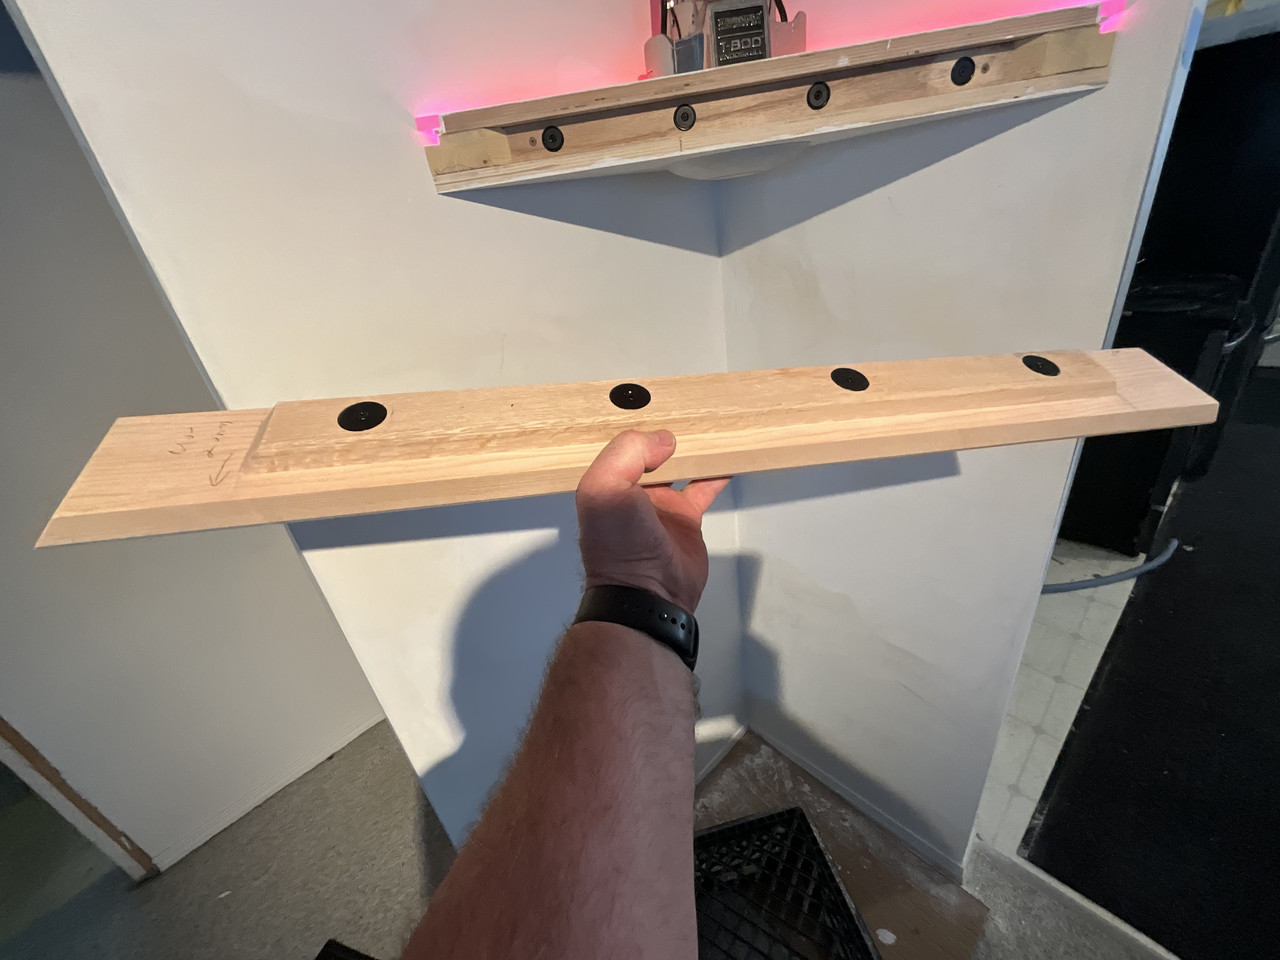
Here’s with the front in place .
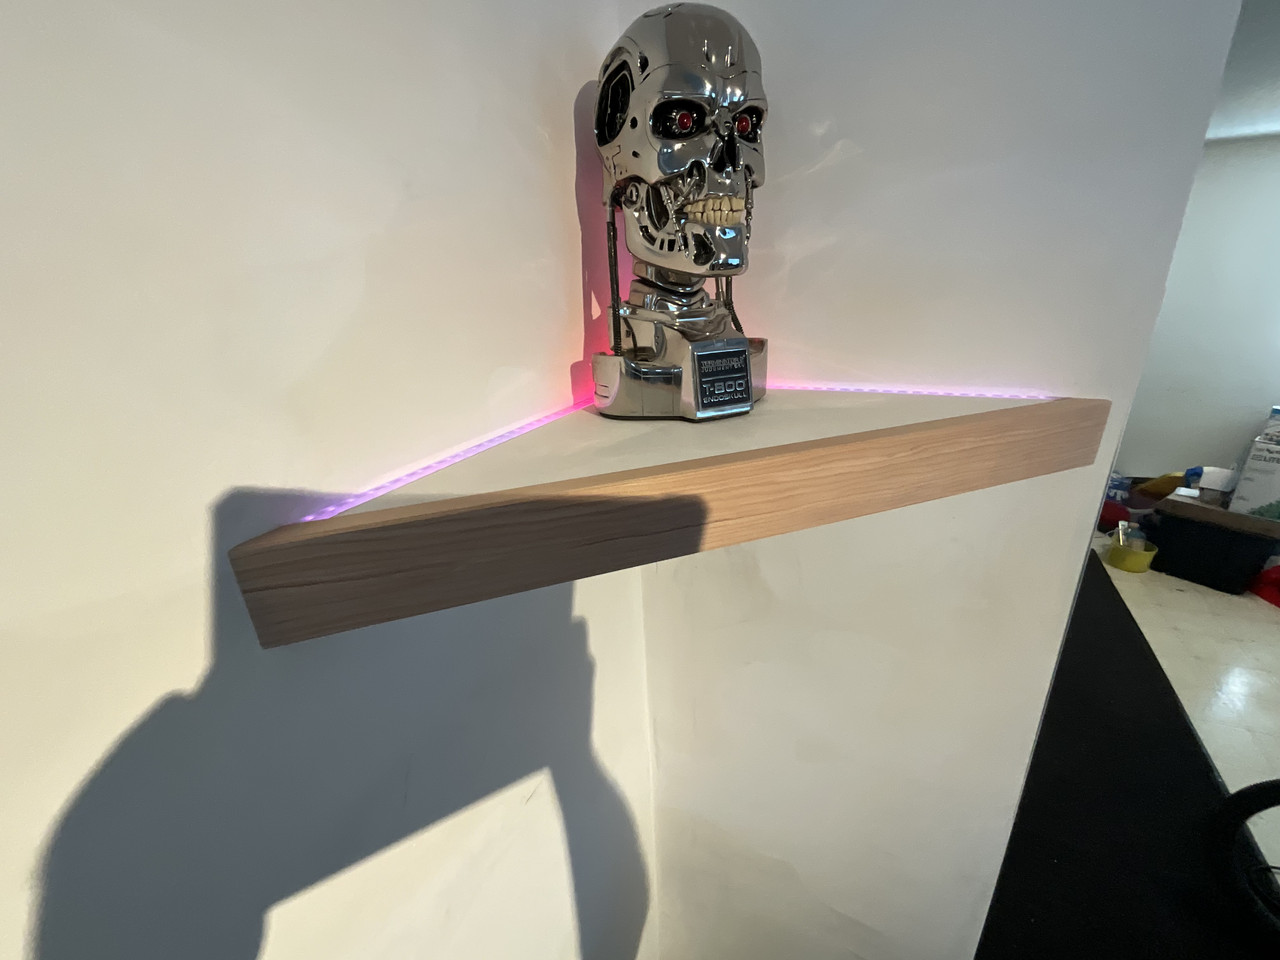
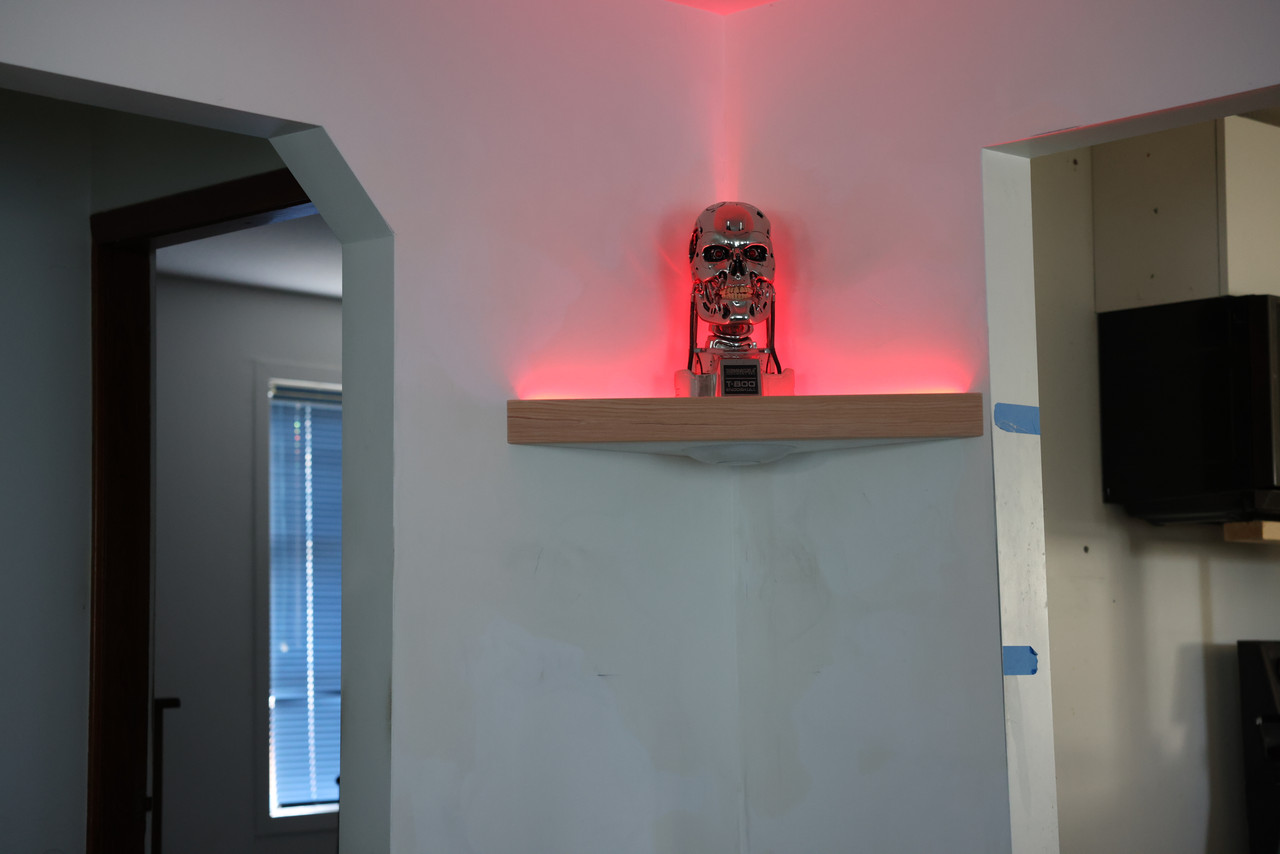
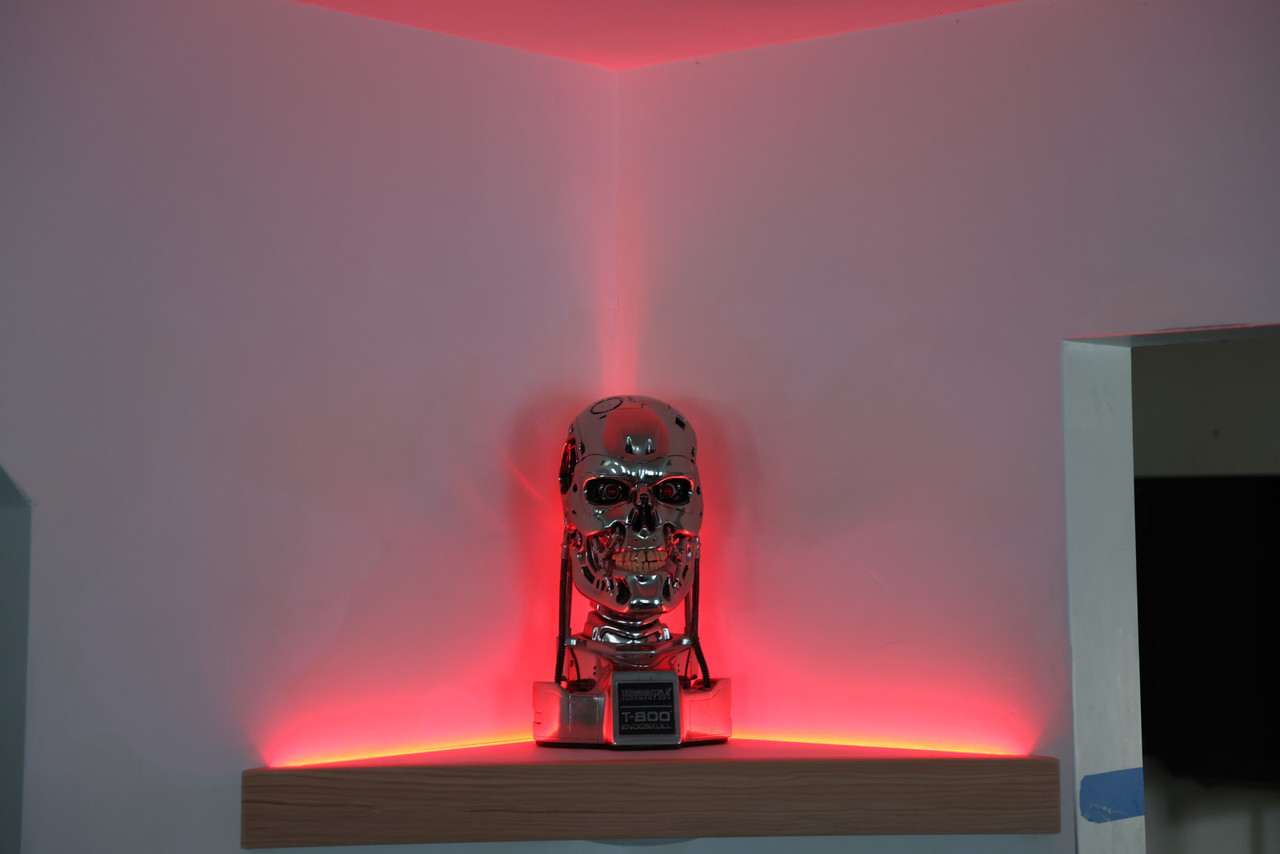
Used my canon camera to take a few pics that a posted below in hopes of getting a better quality picture . I think things go for chit once you upload them to these share sites though . I think if you subscribe they let you post a bigger file size , dunno .
The walls are not actually painted yet and the majority of them are bare drywall mud , so I’ll need to prime and paint soon . I wasn’t in a hurry for paint seeing as I have been getting a ding here and there as I’m working on this project
Also took a video with my Canon R5 . I think it’s a bit cleaner looking than what the iPad does
Anyways it went fairly well after that .
I have a small gap from the magnets so they are not pulling as hard as I’d like ,but the front is certainly not falling off .
I purchased some grey stain and plan on staining the front bezel asap .
Here’s with the front in place .
Used my canon camera to take a few pics that a posted below in hopes of getting a better quality picture . I think things go for chit once you upload them to these share sites though . I think if you subscribe they let you post a bigger file size , dunno .
The walls are not actually painted yet and the majority of them are bare drywall mud , so I’ll need to prime and paint soon . I wasn’t in a hurry for paint seeing as I have been getting a ding here and there as I’m working on this project
Also took a video with my Canon R5 . I think it’s a bit cleaner looking than what the iPad does
Back with my Fam
06-22-2026, 08:49 PM
-
#33
- MajorTendonitis
- Join Date: Jan 2016
- Location: East Kootenays BC
- Age: 65
- Height: 5'8"
- Weight: 241 lbs
- Posts: 41,952
- Subscribers: 8
- Rep Power: 714162
-
-
Ok I am disappoint. I just stained the front bezel grey and I think it’s too dark . I think I should have stained it white if they actually make wood stain in white .Either that or just paint it with the same white latex I’m using on the walls . I just thought stain would bring out the grain and look less mundane
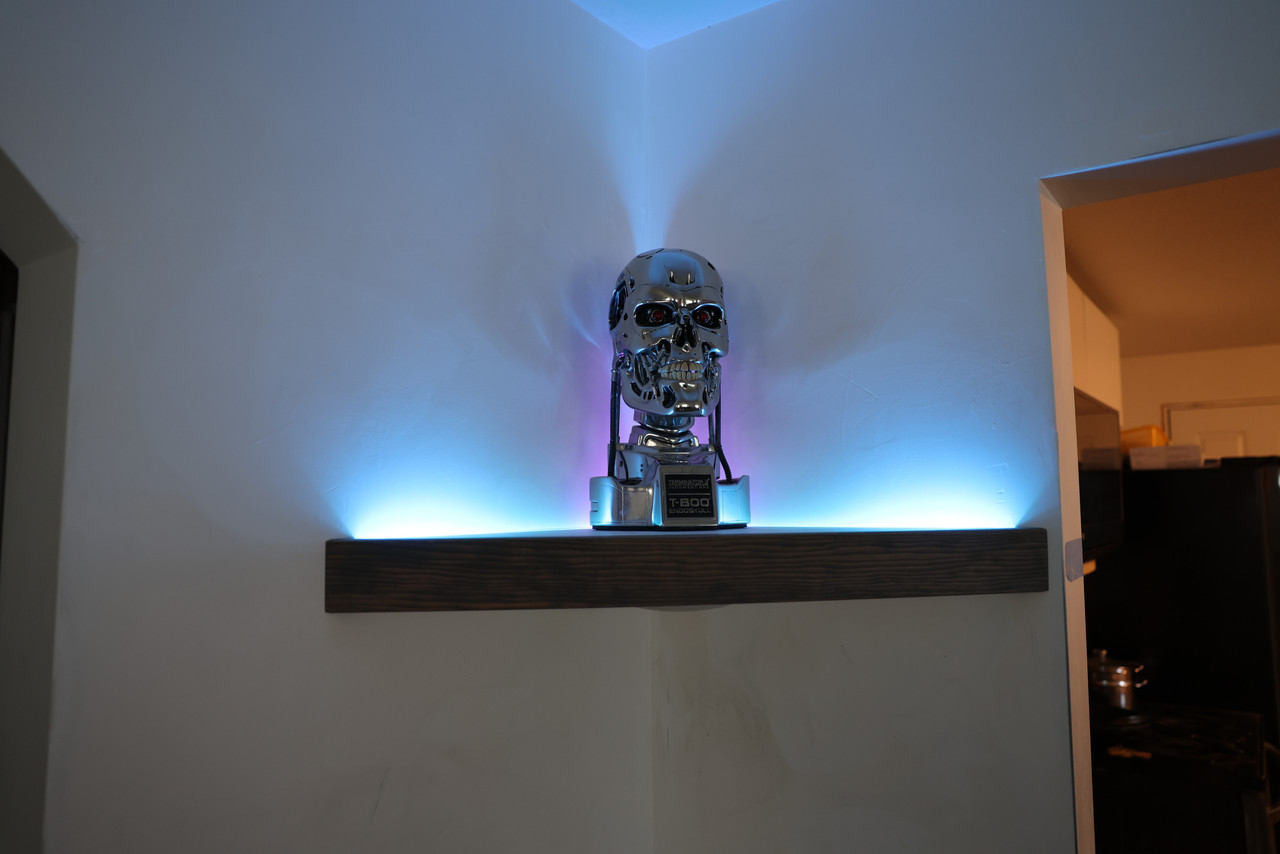
With the light on .
Sorry for the blurry pic , but faurk that stain stoink so bad that I had to get it the fk out of the house and I’m not installing it again till it cures
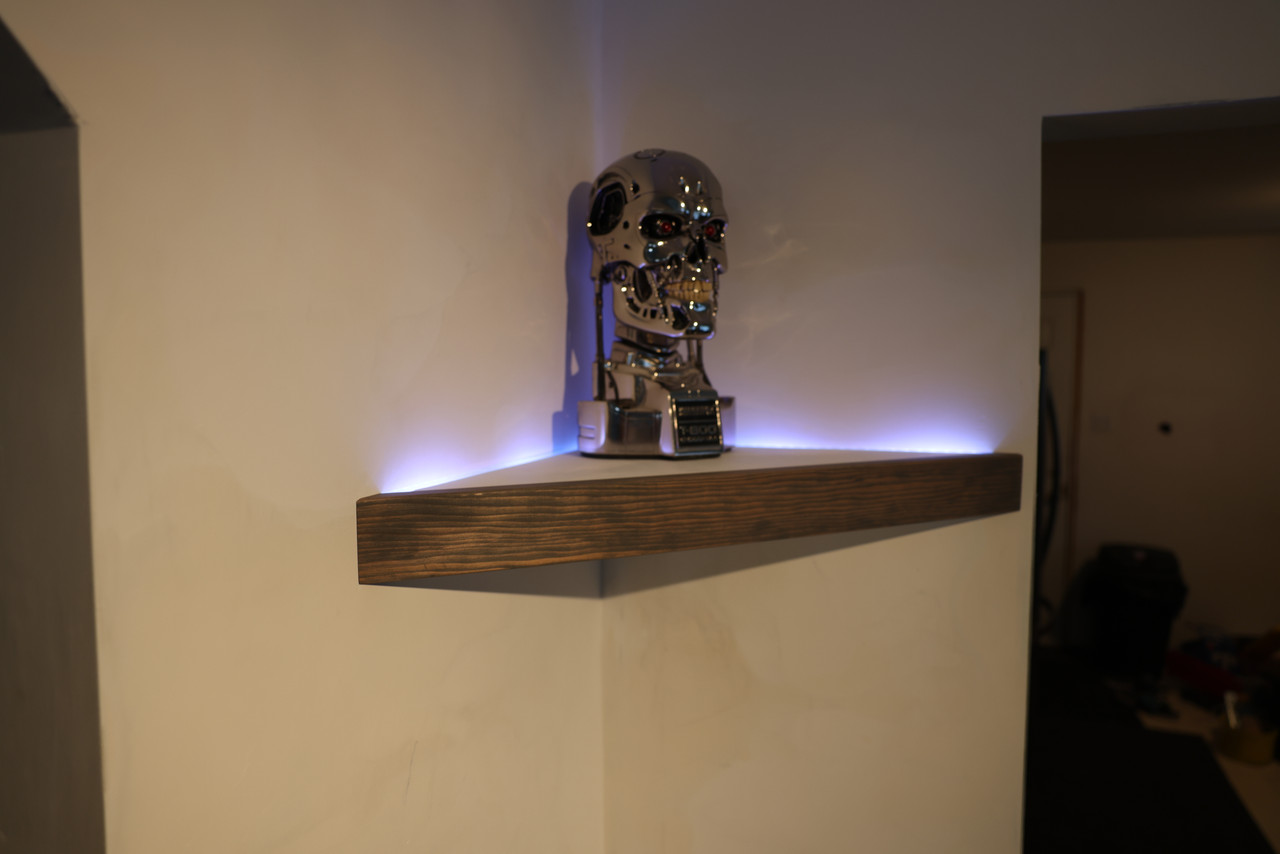
With the light on .
Sorry for the blurry pic , but faurk that stain stoink so bad that I had to get it the fk out of the house and I’m not installing it again till it cures
Back with my Fam
07-04-2026, 10:38 AM
-
#34
- MajorTendonitis
- Join Date: Jan 2016
- Location: East Kootenays BC
- Age: 65
- Height: 5'8"
- Weight: 241 lbs
- Posts: 41,952
- Subscribers: 8
- Rep Power: 714162
-
-
Ok for the next shelf , the lower one , I want a slow moving table to display my camera . I was going to just use a piece of mdf for the rotating top , but someone suggested plexiglass.
I gave up on using my 28 year old Makita router that I used in a dedicated circle jig back in my subwoofer days , as it was causing some issues .
So I spent yesterday morning building my own circle jig to fit my newly purchased cordless Dewalt trim router . Being cordless is going to be such an improvement over fighting with a corded router as you’re doing several passes with a circle jig srs .
I had to take my time and be very finicky about all the cuts and drilling, but unbelievably I pulled it off and it works great .
At the beginning I was just going to use a piece of mdf to make the jigs, but then decided to use lexan as I had some on hand anyways . Much better choice imo
I started off by cutting a piece of lexan and did a dado cut the exact size as the steel plate that used to be I the old craftsman jig
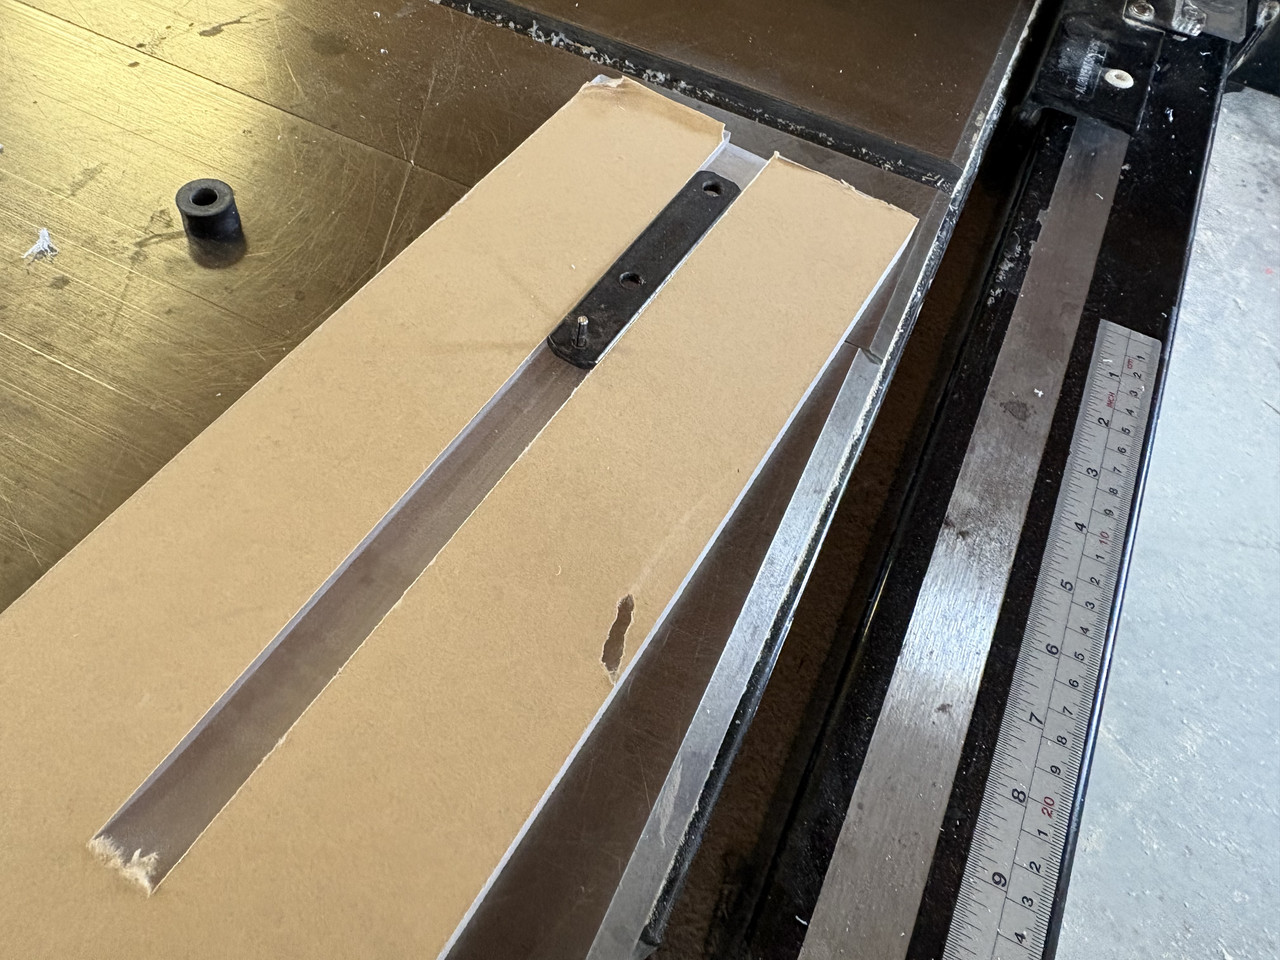
Then I used my router table to carefully cut a groove for the metal bars knob to go through . Everything had to be exact . It’s the measuring and prep work that takes all the time
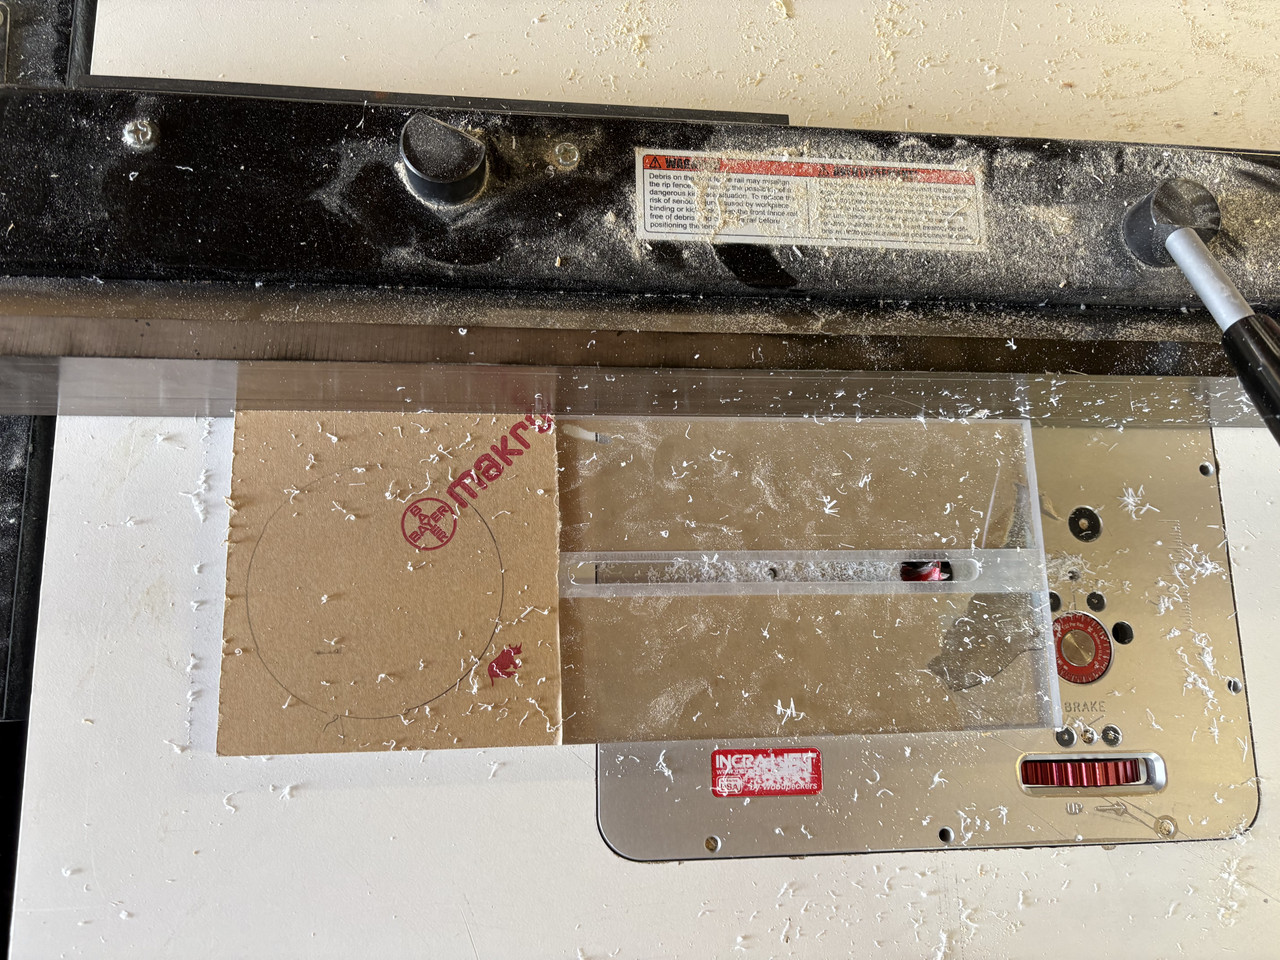
I used the original base to get the proper alignment of the holes for the router
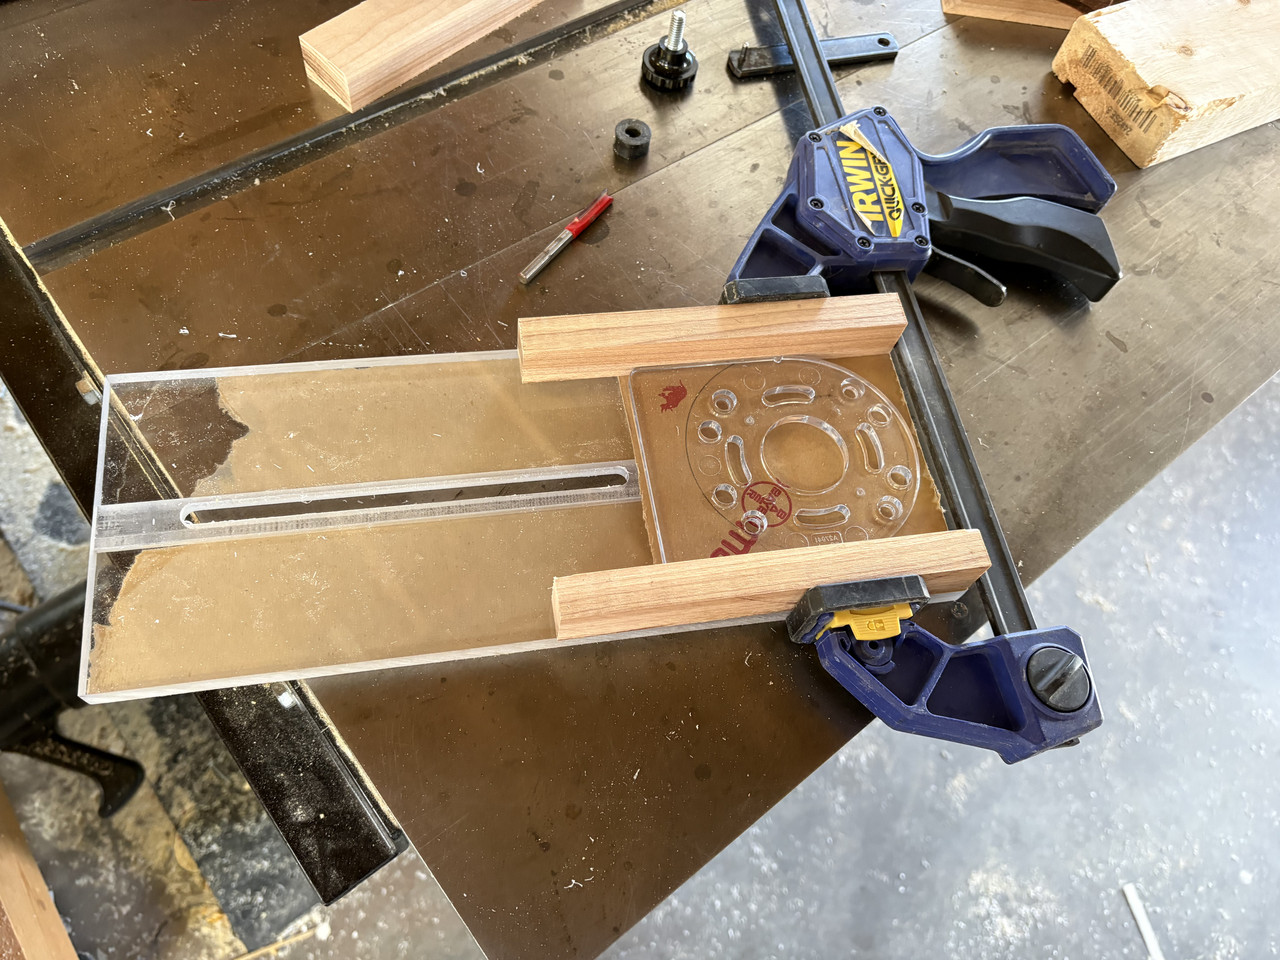
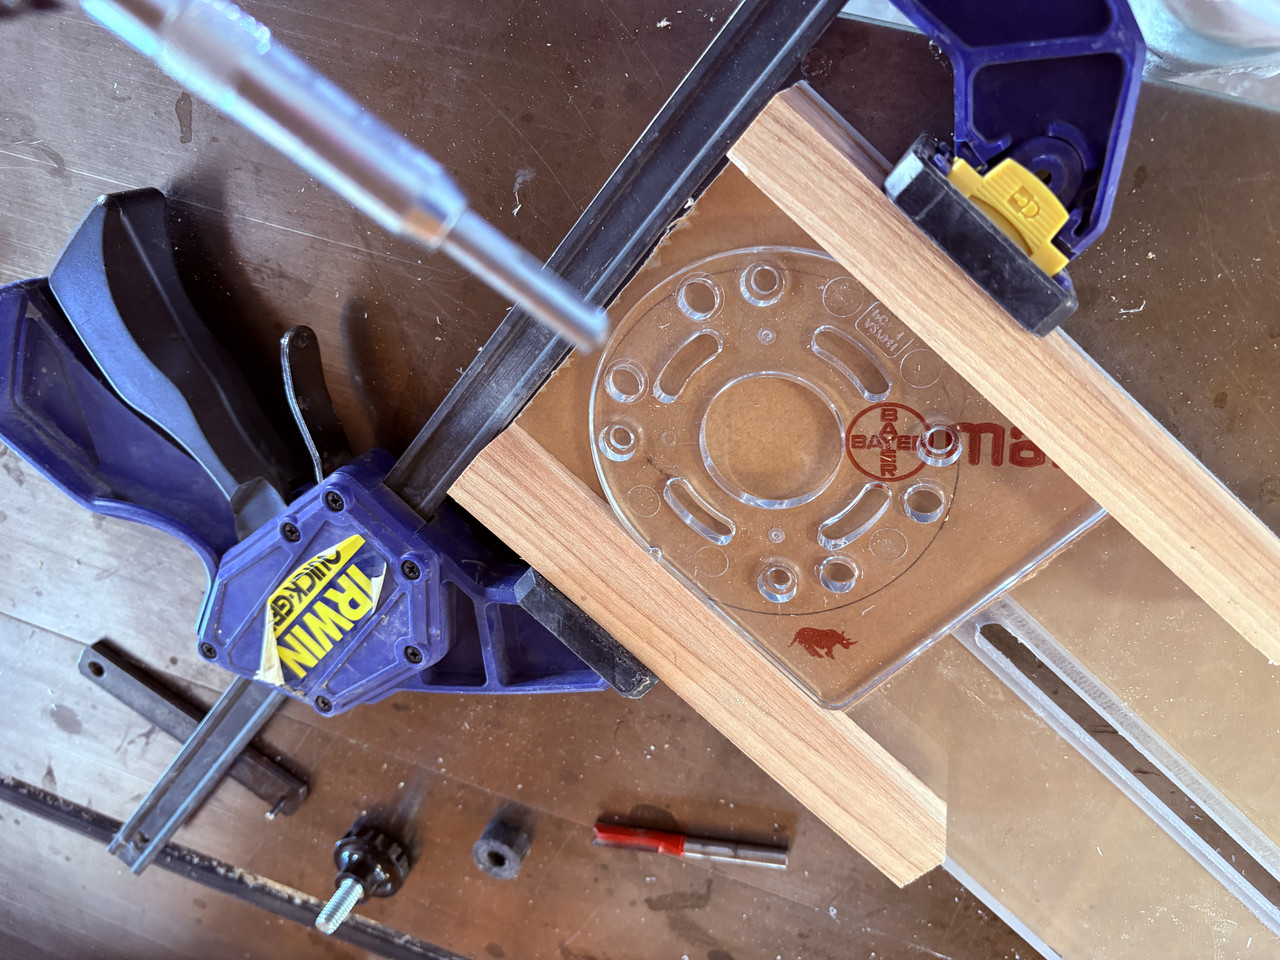
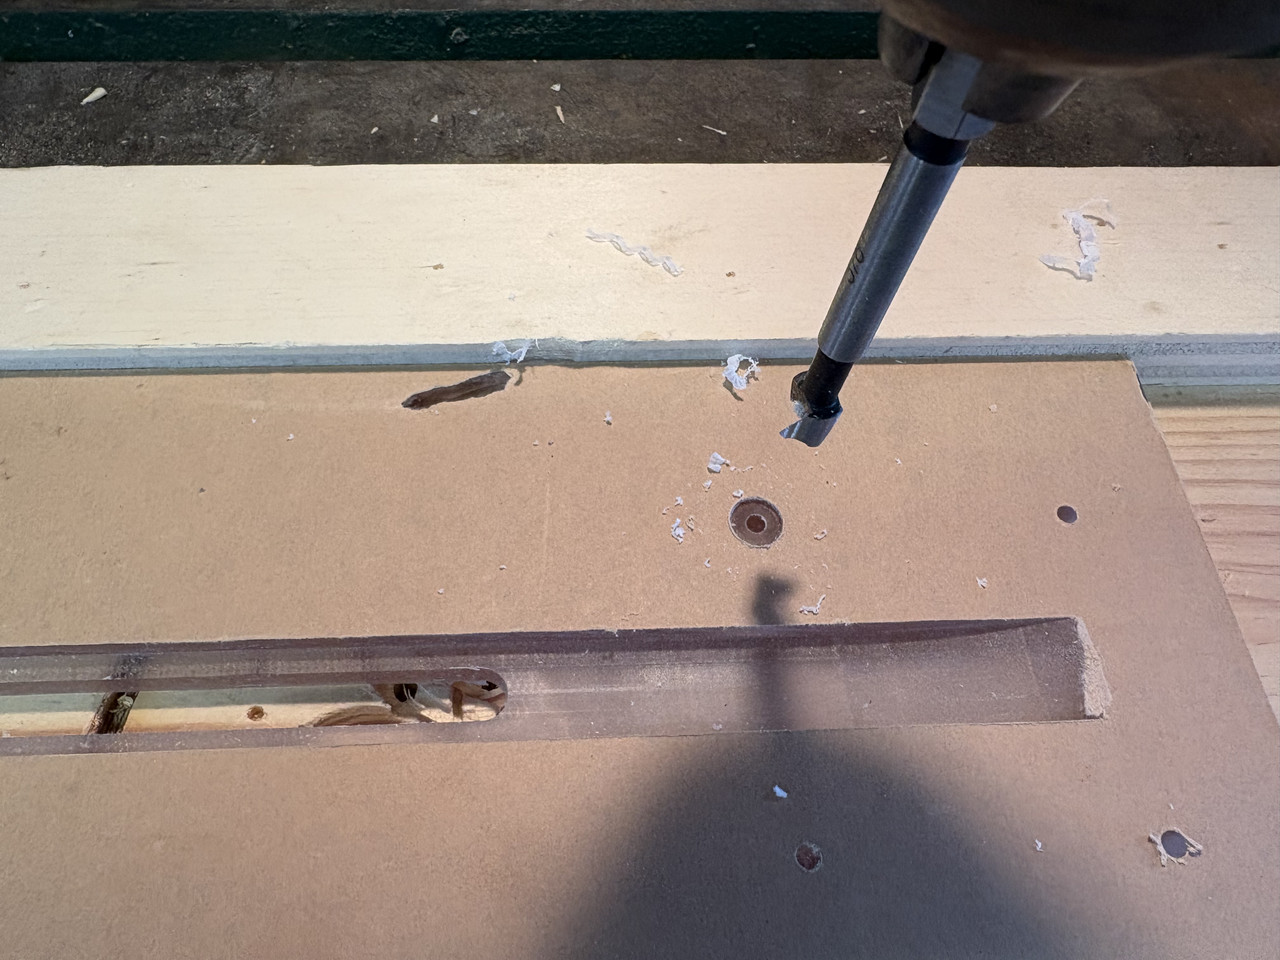
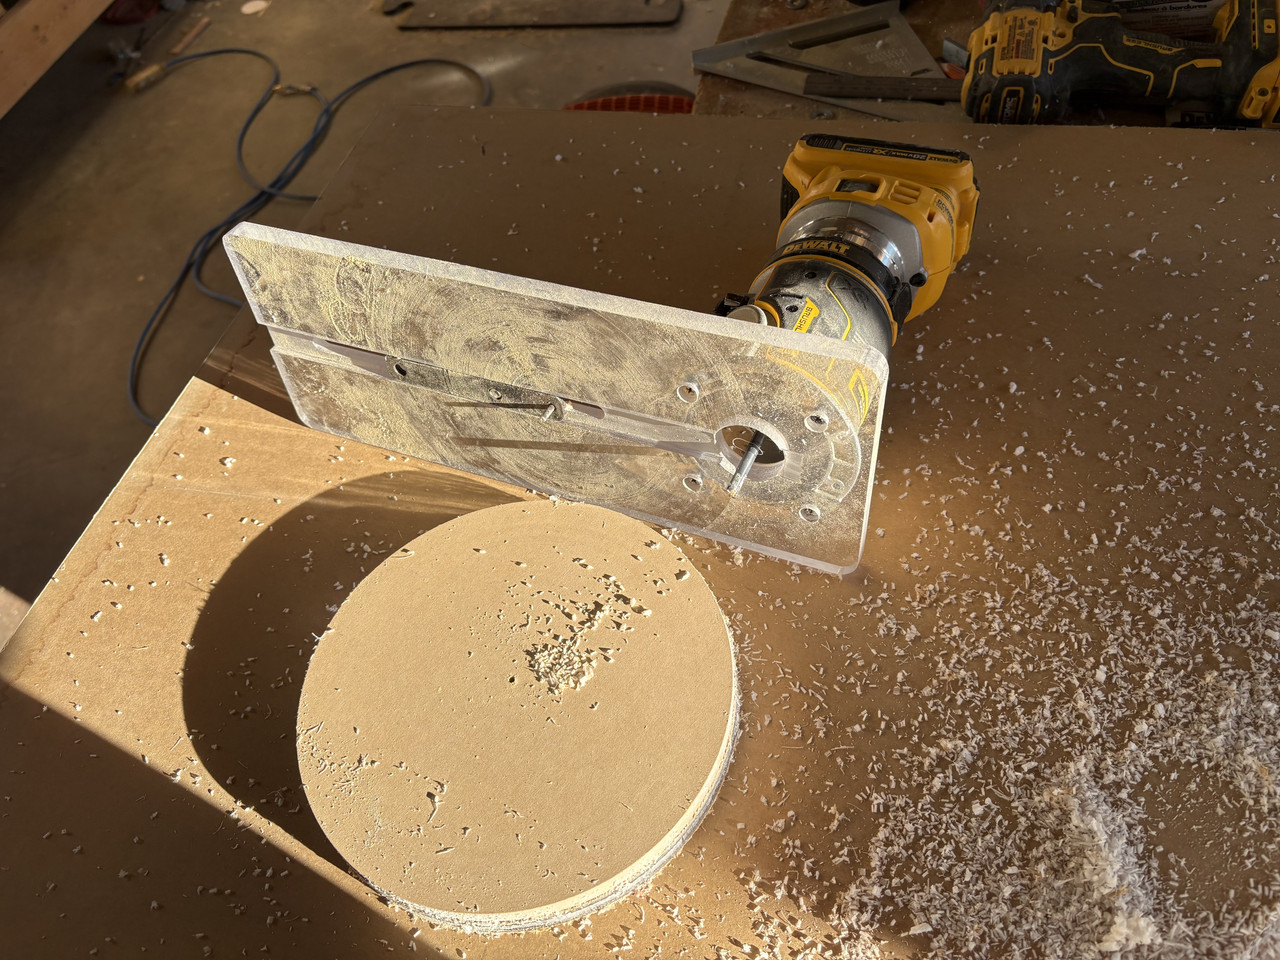
All complete , time to test
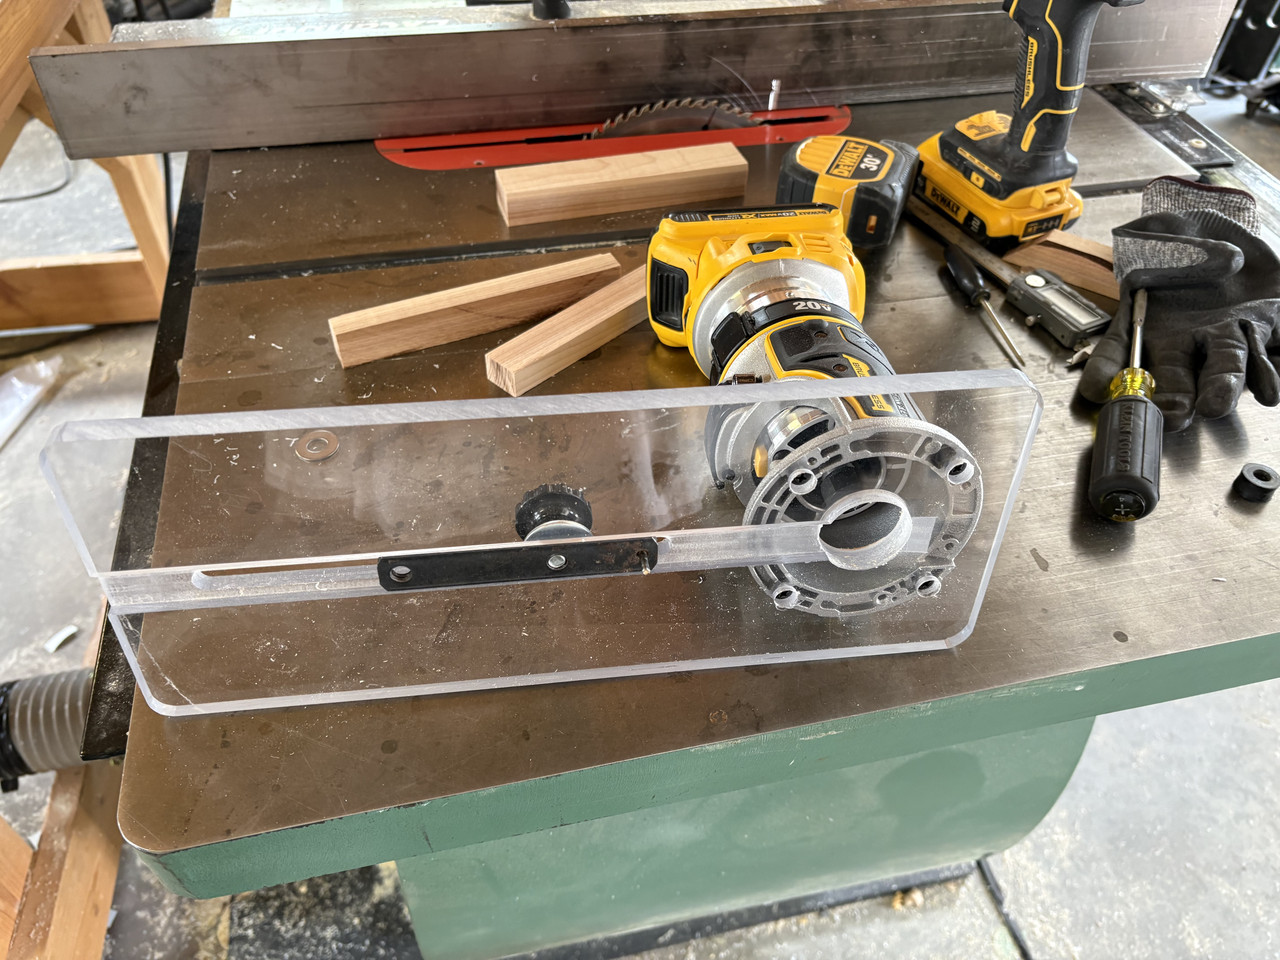
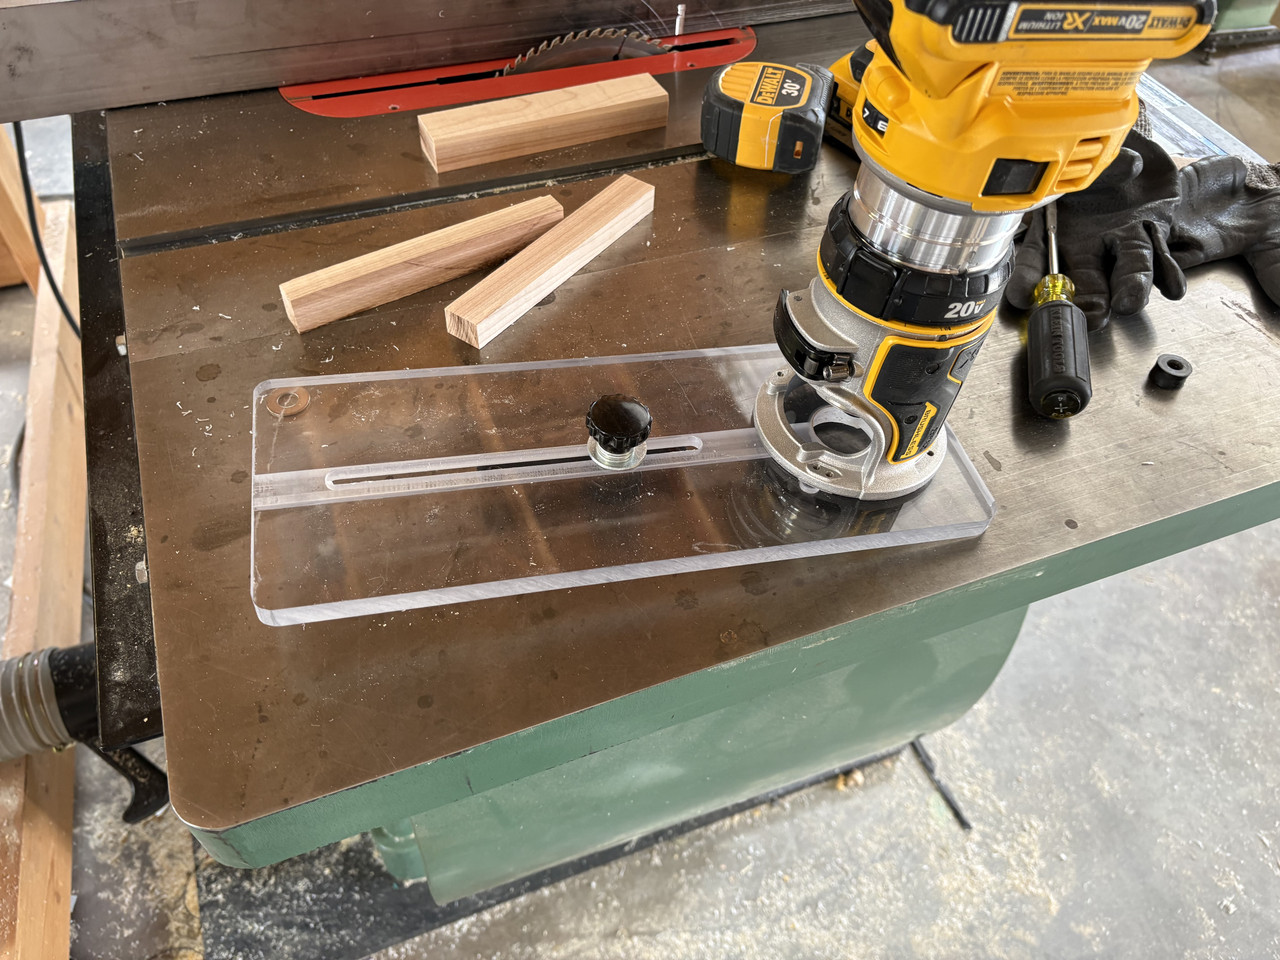
Worked really well and I’m happy with the outcome
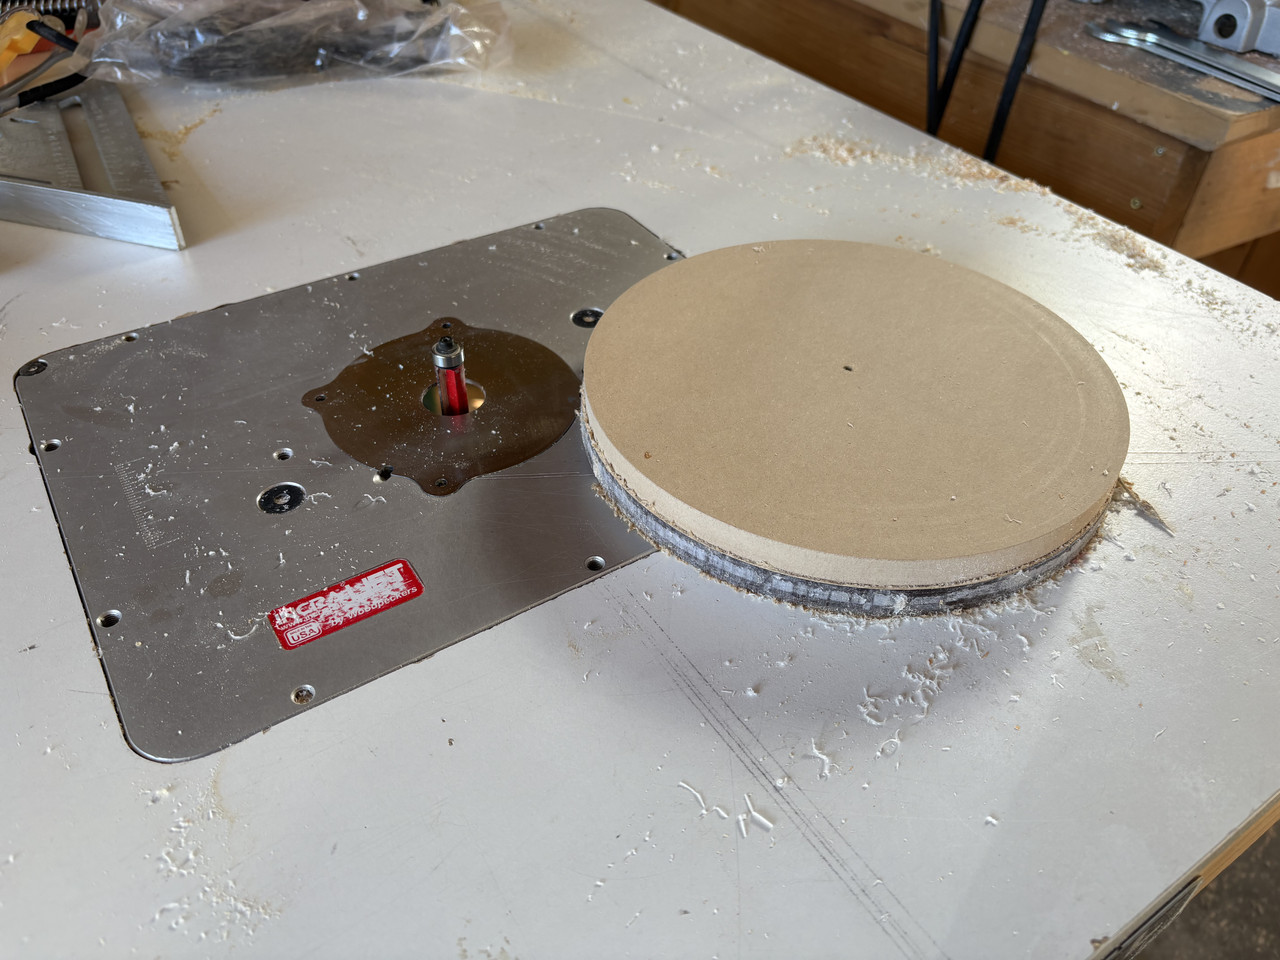
I still cannot get a quality finish on the side , so I used the mdf as a jig to finish the outside perimeter with a flush mount bit on my router table .
Ypu can see the side of the lexan is pretty rough after being cut with just a straight bit .But the pic above cleans it up fairly well . There’s only one spot where I’m concerned. I turned it around for the pic .
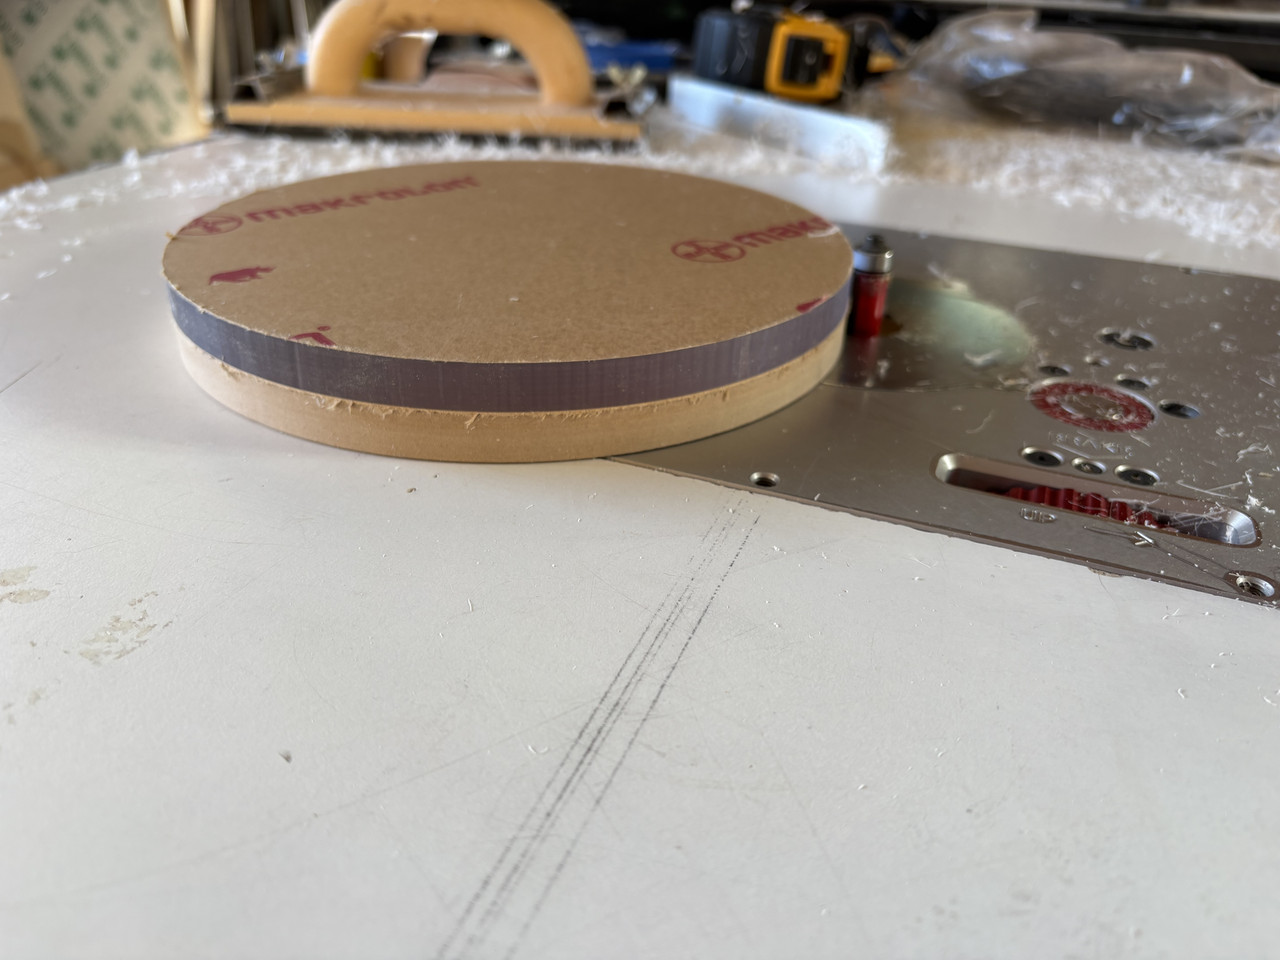
So the lexan table top will sit on top of the motorized display. I have additional pieces of mdf that will go under the lexan so it can sit snuggly to the motorized top without screws or glue .
I think just throwing my camera on the motorized display will look kind of cheap , and having the top close to the same height as the shelf will look much more refined .
I took the display apart and managed to get the circuit board with the buttons out . For the time being I’m going to solder wires to those board and install buttons under the shelf to control it .
In the future I’m hoping to use an ardunio a control it via my iPad . Not sure if I can pull that off though, but I’ve got many projects ahead of that
I gave up on using my 28 year old Makita router that I used in a dedicated circle jig back in my subwoofer days , as it was causing some issues .
So I spent yesterday morning building my own circle jig to fit my newly purchased cordless Dewalt trim router . Being cordless is going to be such an improvement over fighting with a corded router as you’re doing several passes with a circle jig srs .
I had to take my time and be very finicky about all the cuts and drilling, but unbelievably I pulled it off and it works great .
At the beginning I was just going to use a piece of mdf to make the jigs, but then decided to use lexan as I had some on hand anyways . Much better choice imo
I started off by cutting a piece of lexan and did a dado cut the exact size as the steel plate that used to be I the old craftsman jig
Then I used my router table to carefully cut a groove for the metal bars knob to go through . Everything had to be exact . It’s the measuring and prep work that takes all the time
I used the original base to get the proper alignment of the holes for the router
All complete , time to test
Worked really well and I’m happy with the outcome
I still cannot get a quality finish on the side , so I used the mdf as a jig to finish the outside perimeter with a flush mount bit on my router table .
Ypu can see the side of the lexan is pretty rough after being cut with just a straight bit .But the pic above cleans it up fairly well . There’s only one spot where I’m concerned. I turned it around for the pic .
So the lexan table top will sit on top of the motorized display. I have additional pieces of mdf that will go under the lexan so it can sit snuggly to the motorized top without screws or glue .
I think just throwing my camera on the motorized display will look kind of cheap , and having the top close to the same height as the shelf will look much more refined .
I took the display apart and managed to get the circuit board with the buttons out . For the time being I’m going to solder wires to those board and install buttons under the shelf to control it .
In the future I’m hoping to use an ardunio a control it via my iPad . Not sure if I can pull that off though, but I’ve got many projects ahead of that
Back with my Fam
07-05-2026, 10:05 PM
-
#35
- MajorTendonitis
- Join Date: Jan 2016
- Location: East Kootenays BC
- Age: 65
- Height: 5'8"
- Weight: 241 lbs
- Posts: 41,952
- Subscribers: 8
- Rep Power: 714162
-
-
Ok I made the piece that sits on top of the platter that will be used to hold the lexan top .
Not shown , but I spent some time doing test holes in an attempt to get the mdf base to fit the diameter of the motorized display perfect .
Once I got the measurements within a bizzilameter I did the first cut
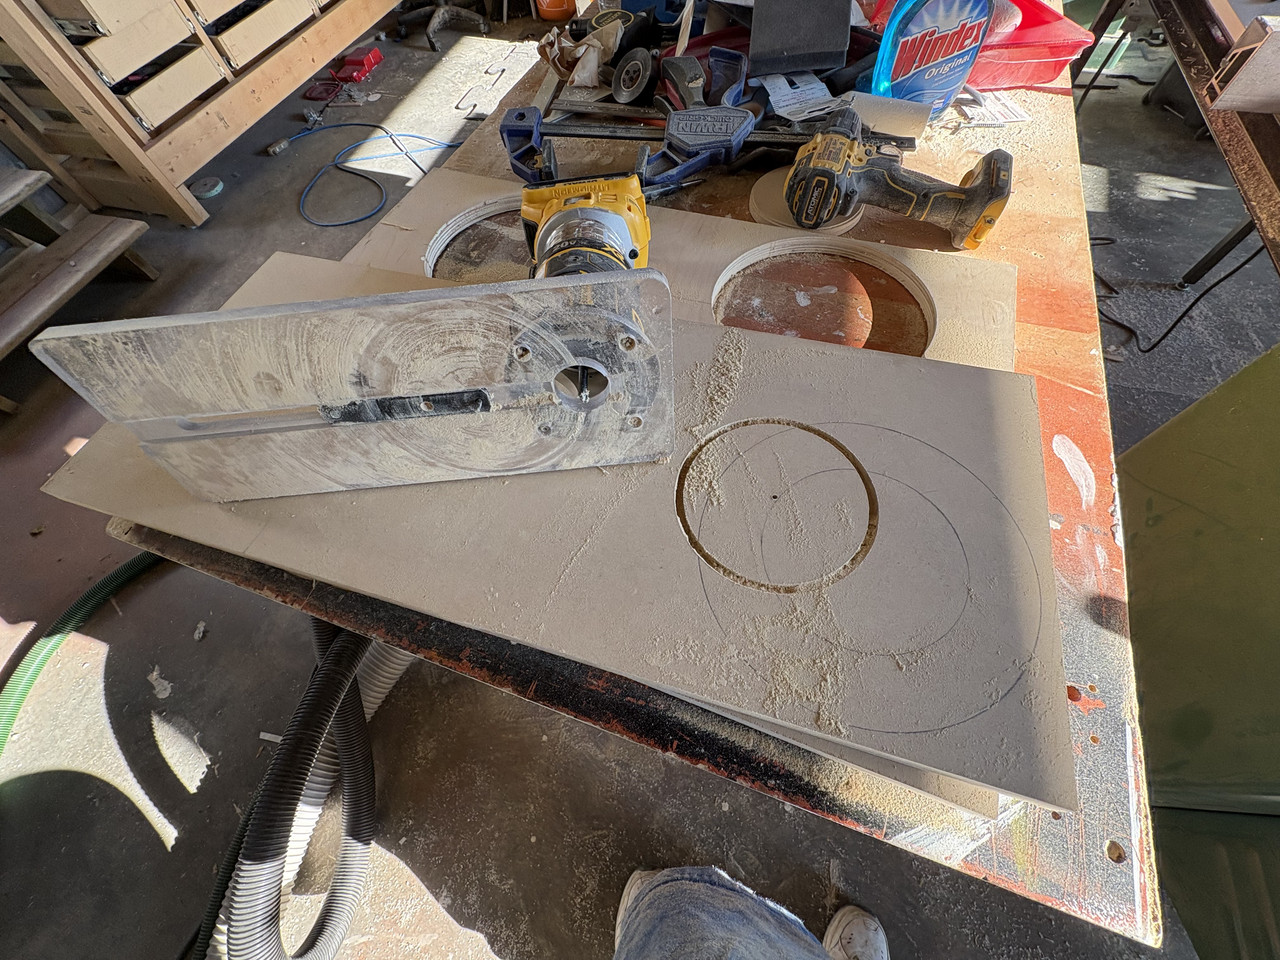
Then I hogged out the rest with a conventional router with dust extraction thank god.
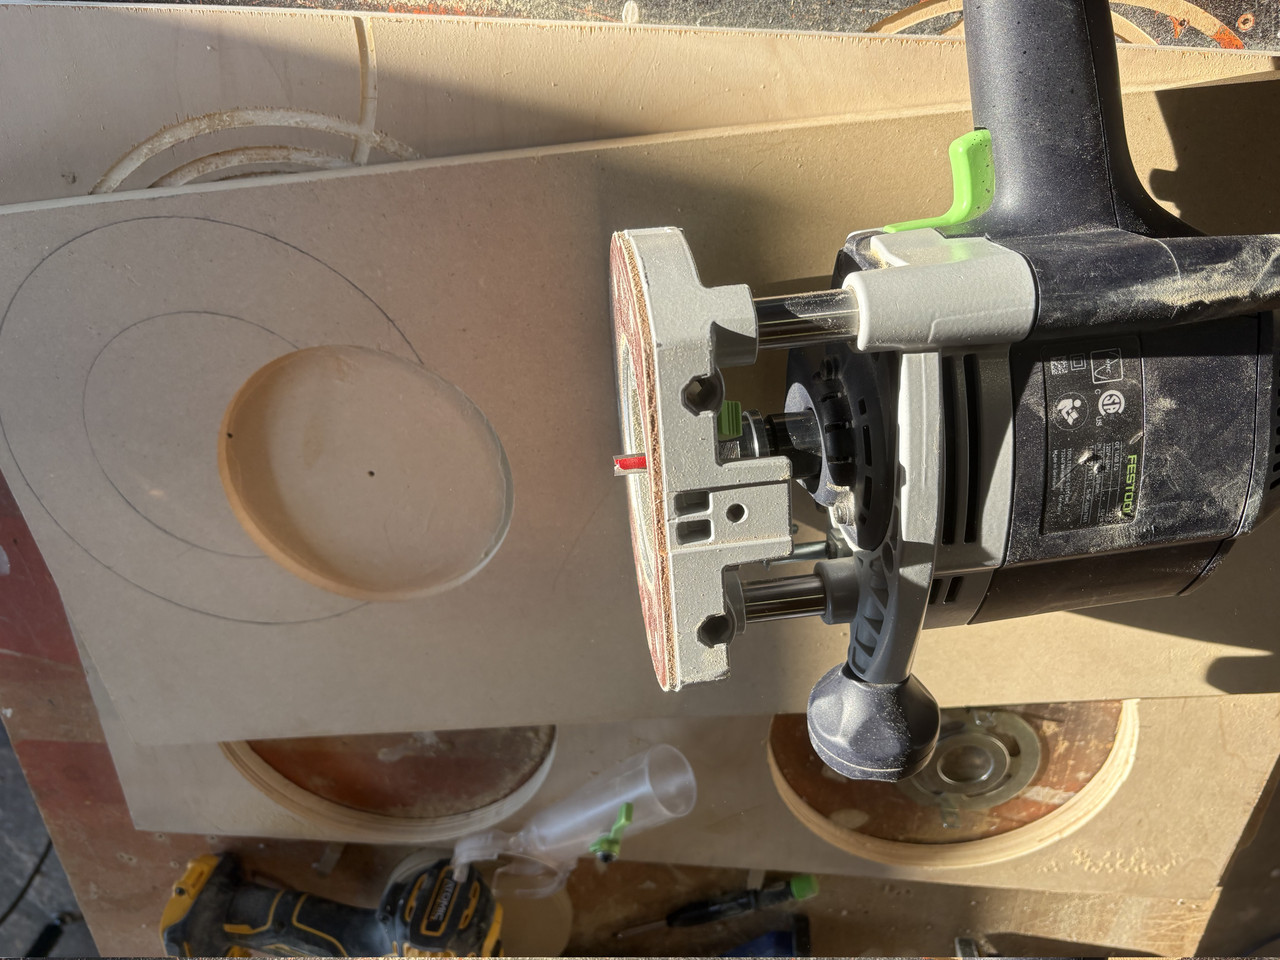
Next I flipped the mdf sheet over and cut the outside perimeter
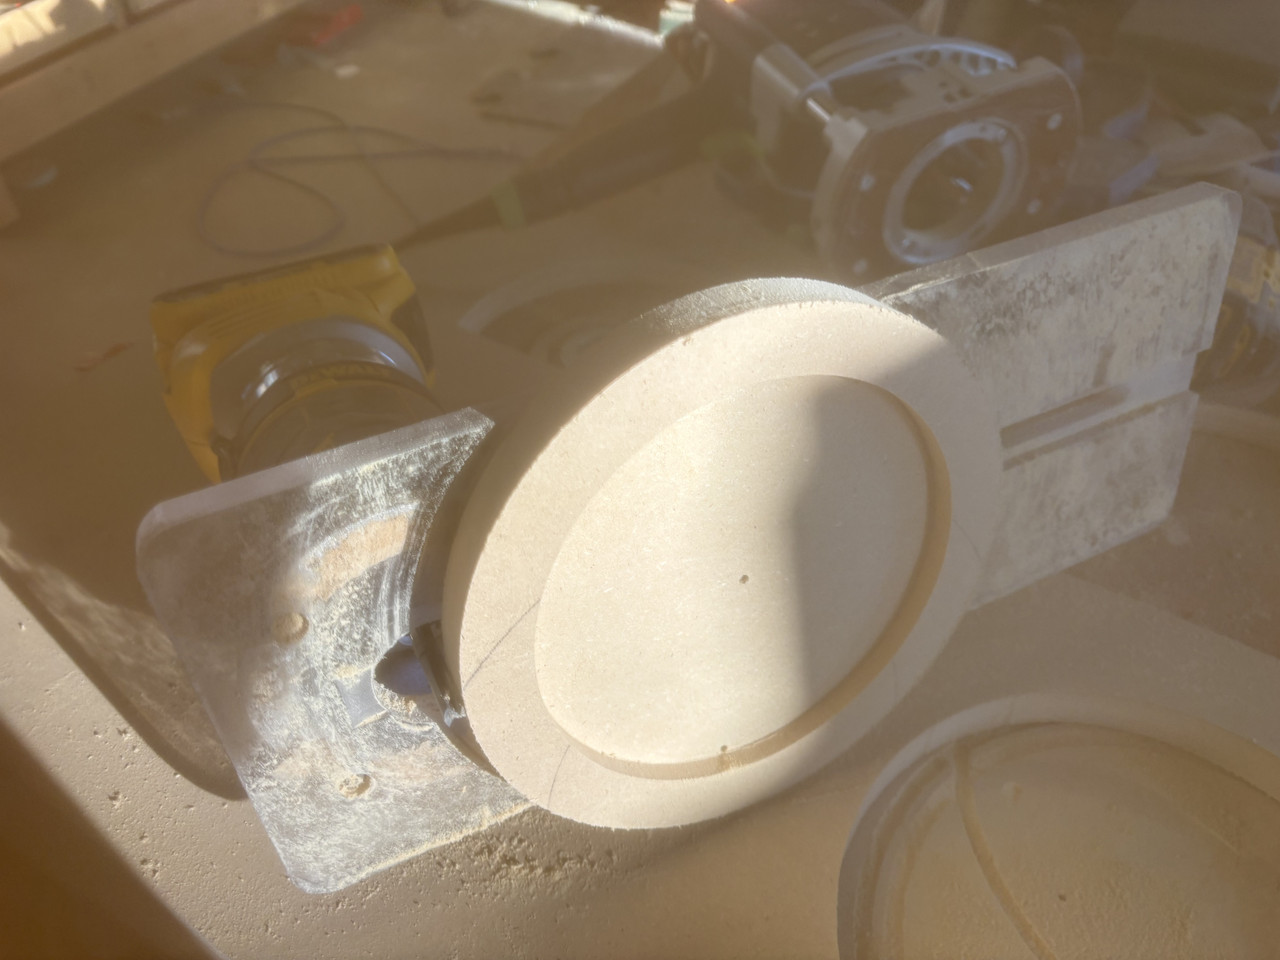
With a little bit of sanding it fit about as snug and perfect as you’d want . The lexan gets secured to this piece that I’m showing here . This disk I just cut is just to secure the lexan to the platter somehow, and to establish the final height that I require so it’s just a little proud of the top
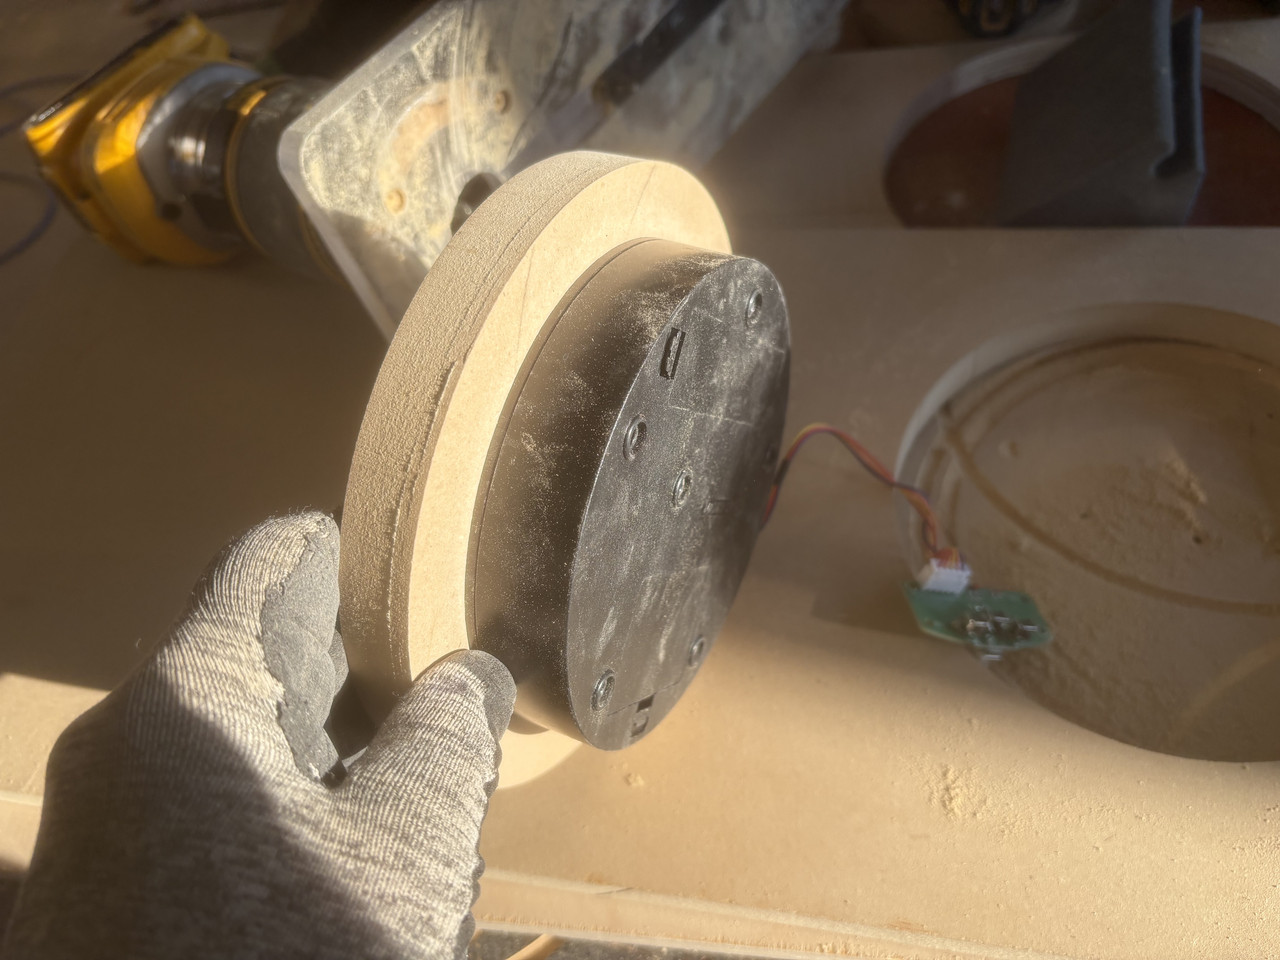
Spent a lot of time for nothing I guess , as after I built it I just did a test and it appears to be more jittery than I first thought .
Well this other rotating display that I bought seems a little more heavy duty and I think has a smoother rotation . The reason I didn’t use it originally is I couldn’t figure out how to take it apart , and I need to rewire and relocate the buttons to the bottom of the shelf.
With some persuasion I managed to get it open today without breaking it , so I’ll be building a new base for it tomorrow. I wish they’d just use screws to assemble these things but they use clips that are not accessible. It’s a different diameter so it doesn’t fit the piece I built today either , faurk
Not shown , but I spent some time doing test holes in an attempt to get the mdf base to fit the diameter of the motorized display perfect .
Once I got the measurements within a bizzilameter I did the first cut
Then I hogged out the rest with a conventional router with dust extraction thank god.
Next I flipped the mdf sheet over and cut the outside perimeter
With a little bit of sanding it fit about as snug and perfect as you’d want . The lexan gets secured to this piece that I’m showing here . This disk I just cut is just to secure the lexan to the platter somehow, and to establish the final height that I require so it’s just a little proud of the top
Spent a lot of time for nothing I guess , as after I built it I just did a test and it appears to be more jittery than I first thought .
Well this other rotating display that I bought seems a little more heavy duty and I think has a smoother rotation . The reason I didn’t use it originally is I couldn’t figure out how to take it apart , and I need to rewire and relocate the buttons to the bottom of the shelf.
With some persuasion I managed to get it open today without breaking it , so I’ll be building a new base for it tomorrow. I wish they’d just use screws to assemble these things but they use clips that are not accessible. It’s a different diameter so it doesn’t fit the piece I built today either , faurk
Back with my Fam
07-05-2026, 11:48 PM
-
#36
 07-05-2026, 11:52 PM
-
#37
- MajorTendonitis
- Join Date: Jan 2016
- Location: East Kootenays BC
- Age: 65
- Height: 5'8"
- Weight: 241 lbs
- Posts: 41,952
- Subscribers: 8
- Rep Power: 714162
-
-
Originally Posted By theory⏩
Thx , but I’m not very good at it srs . Make a lot of mistakes, and still continue to but I’m getting buy . Ded srs I’m kind of mad at myself for not becoming a machinist , as I like to tinker around so much
dayum bro can woodwork
Back with my Fam
07-09-2026, 07:17 PM
-
#38
- MajorTendonitis
- Join Date: Jan 2016
- Location: East Kootenays BC
- Age: 65
- Height: 5'8"
- Weight: 241 lbs
- Posts: 41,952
- Subscribers: 8
- Rep Power: 714162
-
-
So I discarded that black display turntable in favour of the white one (which appears to be a little more robust) .
Had to literally start over and make new plates for the new one as it’s a little larger in diameter.
I made some progress that I’m happy with this past few days though .
This is as good as I can get the finish on the side with a flush mount bit . I turned it around as the mdf ring is what guides the lexan on the router table
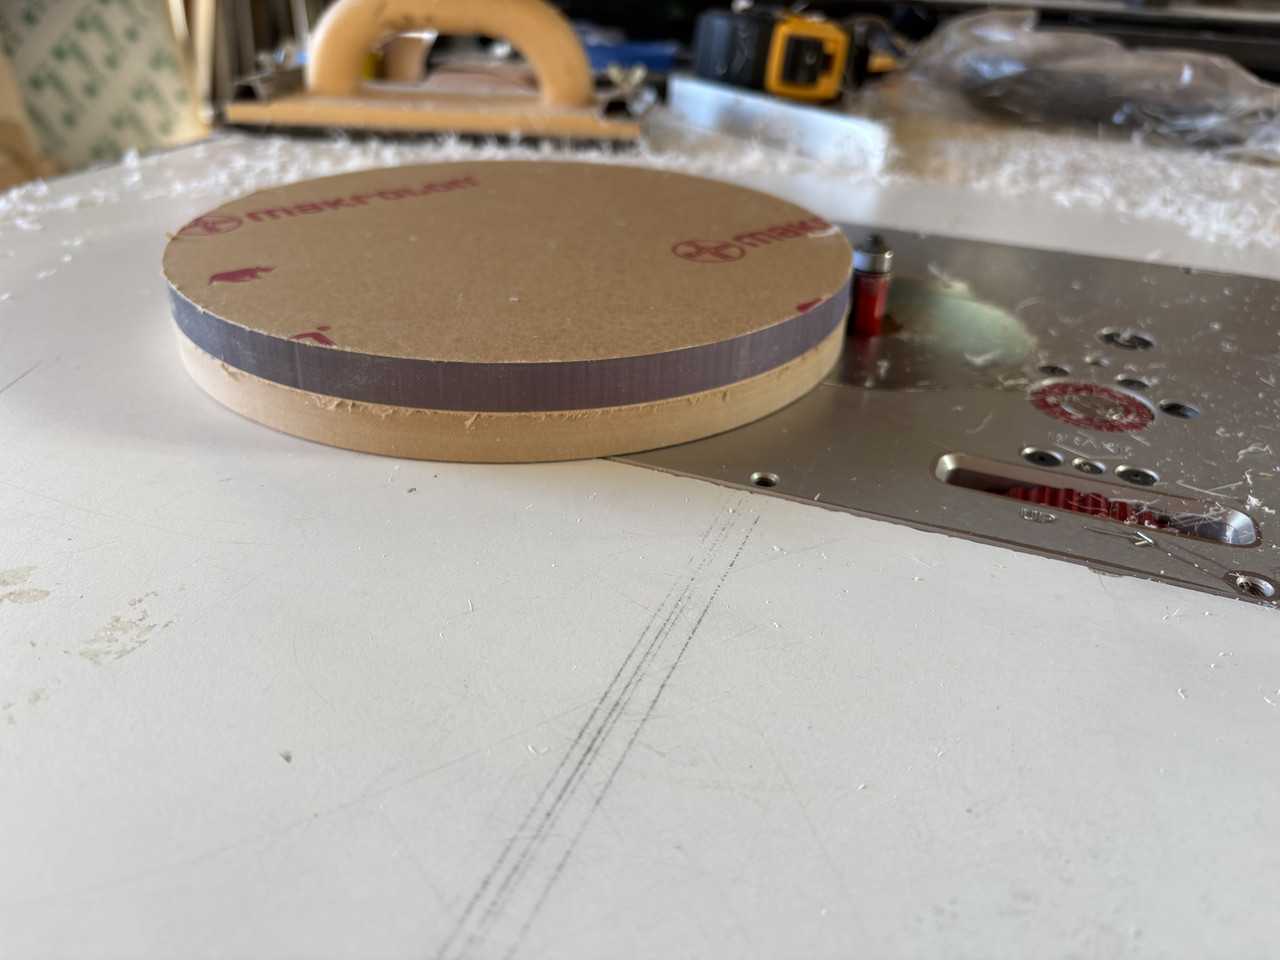
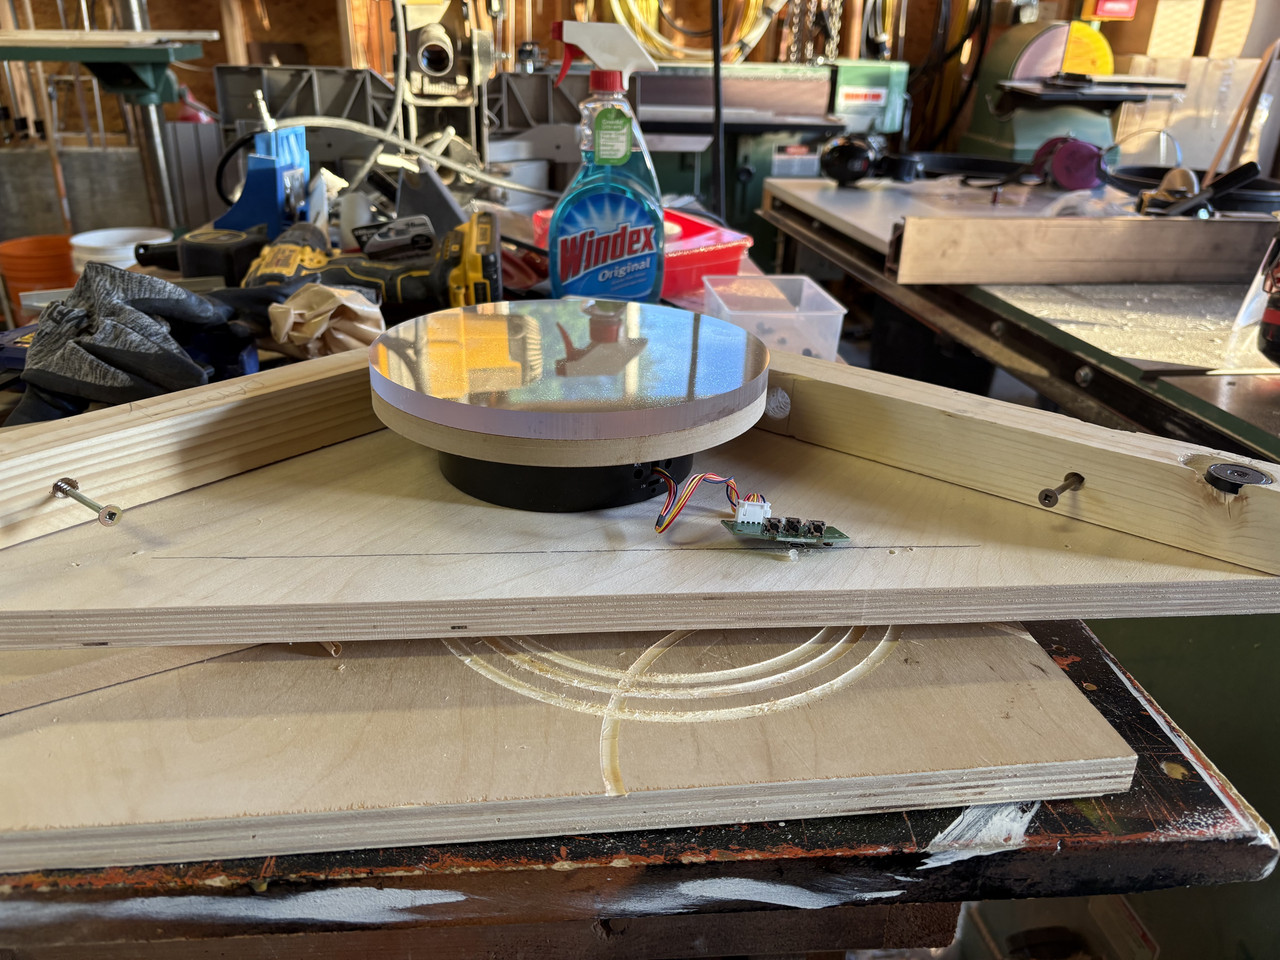
Mistakenly went over the perimeter with 80 grit with my orbital sander to get rid of the larger imperfections. One should start with 120 and work your way up to 400 if you’re shooting for a clear finish
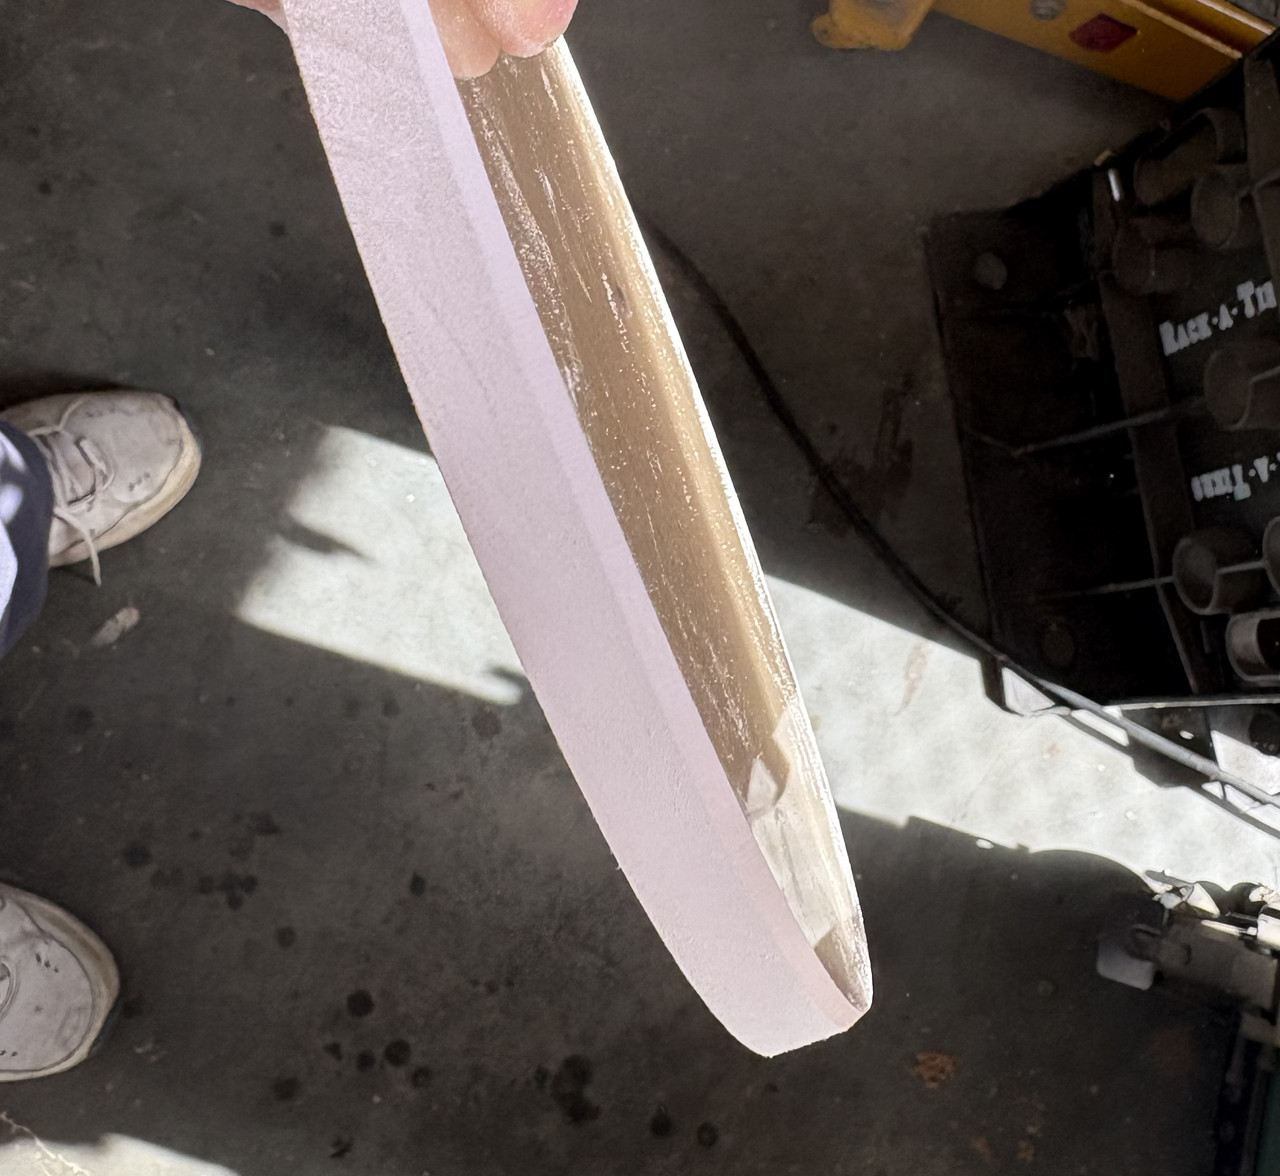
After sanding with 120 I went to 220 , then to 400 . Now I have to get a mico cloth and use some elbow grease and toothpaste as plexiglass polish .
If you spend enough time you can get it clear . You can also torch it , but it’s very risky . One millisecond too long and the lexan will have a burn that can’t be repaired unless you remove a lot of material.
In this pic you can see I did a chamfer cut on the router table . Not sure how to clean that up with a sander but I’ll try
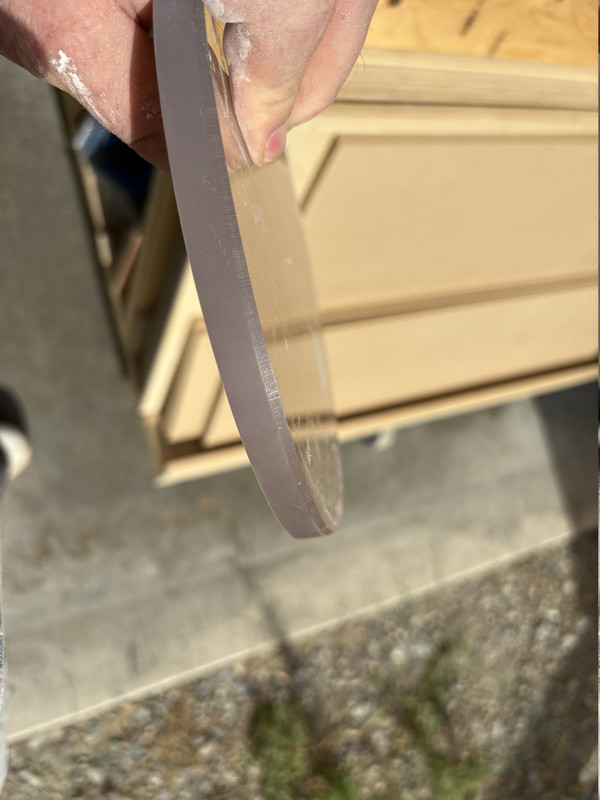
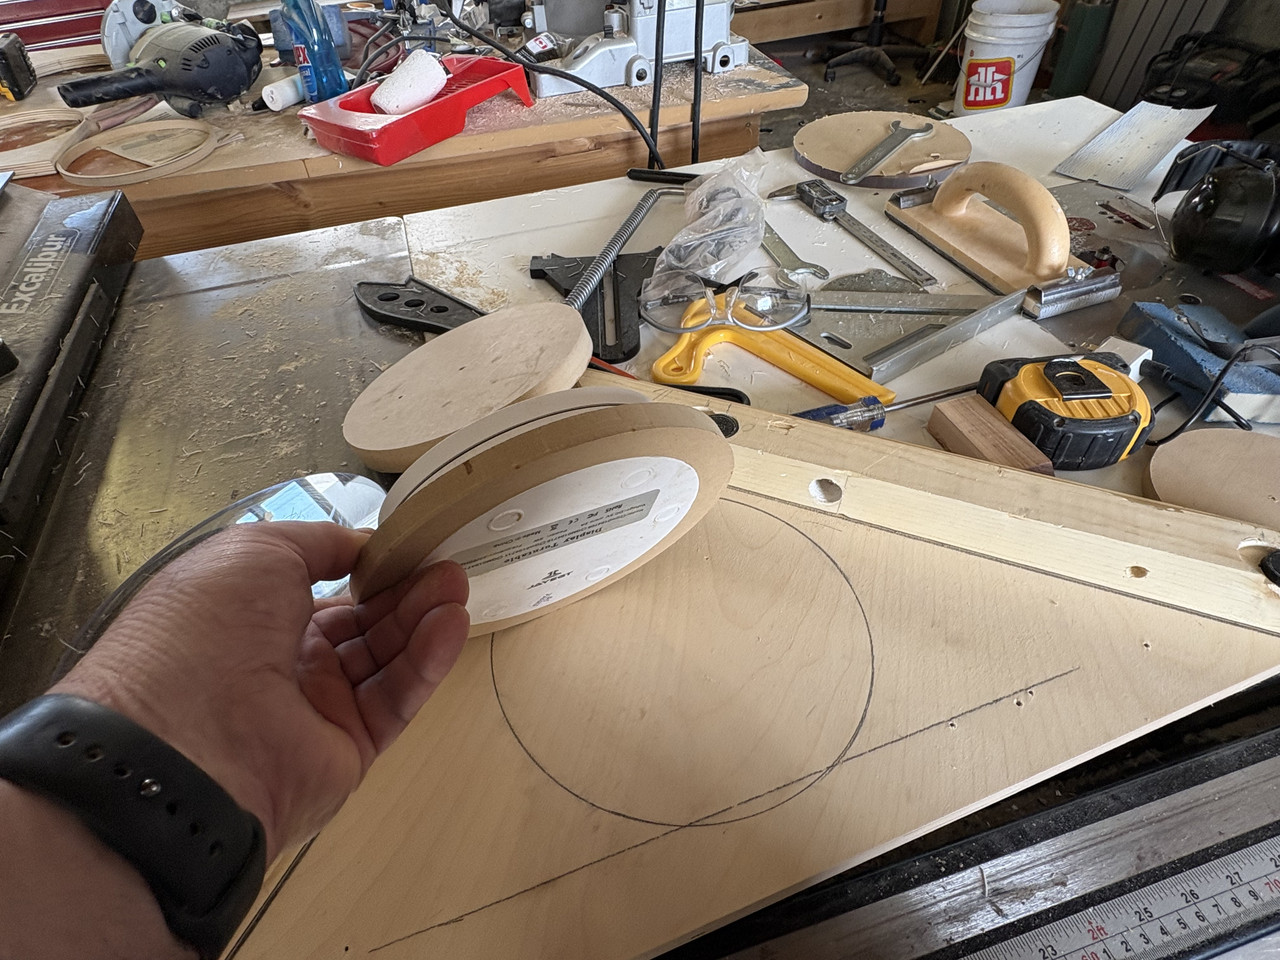
I made a new platter that will sit underneath the lexan and sit on the top of the displays turntable . Drilled the hole so it can be attached to the underside of the lexan
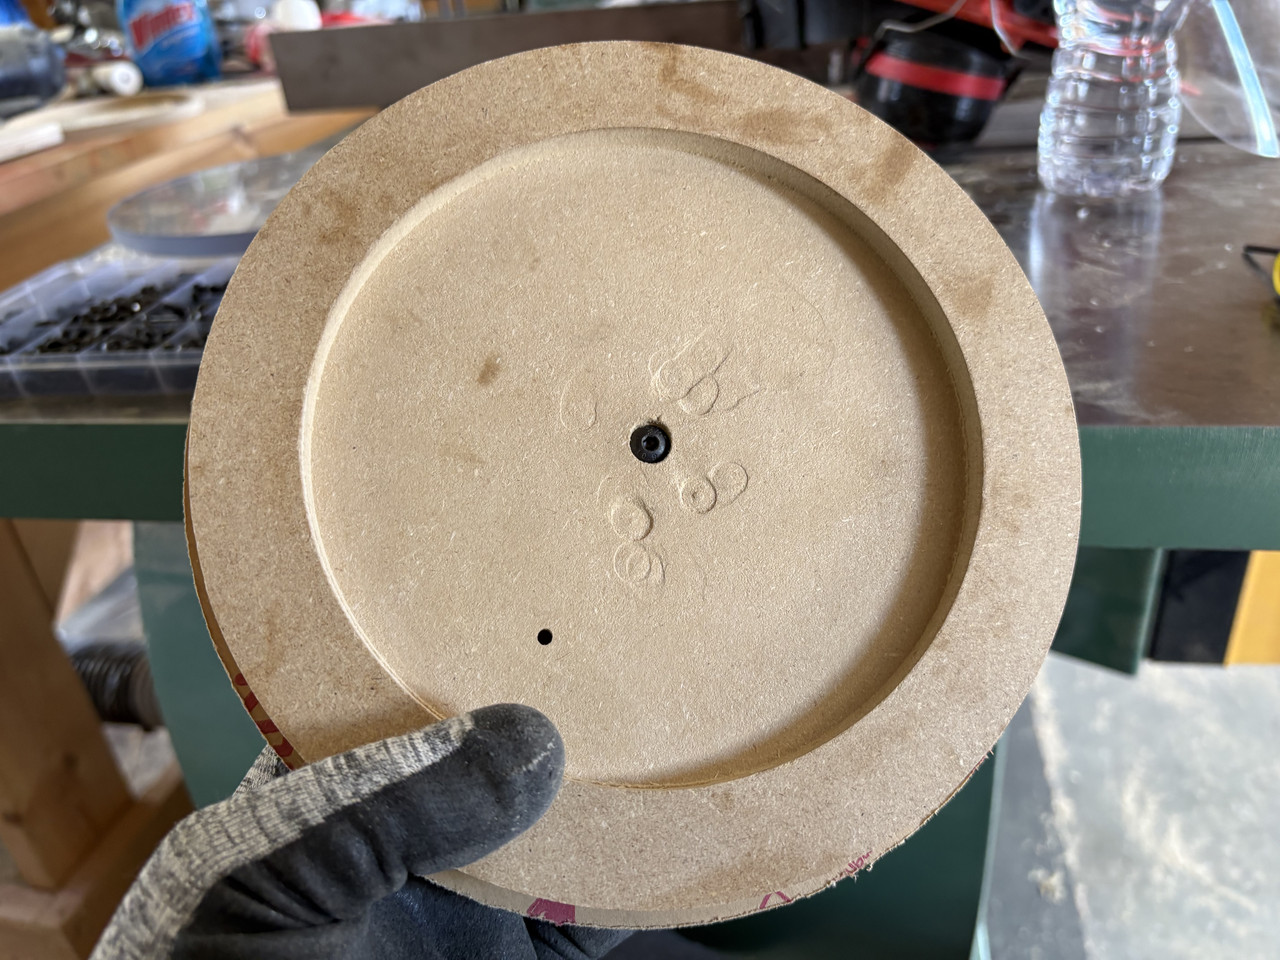
I thought I was going to have to remove the sides in order to route out some material for the displays base to sit in . Turns out it’s only going to be one millimetre too high by letting it sit on the bottom so I didn’t bother .
Made a ring to hold it in position on the bottom of the shelf and air nailed it into place
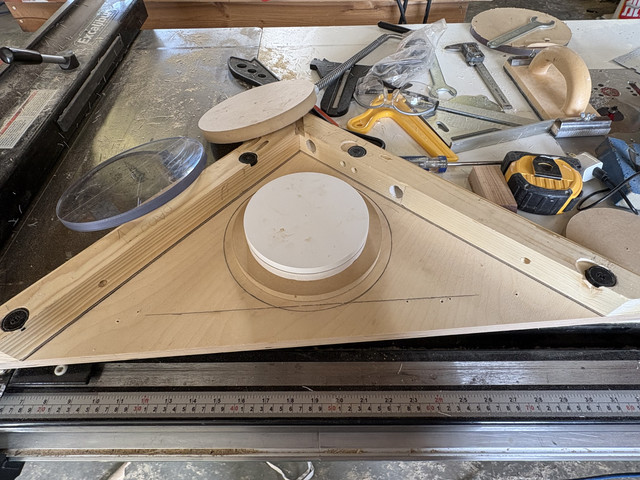
Here’s how it will sit when finished. Doing some minor prep work b4 paint . If all else fails I may just sand the top of the Lexan with 220 grit and go with the opaque look . Next thing is to make the top shelf and hope to get the hole perfectly centred
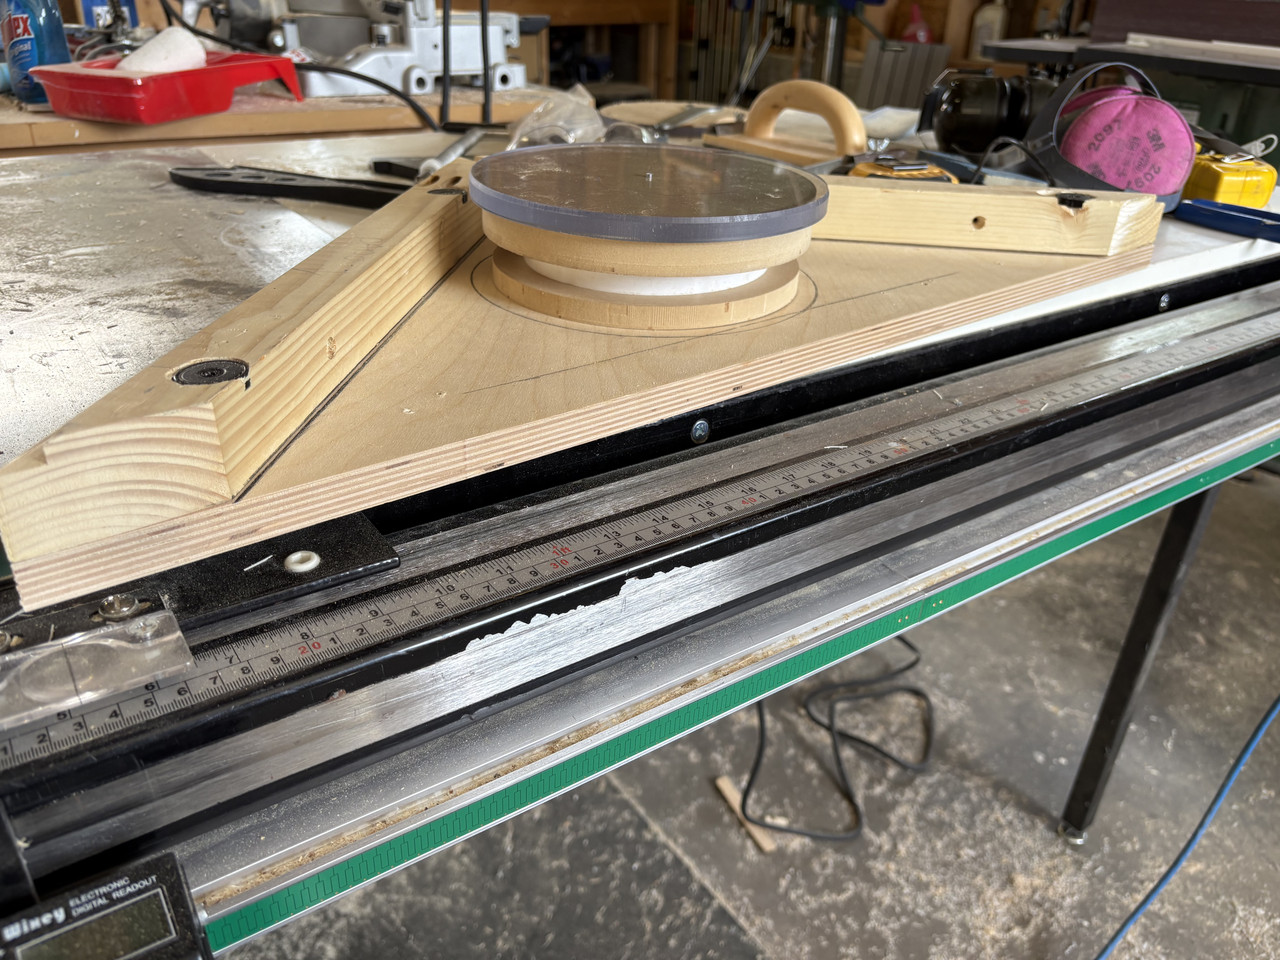
Had to literally start over and make new plates for the new one as it’s a little larger in diameter.
I made some progress that I’m happy with this past few days though .
This is as good as I can get the finish on the side with a flush mount bit . I turned it around as the mdf ring is what guides the lexan on the router table
Mistakenly went over the perimeter with 80 grit with my orbital sander to get rid of the larger imperfections. One should start with 120 and work your way up to 400 if you’re shooting for a clear finish
After sanding with 120 I went to 220 , then to 400 . Now I have to get a mico cloth and use some elbow grease and toothpaste as plexiglass polish .
If you spend enough time you can get it clear . You can also torch it , but it’s very risky . One millisecond too long and the lexan will have a burn that can’t be repaired unless you remove a lot of material.
In this pic you can see I did a chamfer cut on the router table . Not sure how to clean that up with a sander but I’ll try
I made a new platter that will sit underneath the lexan and sit on the top of the displays turntable . Drilled the hole so it can be attached to the underside of the lexan
I thought I was going to have to remove the sides in order to route out some material for the displays base to sit in . Turns out it’s only going to be one millimetre too high by letting it sit on the bottom so I didn’t bother .
Made a ring to hold it in position on the bottom of the shelf and air nailed it into place
Here’s how it will sit when finished. Doing some minor prep work b4 paint . If all else fails I may just sand the top of the Lexan with 220 grit and go with the opaque look . Next thing is to make the top shelf and hope to get the hole perfectly centred
Back with my Fam
07-09-2026, 07:24 PM
-
#39
 07-11-2026, 10:21 PM
-
#40
- MajorTendonitis
- Join Date: Jan 2016
- Location: East Kootenays BC
- Age: 65
- Height: 5'8"
- Weight: 241 lbs
- Posts: 41,952
- Subscribers: 8
- Rep Power: 714162
-
-
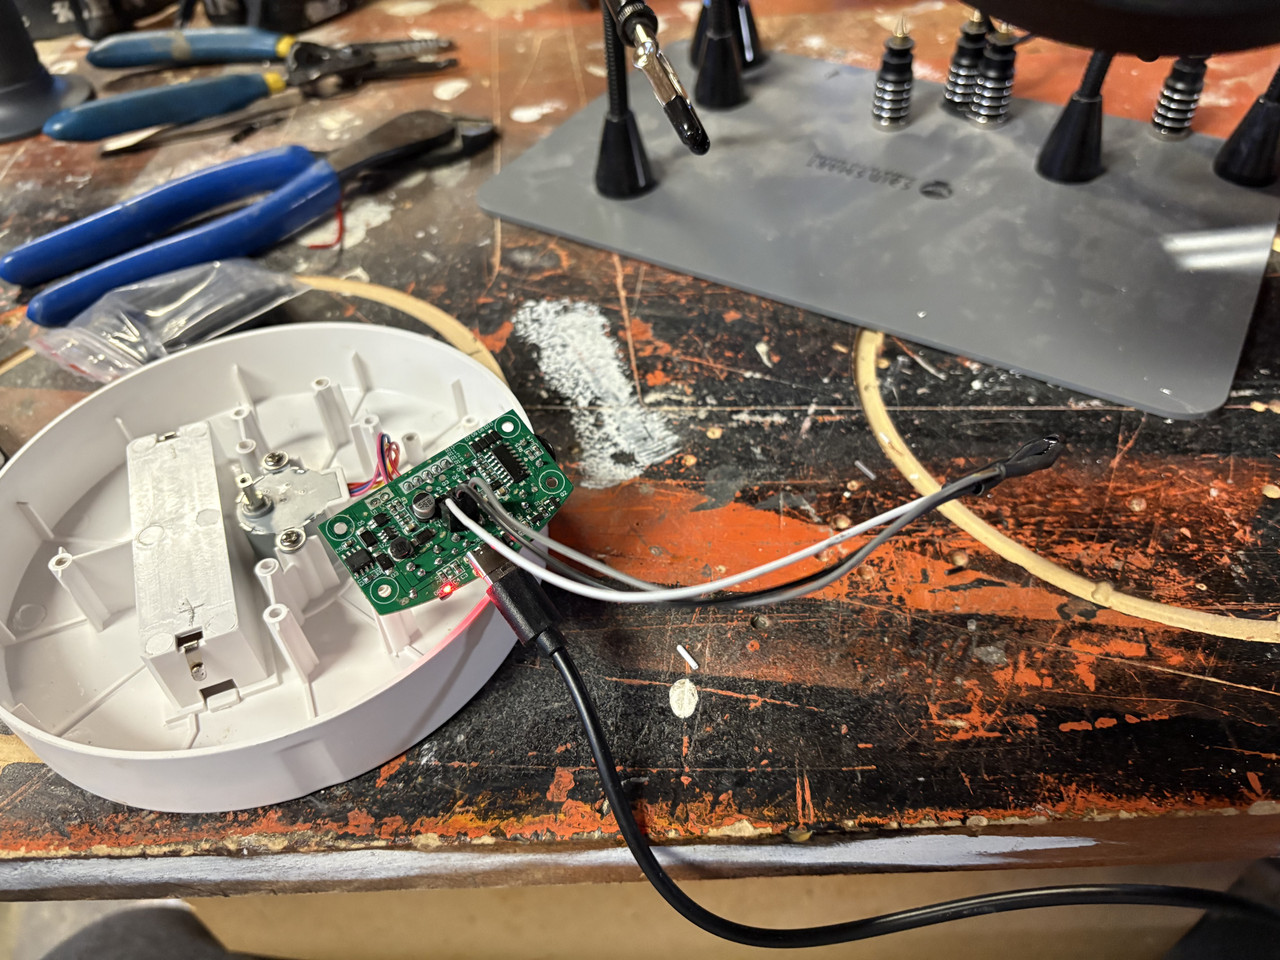
Well I had take that rotating display apart to see if I could relocate the electronics outside the unit . Very weird as the other display had a long harness , but this one had literally no extra wire at all , so I cut the harness from the discarded unit that I’m not going to use and spliced it.
Faulk if those aren’t the thinnest freaking wires I’ve ever seen in my life . My wire strippers don’t even go that small .
Anyways I managed.
This is the lower shelf I’m working on right now , and the top section of this shelf will obviously have a hole cut so this lexan table I built will protrude from it 6 mm . So my idea is to route out some material under the perimeter of the hole and install LEDs to light up this lexan disk .
Debating to sand the top of the lexan disc with 600 grit so that it catches the light for a better effect , dunno. I guess I could test it with the transparent look first and then decide . I’m also putting leds in the back of the shelf like the upper one . Not sure if that’s overkill though , but if it is I can control them independently anyways
There’s the IR led that I had to remove from the board and extend it in order to have it protruding out the bottom of the shelf so that the remote can still control it. Wish the remote was RF instead of IR . The end game would be to hardwire an Arduino to the board and control it via an App , but I have too many other priorities right now .
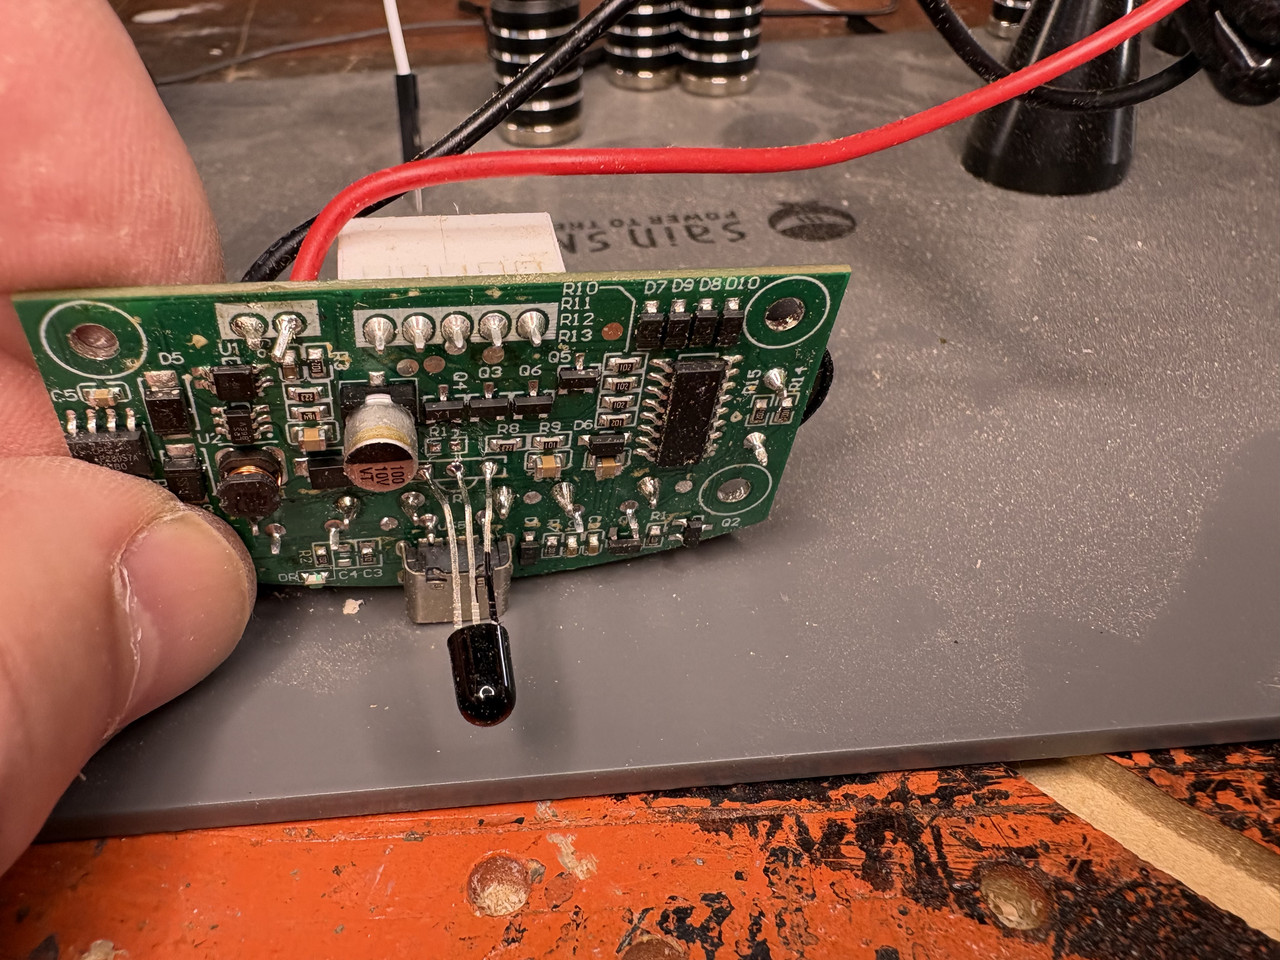
The board is sure small and difficult to work with , especially when you have fat digits like me . Here the IR led is extended with some small gauge wires .
Faulk if those aren’t the thinnest freaking wires I’ve ever seen in my life . My wire strippers don’t even go that small .
Anyways I managed.
This is the lower shelf I’m working on right now , and the top section of this shelf will obviously have a hole cut so this lexan table I built will protrude from it 6 mm . So my idea is to route out some material under the perimeter of the hole and install LEDs to light up this lexan disk .
Debating to sand the top of the lexan disc with 600 grit so that it catches the light for a better effect , dunno. I guess I could test it with the transparent look first and then decide . I’m also putting leds in the back of the shelf like the upper one . Not sure if that’s overkill though , but if it is I can control them independently anyways
There’s the IR led that I had to remove from the board and extend it in order to have it protruding out the bottom of the shelf so that the remote can still control it. Wish the remote was RF instead of IR . The end game would be to hardwire an Arduino to the board and control it via an App , but I have too many other priorities right now .
The board is sure small and difficult to work with , especially when you have fat digits like me . Here the IR led is extended with some small gauge wires .
Back with my Fam
Bookmarks
-

- Digg
-

- del.icio.us
-

- StumbleUpon
-

-

Posting Permissions
- You may not post new threads
- You may not post replies
- You may not post attachments
- You may not edit your posts